PRE-FLIGHT ENVIRONMENT CHECK
C
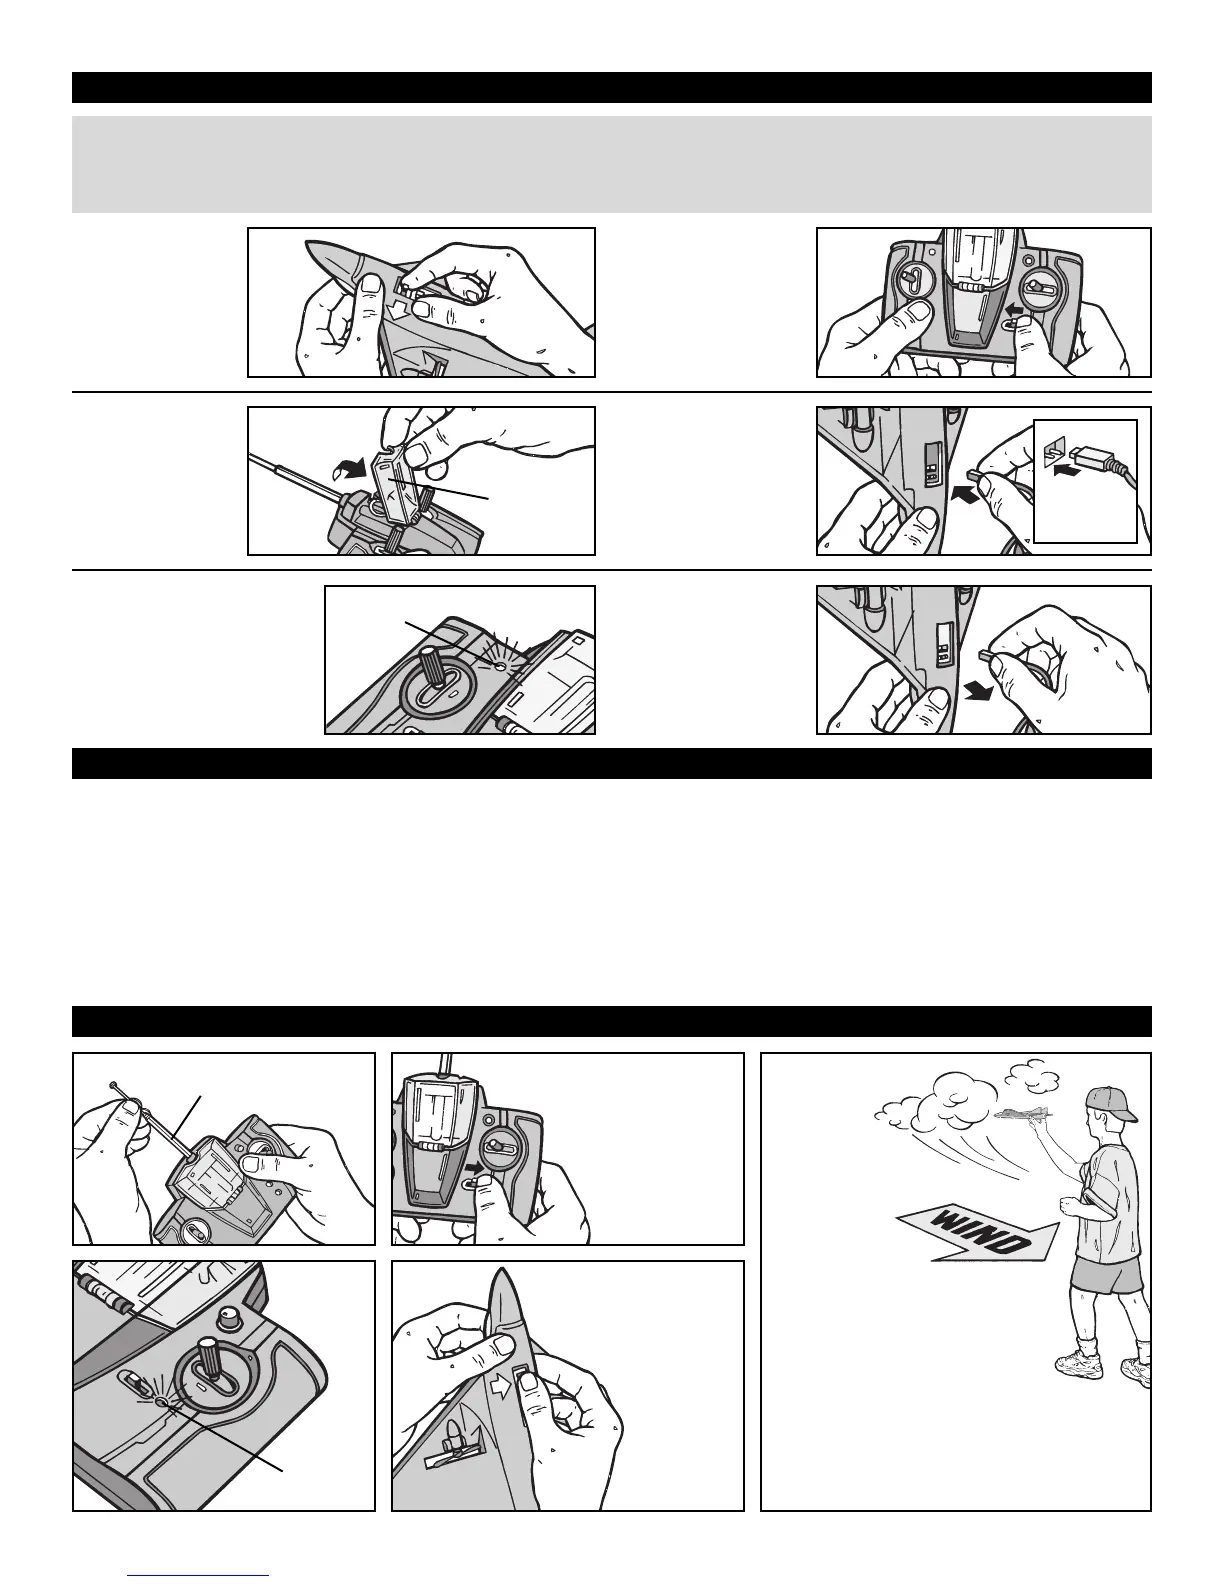
HARGING YOUR PLANE
1. Push the
plane’s
ON/OFF
Switch to the
left to set the
plane to OFF.
2
. Set the
C
ontroller/
C
harger
s
witch to OFF.
4. Push the Charge
Nozzle all the
way into the
plane’s Charge
Port located at
the bottom of
the plane.
3. Flip the Charge
Door open to
reveal the
Charge Nozzle.
1
4
3
2
FLYING INSTRUCTIONS
Push the
plane’s
ON/OFF
to the right
to set the
plane to
ON.
Fully extend Controller
antenna.
Push the
Controller/Charger
Switch right to ON
to start the plane’s
engine.
Power
LED
4
3
1
2
5
5. During the charging
process, the charging
LED will turn ON.
When the Jet Set™ is
completely charged,
the charging LED will
turn OFF.
6. Remove Charge
Nozzle gently
from the plane’s
Charge Port and
close the Charge
Door.
FLYING INDOORS?
NOTE: Always get a parent’s permission
to fly your Jet Set™ indoors.
Location – Fly in a wide open room, far
from breakable items – an empty double
car garage or unfinished basement are
great options. Avoid flying near vents
and/or fans, as they may overpower the
plane and make it difficult to control.
When
launching
the plane, use
partial throttle.
Refrain from
using the
directional
toggle while
launching the plane.
Launch the plane against the
wind and parallel to the ground.
When preparing for take off,
check the direction of the wind.
Always launch your plane against the
wind for the best take off and flight results.
TIP: The wind will blow against
your face, if you are facing the correct
direction.
5
Important Charging Information:
• Before taking your initial flight, charge the plane for a complete charge cycle on your charger.
• Depending upon the length of future play, you will not need to complete a full charge before each flight.
NOTE: A shortened charge results in a shorter playtime (may take up to 1/2 hour to fully charge).
Charging
LED
Charge
Door
6
1. Location – Fly in a large wide open, grassy location that is free of
buildings, trees, overhead wires, and other obstructions. Do not fly
near people or animals.
2. Weather – Fly on mild, sunny days. Do not fly in electrical storms, rain,
sleet, snow or other adverse weather conditions. Do not fly if the
temperature is below 7°C/45°F. In very cold temperatures, the plane will
become fragile and the engine performance will decrease.
3. Wind Conditions – Do not fly in wind. Winds may overpower the plane
and make it difficult to control. In windy conditions, it may appear as
though you have no control over the plane.
Holes in plug
must align with
pins in plane.