IM-P358-26 CH Issue 1
11
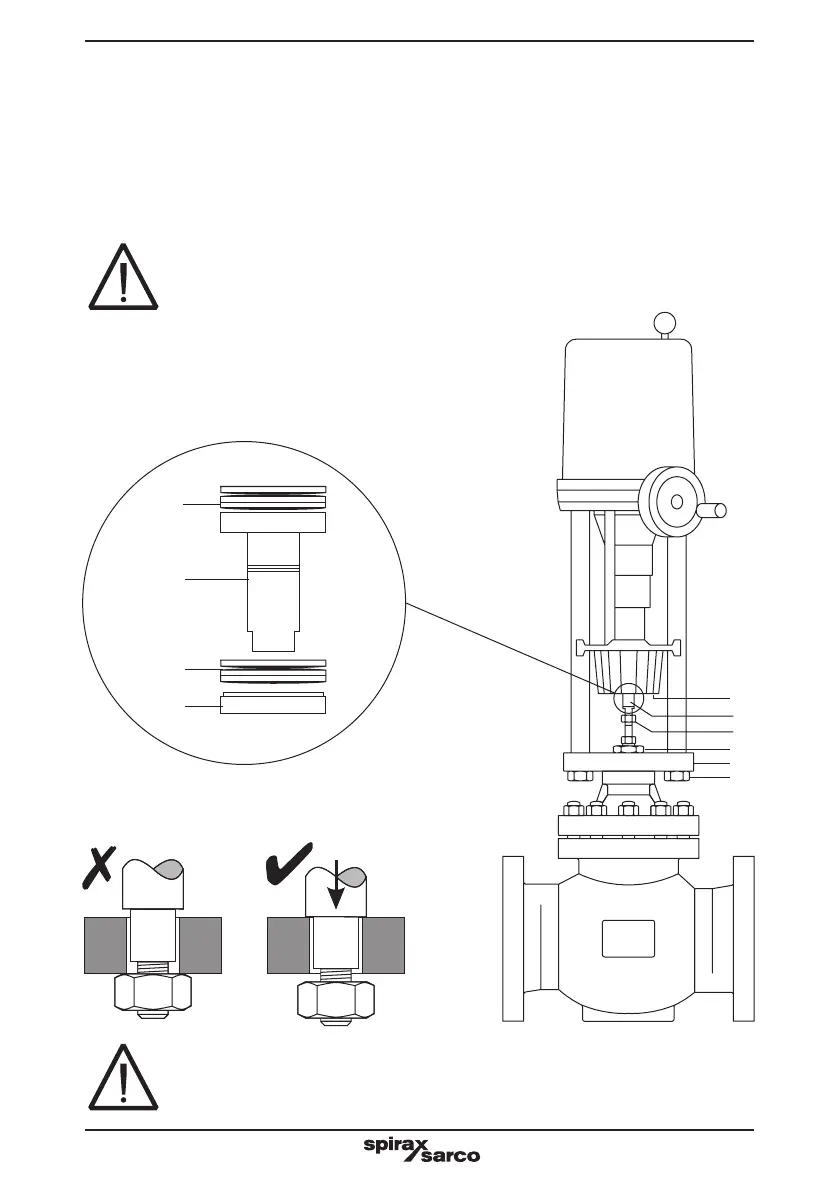
Fig. 5
10
14
15
12
13
11
8. Lift the valve stem up into the actuator connecting piece (10), until it stops.
9. Screw the actuator connecting piece (10) onto the valve stem until it meets the lock-nut
or comes to a stop (whichever is first).
10. Screw the retaining nut (11) into the actuator spindle until the returning unit is level with
the housing. This will preload the disc springs. Lock the valve stem lock-nut (14).
Use the peg spanner (found tied to the pillar) to tighten the retaining nut (11).
It is important that when the retaining nut is screwed hand tight, the valve plug
must not be on its seat. Ensure that one marking ring is exposed 1 mm below
the bottom of the retaining nut, as shown in Figure 2.
Before the pillar nuts are tightened, make sure that the pillar ends are
completely inserted into the bores of the mounting flange. If necessary,
correct the position of the actuator using the handwheel.
9
10
9
11
 Loading...