IM-P358-26 CH Issue 1
8
Note: Please read Section 1, 'Safety information' before proceeding with installation.
3.1 Location
The actuator should be mounted above the valve with sufficient space to remove the cover and
general ease of access. When selecting the location, make sure that the actuator is not exposed
to an ambient temperature exceeding the range -20°C to + 60°C (-20°C to +50°C for actuators
fitted with positioners). If necessary, provide insulation to prevent overheating. The actuator is
rated at IP65, but only when the lid is correctly fitted (see Section 3.3). It is recommended that
adequate shelter is provided for outdoor installations.
If condensation is present a heating resistor should be installed. Refer to Technical Information
Sheets for details.
The operating modes for these electric actuators are for S2 - short time service and
S4 - intermittent service as stated in IEC 6034 - 1, 8.
3.2 Connecting the actuator to the valve
Normally the AEL5 actuator will be supplied already fitted to the valve. However, should it be
necessary to fit an actuator, the following procedure should be adopted:-
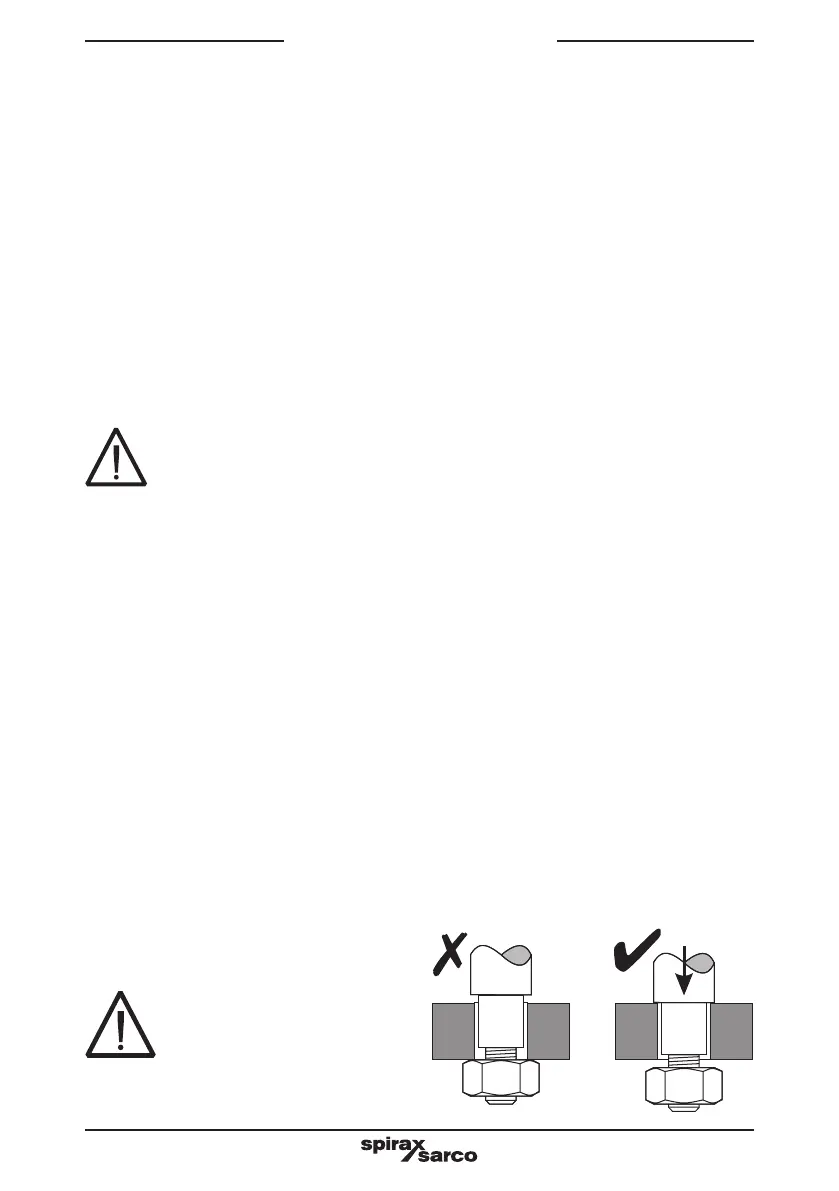
When mounting an actuator on a valve, never drive the actuator electrically,
instead use the handwheel.
Note: When mounting the actuator to the valve it is advised that the polystyrene
packaging remains on the head of the actuator. The actuator can become damaged if it
dropped or if it topples down onto a hard surface without the packaging.
3.2.1 AEL51_, AEL52_, AEL53_, AEL54_ and AEL55_ actuators
1. If the diameter of the valve is smaller than DN65 the AEL6911 adaptor must be used
for the SPIRA-TROL K valve or the AEL6911 J adaptor for the SPIRA-TROL J valve.
Themountingangeis:
EL5970 for the DN15 - DN50 SPIRA-TROL K valve or
EL5971 for the DN65 - DN100 SPIRA-TROL K valve or
AEL5971J for the DN15 - DN100 SPIRA-TROL J valve.
2. Remove the actuator retaining nut (8)fromthevalveandplacethemountingangeover
the valve bonnet thread.
3. Rettheactuatorretainingnut(8) and tighten (50 Nm for M34 or 100 Nm for M50).
4. Remove the actuator pillar nuts (3) Using the hand wheel retracts the actuator spindle.
5. Untighten the four screws (2) until the nut comes free (about 2 turns)
6. Screw the valve stem lock-nut (5) 2 x valve stem diameters onto the valve stem.
7. Puttheactuatorontothemountingange.
8. Retandtightenthepillarnuts(3) to a torque of 100 Nm.
Before the pillar nuts are
tightened, make sure that the
pillar ends are completely
inserted into the bores of the
valve mounting flange.If
necessary, correct the position
of the actuator using the
handwheel.
3. Installation
 Loading...