IM-P006-07 CTLS Issue 12
20
11
14
13C
13D
13A
13B
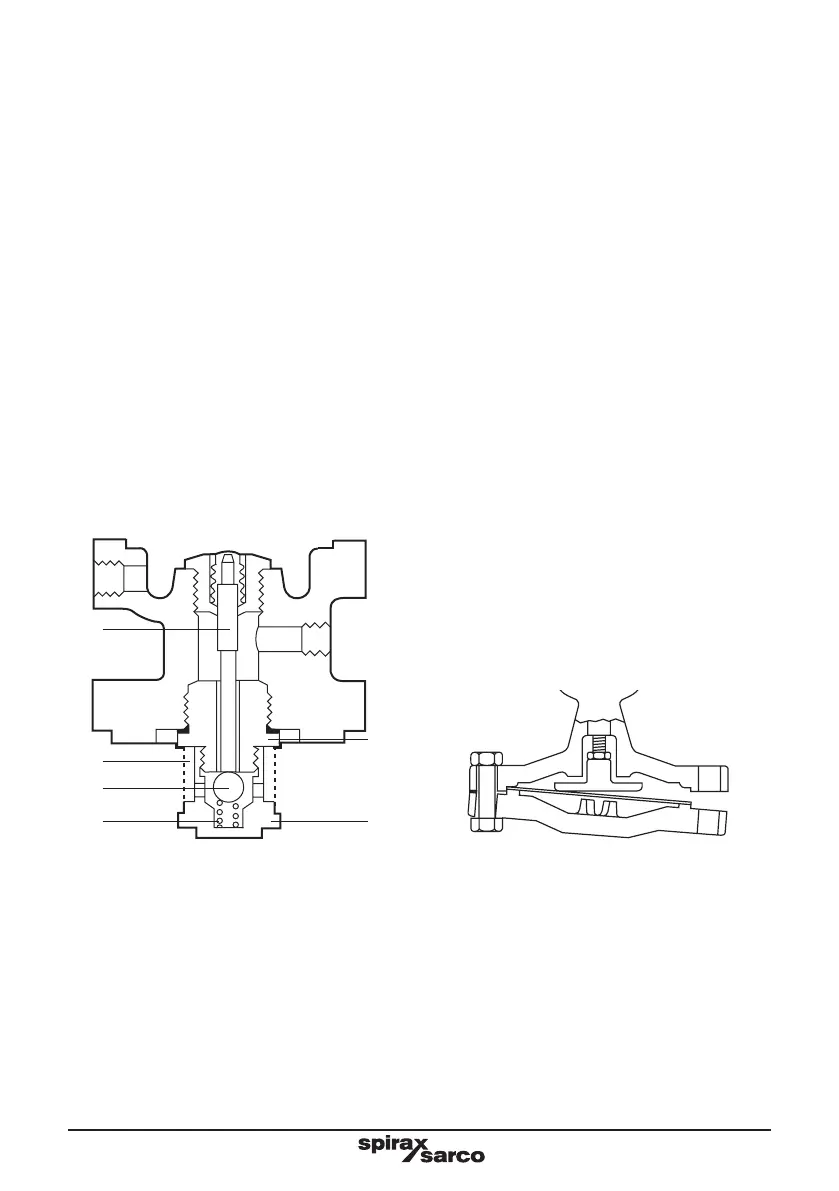
Fig. 9
5.6 How to clean the pilot valve strainer screen
1. Isolate the reducing valve and zero the pressure.
2. Release the lock-nut (2) and turn the adjustment screw (1) anticlockwise until the spring is slack.
3. Undo the union nuts and release the 6 mm stainless steel pipework.
4. Undo the nuts (21) and remove the pilot valve housing (10) complete with the spring housing assembly,
making sure that the main valve spring (16) is positioned correctly on top of the main valve head (17).
5. Holding the pilot valve block upside down, unscrew the screen retaining nut using a 27 mm A/F spanner.
6. Remove the screen (14) for cleaning, taking care not to lose the small return spring (13D) and ball (13C)
which can also be cleaned if necessary.
7. Refit the ball, spring and screen and refit the screen retaining nut (13B), tightening it to a torque of 15
N m.
8. Make sure that the gasket faces on both the pilot valve block and the body are clean. Make sure that the
main valve spring (16) is positioned correctly on top of the main valve head (17).
9. Fit new gasket (15) and secure the pilot valve block assembly onto the body with the nuts (21). Tighten
these nuts to the torque shown in Table 1.
10. Refit the 6 mm stainless steel pipework and retighten the union nuts to ensure a steam tight seal.
11. Bring the valve back into commission by following as many steps are as necessary in Section 4.1, 'Start-
up'.
Fig. 10