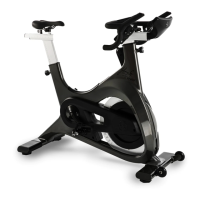
Do you have a question about the Spirit JOHNNY G SPIRIT BIKE and is the answer not in the manual?
| Brand | Spirit |
|---|---|
| Model | JOHNNY G SPIRIT BIKE |
| Category | Exercise Bike |
| Language | English |
Safety notes for owners, users, and staff regarding bike operation.
Key warnings for safe operation and health considerations.
Operating precautions for users and club managers.
Maximum weight capacity and safe dismounting procedure.
Warning about chemicals in California products.
Warning about personal injury risk and child safety.
Product certification information.
Space to record the product's serial number.
Instructions for warranty registration via mail or phone.
Procedures to unpack and verify all parts.
Advice on lifting, tools, and packaging.
List of necessary tools for bike assembly.
Link to an assembly video for guidance.
Instructions for attaching the front stabilizer.
Instructions for attaching the rear stabilizer.
Instructions for attaching the pedals to the bike.
Route the main wire through the handlebars.
Attach the handlebar assembly to the slide rail.
Secure the handlebar end cap to the slide rail.
Instructions for positioning the handlebar anchor.
Attach the adjusting axle with washers and lever.
Seal the lever with a plastic cap.
Connect wires to the console.
Secure the console to the aluminum slide rail.
Important note about removing the flywheel shim.
Checklist for bolt tightness, seat level, and adjustments.
Test pedal movement and bike stability.
Warning about dismounting before pedals stop.
How to use resistance keys and shifters.
Overview of adjustments for user comfort.
Steps to adjust the seat height for optimal fit.
Instructions for adjusting the seat position forward or back.
How to adjust the handlebar height.
How to adjust the handlebar position forward or back.
How to adjust pedal straps for a secure fit.
Using forward control pad and handlebar shifters.
How to use the dynamic braking handle for emergency stops.
Importance of proper setup and consulting a physician.
Guidelines for warm-up, brisk workout, and cool-down.
Warning about pedal movement after stopping.
Information on ANT+ and Bluetooth compatibility.
Basic function for preparing for activity.
How to adjust resistance during warm-up.
Basic function for workouts and tracking.
Display and scrolling of workout summary data.
How to pair a heart rate strap.
List of programs: Pair HR, Power Zone, Lap, Exit.
Steps to connect HR strap via Programs Mode.
Console display when HR devices are found or scanned.
Selecting sensors, entering age, and setting Max HR.
Information on identifying MyZone/ANT+ devices.
Tracks time in 5 heart rate zones with LED color guide.
Steps to start the HR Zone Program.
Options to end the ride or user session.
Displays detailed workout data.
Displays time spent in each Power Zone.
Displays time spent in each HR Zone.
Compares current lap with previous lap.
How to activate/deactivate programs concurrently.
Tracks performance across 5 training zones, can administer FTP test.
Steps to enter FTP or start an FTP test.
Steps for setting up the FTP test.
Choosing between a 5-min or 20-min test.
How to enable and start the Lap Program.
Procedure to start recording a lap.
How to end a lap and view results.
Cycle for recording subsequent laps.
Overview of available settings in Maintenance Mode.
How to enter Maintenance Mode.
How to exit Maintenance Mode via console reset.
Verifies proper signaling of all buttons.
Checks functionality of all LED panels.
Tracks total hours the bike has been in use.
Changes distance calculation between English and Metric.
Tests the magnetic resistance system.
Manual control of the motor for testing.
Tests flag movement between home and limit sensors.
Tests the RPM detection system functionality.
Steps to update console software using a USB drive.
Adjusts the brightness of the display.
Assigns a unique number to the bike for leaderboard software.
Turns HR pairing function ON or OFF.
Turns the HR Zone LED light ON or OFF.
Continually displays demo mode for trade shows.
Warning against adjusting factory-sensitive resistance settings.
Explanation of FTP and its importance in cycling.
Overview of methods to measure FTP.
Detailed steps for the 20-minute FTP test.
Detailed steps for the 5-minute FTP test.
Explains the 5 training zones and their benefits.
How power data aids training and evaluation.
How the HR/Power ratio indicates fitness progression.
Daily, Weekly, and Monthly maintenance activities.
List of tools needed for maintenance.
Instructions for relocating and stabilizing the bike.
Procedures for cleaning the bike after use.
Inspections for vibration, loose parts, and flywheel alignment.
Checking pedal torque and frame sealing.
Specific instructions for cleaning the bike.
Applying wax or polish to protect the frame.
Contact information for Dyaco Commercial & Medical North America.
Addresses and contact details for global offices.