OmegaLadder Instructions
If you have purchased an OmegaPool, these instructions replace steps(7) and (9) in your SplashLadder Instruction
Manual.
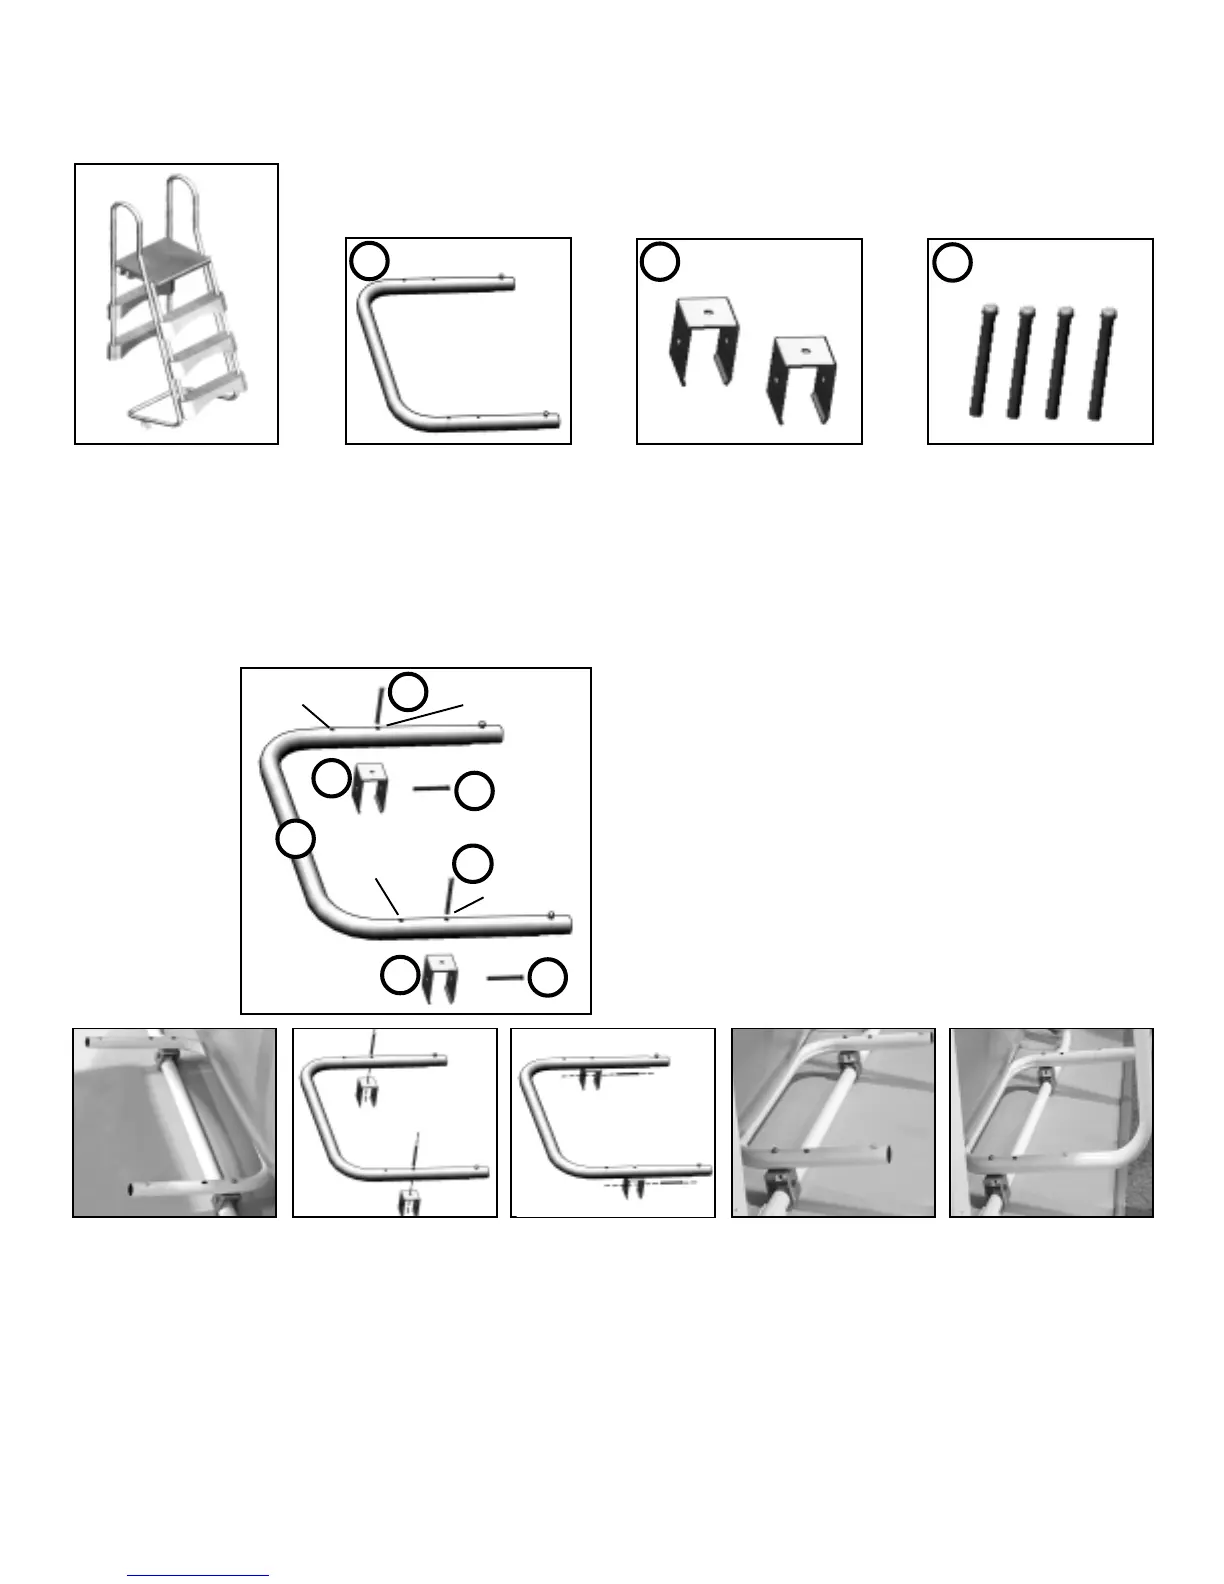
Attaching the OmegaLadder Berth Pipe to the Buttress Leg
Please note: The front holes (the ones closest to the pointed ends) in the OmegaLadder Berth Pipe are for OmegaPool
sizes 12’ x 4’ and 16’ x 4. The rear holes are for OmegaPool sizes 20’ x 4’ and 24’ x 4’.
Parts Needed:
I. OmegaLadder “Horseshoe” Berth Pipe
P. OmegaLadder Mounting Brackets
O. (4) Long Metal Screws w/Nuts and Washers
1. Select the desired OmegaPool Buttress Leg for your OmegaLadder and place the “Horseshoe” Berth Pipe on top
of a OmegaPool Buttress Leg. (The pointed end should face away from the pool.) 2. Take the two Long Metal Screws
and place them vertically through the OmegaLadder “Horseshoe” Berth Pipe and the OmegaLadder Mounting Brackets
on the Buttress Leg. Tighten with the corresponding Nuts and Washers. 3. Take the two remaining Long Metal
Screws and place them horozontally underneath the Mounting Brackets and tighten with the corresponding Nuts
and Washers. 4. The OmegaLadder “Horseshoe” Berth Pipe is now secure. 5. Slide the OmegaLadder Vertical
Supports into the OmegaLadder “Horseshoe” Berth Pipe until the snap couple system is in place. The OmegaLadder
assembly is now complete.
1
2345
29
Letter (I) is now the OmegaLadder
“Horseshoe” Berth Pipe
Letter (P) is now the OmegaLadder
Mounting Brackets
Letter (O) is now (4)Long Metal
Screws w/Nuts and Washers
I
P
O
O
O
O
P
Rear Hole
Front Hole
Rear Hole
Front Hole
©
2003-Splash Superpools Ltd.
Please replace the following letters with the corresponding diagram parts list on
page 1 of
your SplashLadder Instruction Manual:
I
P
O