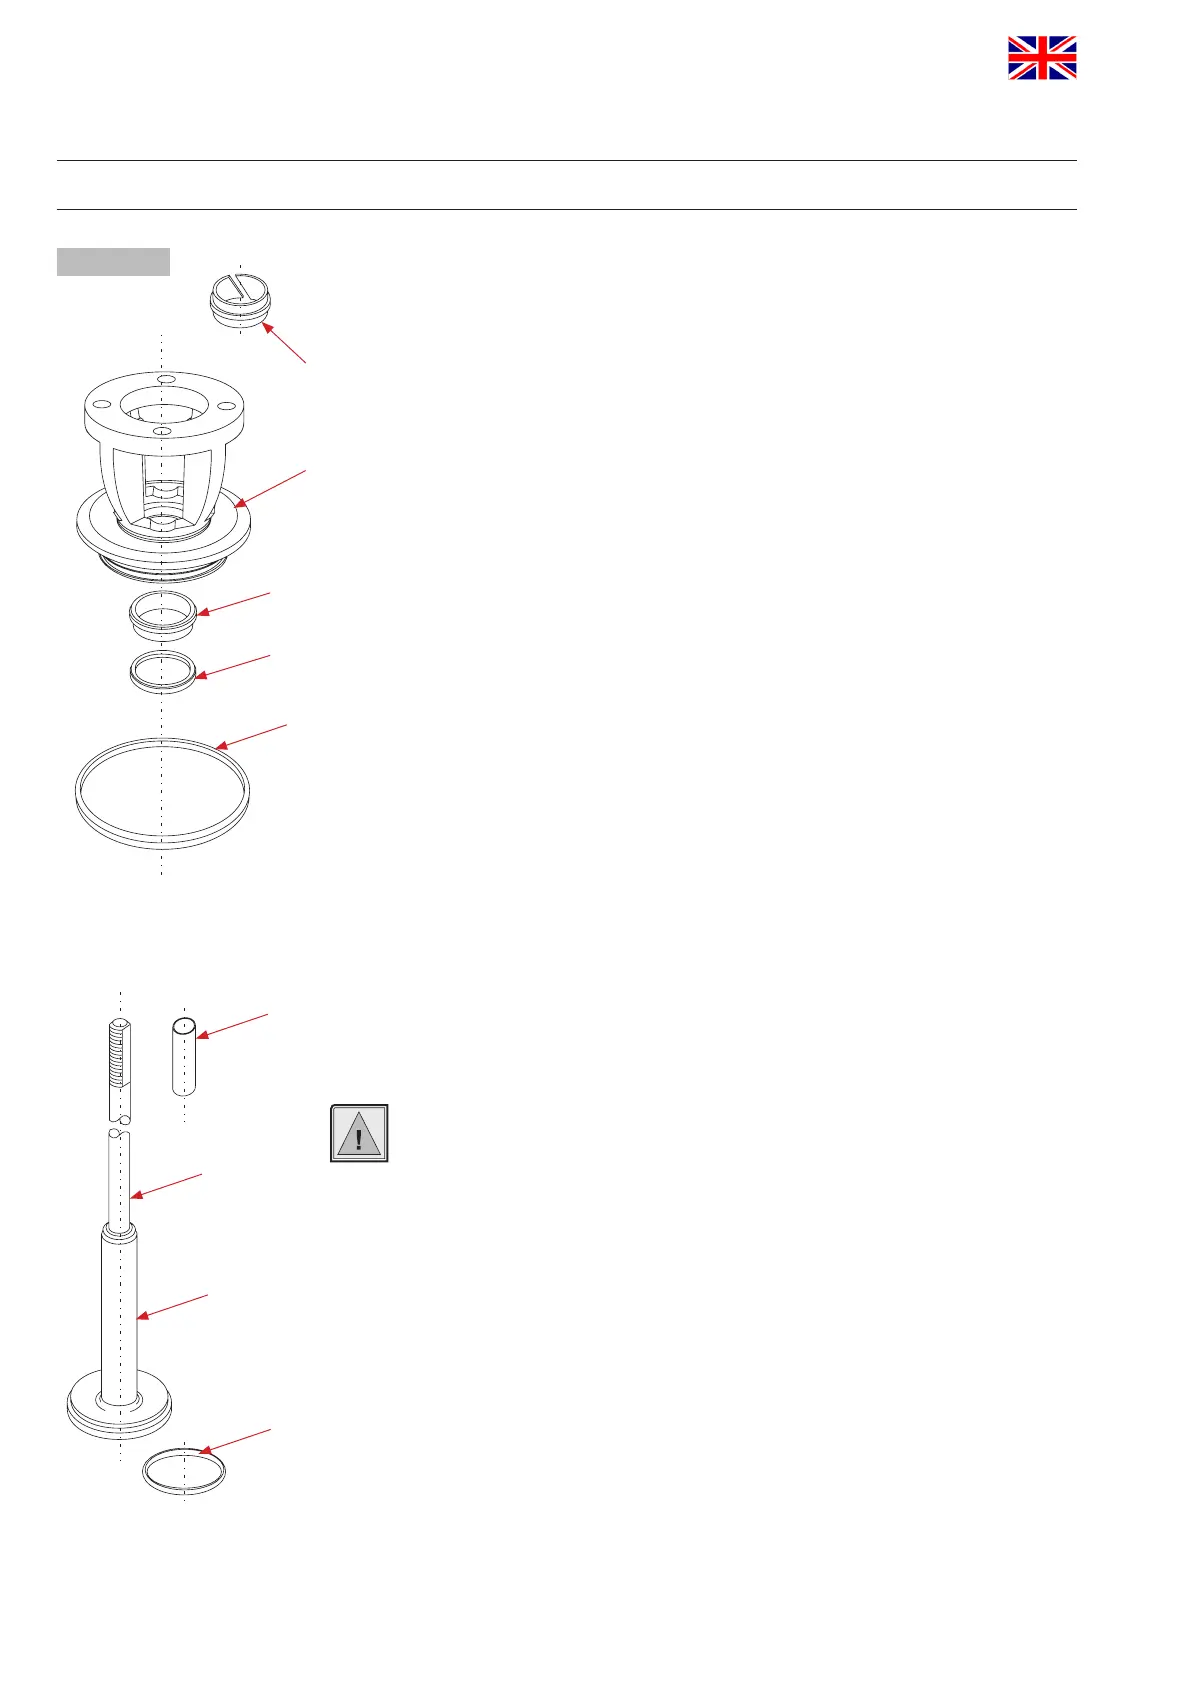
fig. 11.3.1.
guide bushing
shaft seal
seat seal
housing seal
shaft
seat seal
guide rod
protective tube
yoke
17
APV_SW4_UK-4_082017.indd
UK
Single seat and change-over valve
DELTA SW4
Instruction manual: UK - rev.4
APV
11. Service Instructions for Single seat valve
11.3. Installation of seals and assembly of valve
1. Insert the guide bushing into the yoke.
Afterwards, insert the shaft seal and press in
the slightly greased seat seal (see fig. 11.3.1.).
See to the correct installing position.
2. Install the yoke at the actuator.
3. Insert the seat seal into the shaft. Use the assembly tool
to install the seat seal (see chapter 14). Grease the
seat seal only slightly before its installation.
In case of manual installation, vent the seal groove with
a thin object between the seal and groove wall.
4. Install the protective tube via the thread of the guide rod.
Slide the shaft through the yoke and actuator. Place
centering washer and tighten it with the safety nut.
Hold up the centering washer during this process.
Tightening torque 40 Nm.
5. Slightly grease the housing seal and install it in the groove
of the yoke.
6. Install the adapter for the control unit on the actuator.
Apply a drop of a screw locker (e.g. type: Loctite semi-solid)
in the area of the threaded bore of the actuator screw.
Fasten actuator screw on the guide rod.
11.4. Installation of valve
1. Fasten the control unit.
2. Connect compressed air supply.
3. Valve design NC : Control actuator with air.
Do not touch movable valve parts!
Risk of injury by sudden valve operation.
4. Place the valve insert carefully into the housing and
fasten the clamp.
The housing seal must not be damaged during the installation.
5. Valve design NC: Shut off compressed air.
6. Check the basic adjustment of the valve position indication
if necessary.
- The shift points can be adjusted by turning the positioning screw
in the control unit.

 Loading...