- 21 -
7611F 71.30.31 KS 71.30.31 DT
emaN-D tlletsre emaN .rpeg emaN .ftztesre .dtztesre
9. Wartung
9.3 Wartung der Kondensatableiter
9.3.1 Vierteljährliche Wartungsarbeiten
X-DRAIN®:
• Funktionskontrolle - Kondensatablass.
∗ Betätigen Sie den TEST-Schalter am niveaugesteuerten
Kondensatableiter. Kondensat muss abfließen.
• Schmutzfänger reinigen, Kondensatablass.
Achtung!
Vor Servicearbeiten ist der Ableiter drucklos zu
machen.
∗ Über den niveaugesteuerten Kondensatableiter kann die
Anlage drucklos gemacht werden.
- Betätigen Sie die TEST-Taste am niveaugesteuerten
Kondensatableiter bis das Gerät drucklos ist.
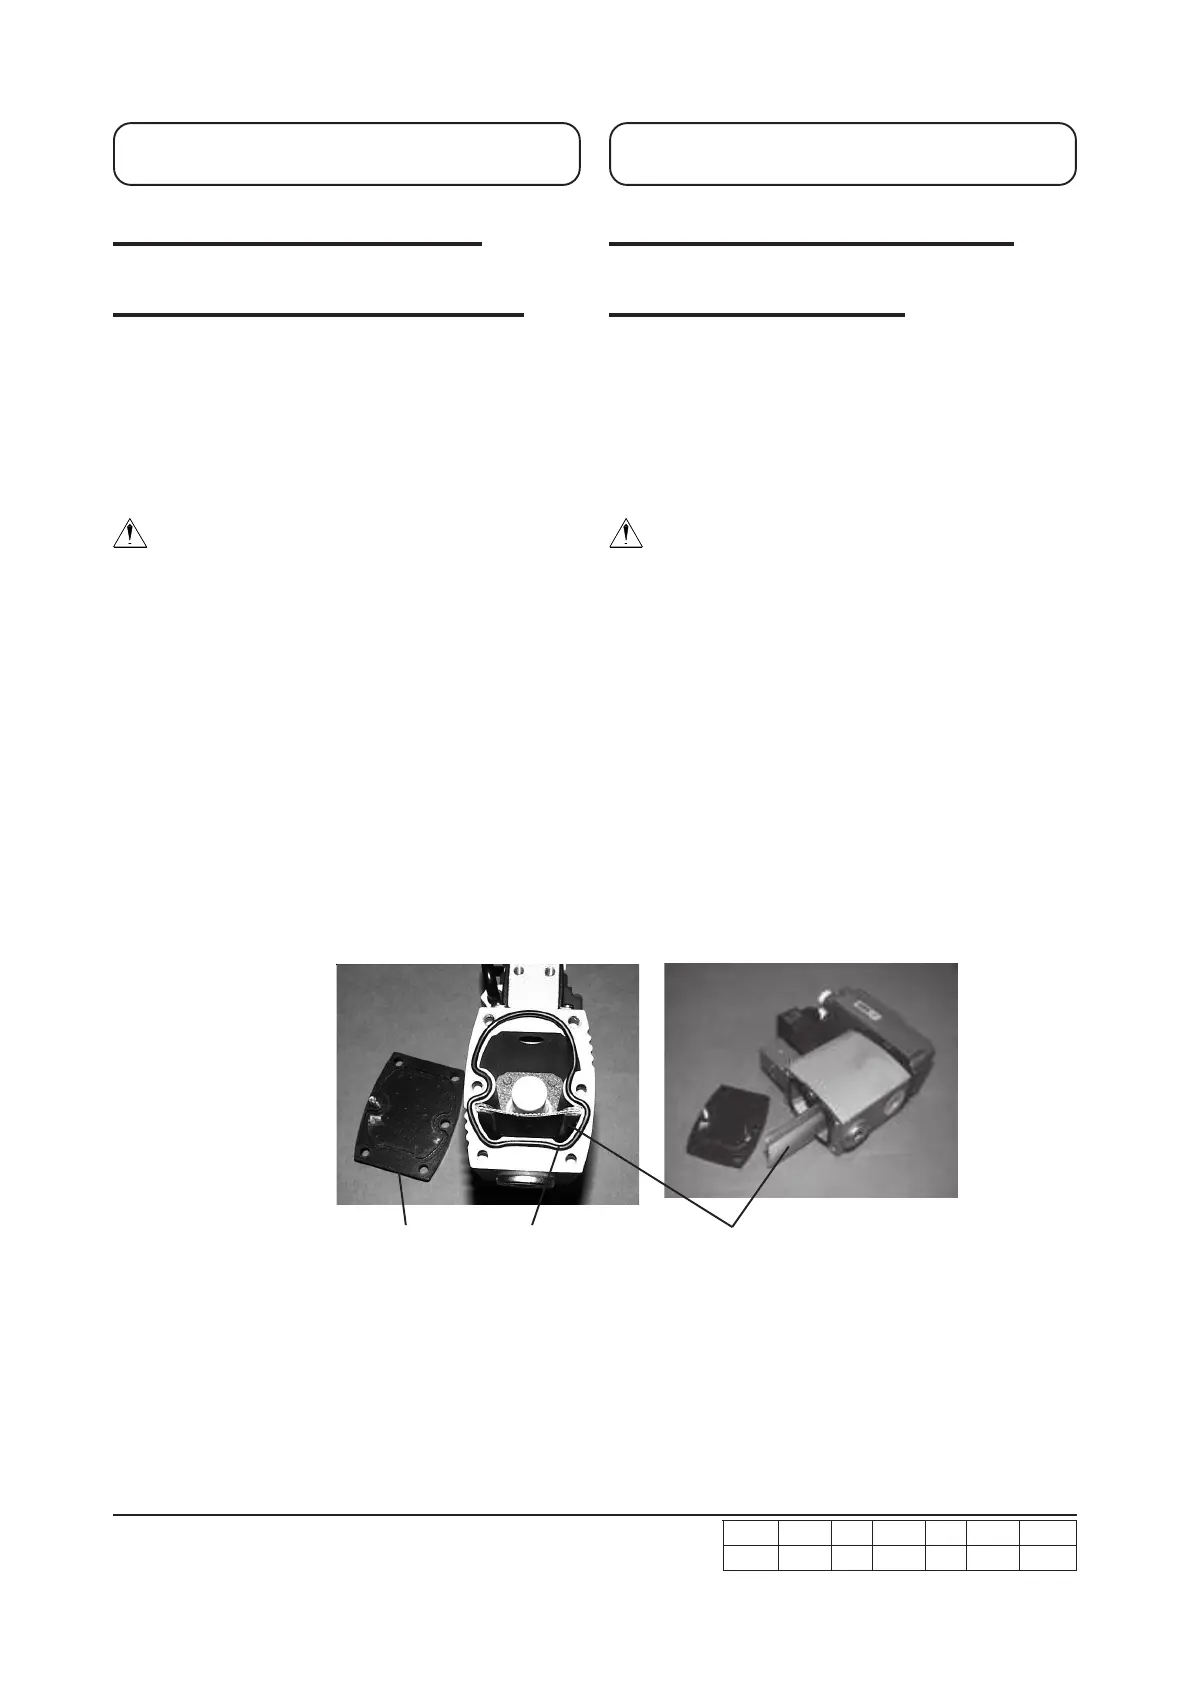
-Entfernen Sie den unteren Gehäusedeckel durch Lösen
der 6 Innen-Sechskant-(Inbus)-Schrauben mit einem 5er-
Inbusschlüssel.
- Ziehen Sie das Schmutzfängersieb aus dem Gehäuse.
- Reinigen Sie das Sieb.
- Anschließend das Sieb wieder in das Gehäuse
einsetzen.
- Den Gehäusedeckel mit den 6 Schrauben schließen.
WICHTIG!
Auf richtigen Sitz des O-Dichtrings achten.
9. Servicing, filter cartridge
9.3 Maintenance of condensate drains
9.3.1 Quarterly maintenance
X-DRAIN®:
• Check the condensate drains.
∗ Press the TEST-button on the condensate drain.
The condensate must be discharged.
• Cleaning the contamination strainer, condensate drains.
Warning!
Before starting any service work, turn off
compressed air supply to the unit and depressurize
the system.
∗ The system can be depressurized via the level-controlled
condensate drain.
- Press the TEST-button on the condensate drain
until the system is depressurized.
- loosen the 6 hex bolts with a 5 mm hex key wrench to
remove the lower cover panel
- remove the strainer from its housing
- clean the strainer.
- re-install in the housing.
- Fix the six hex bolts to fasten the cover.
Important!
Make sure the O-ring gasket is inserted properly.
O-Ring Dichtung
O-ring gasket
Unterer Gehäusedeckel
Bottom housing cover
Schmutzfänger-Sieb
Strainer
 Loading...