© SPX FLOW, Inc.
Form No. 1000623
Rev. 6 Jan. 10, 2017
Repair Procedures continued
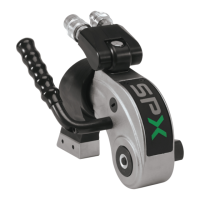
4. See Figure 6. Remove the square drive and square
drive cap.
1
2
Item Description
1 Square Drive Release Button
2 Square Drive Cap
Figure 6. Square Drive Removal
Figure 7. Crank Pin Alignment
Figure 8. Drive Assembly Removal
5. See Figure 7. Push the drive assembly upward
until the crank pin is centralised in the body plug
hole. Push and remove the crank pin from the drive
assembly via the opposite body plug hole.
6. See Figure 8. Using a screwdriver, lever the drive
assembly forward and withdraw the complete
assembly from the front of the body.