Waukesha Cherry-Burrell
®
Brand W60/W80 Valves Maintenance
02/2020 95-03022 Page 41
U-cup, O-ring and Bearing Replacement:
4” Air-to-Raise 3-Position Actuator
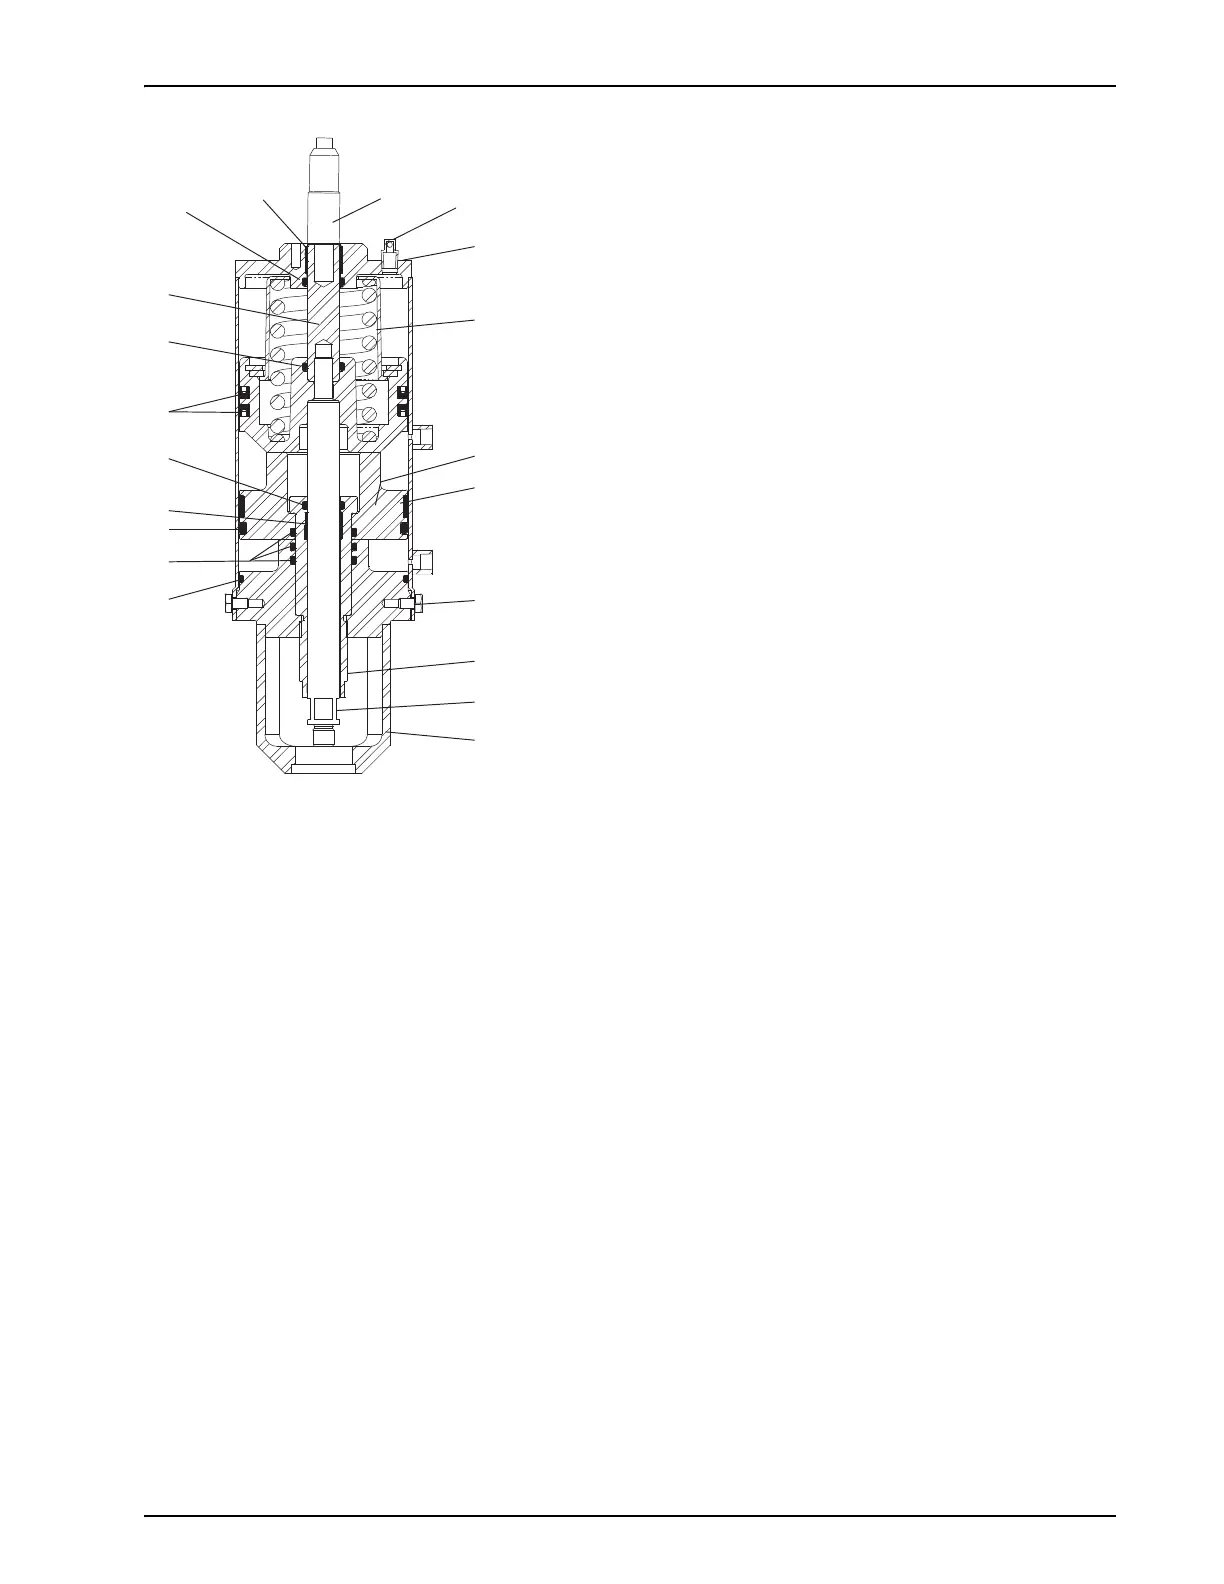
1. Inspect the upper piston U-cup seal (Figure 38, item 8).
2. Remove the worn U-cup seal. Do not score or nick grooves in
the piston (item 10).
3. Coat the new U-cup seal with Dow Corning
®
#7 Silicone
Lubricant or equivalent.
4. Slightly stretch the lubricated seal to fit over the upper piston.
Install the lower seal first with the "U" pointing down. Install
the upper seal with the "U" pointing up. U-cup seals flare
slightly at the outer edges when properly installed.
5. Inspect the lower piston O-ring (item 20), stem O-ring (items
6 and 11) and yoke O-ring seals (item 7).
6. Remove the worn O-ring seals. Do not score or nick grooves
in the piston (item 15).
7. Coat the new O-ring seals with Dow Corning
®
#7 Silicone
Lubricant or equivalent.
8. Slightly stretch the lubricated piston seal to fit over the lower
piston.
9. Inspect and replace the PTFE guide bearings (items 14 and
5) as needed.
10. Place the outer stem (item 21) in the lower piston.
11. Screw the outer stem into the yoke (item 12).
17 turns = full stroke adjustment
1 turn = 0.063 stroke
Using a spanner wrench, turn the stem counter-clockwise for
more stroke and clockwise for less stroke.
12. Place the piston and spring assembly in the cylinder.
13. Place the cylinder over the yoke, and install cap screws (item
9) to secure it.
NOTE: If the stems were disassembled during this maintenance
procedure, clean, prime, and apply Loctite
®
2440 Thread Locker,
according to manufacturer’s specifications, to the upper (items 1,
1a) and lower (item 3) stems. Torque the stems to 200 in/lbs.
Figure 38: 4" Air-to-Raise 3-Position
Actuator
VA100-375
5
13
4
10
14
9
21
3
12
5
7
6

 Loading...