15
Miscellaneous Leaks
Component Testing
(radiators, water pumps, valves, etc.)
When installing new or rebuilt parts, nothing is more
frustrating than to discover, on completion of the job,
that the component is faulty or has a leak. It is far easier
to inspect a radiator or water pump before it is installed
than to nd out later, after the antifreeze is added, that
there is a leak.
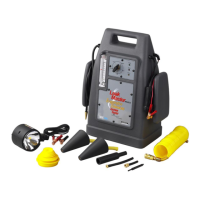
Component testing has endless possibilities; anything
from hoses to diaphragms can be tested. Supplied with
every LeakMaster are two exhaust cone adapters that
can be used to access any opening from 1" to 3-1/2".
Simply introduce smoke into the system being tested,
seal any interconnecting ports or passages, and look for
smoke to exit a leak.
Under-Dash Leaks
Under-dashboard leaks can be difcult to locate. The
LeakMaster can conrm or eliminate the possibility of
an under-dash leak in just minutes.
Most vehicles have a common vacuum supply line that
originates at the engine intake. This vacuum source
comes through the rewall to supply the climate control
functions, as well as other systems in the vehicle.
Vacuum systems under the dashboard are intended to be
closed systems; any ow through these systems would
indicate there is a leak present.
1. Set the control valve on the tester to TEST.
2.
Install the supply nozzle into the main vacuum line
(beyond the check valve) leading to the dashboard.
3. Introduce air into the system, and watch the ow
meter indicator ball. If the ball drops to zero, the
system is leak free.
4. Continue to introduce air into the system while testing
each setting on the climate control. Watch the ow
meter for any change of ow.
If the ow meter indicates ow in any of the positions
on the climate control, you will know what portion
of the system has a leak.
5. Set the control valve on the tester to SMOKE.
6. Introduce smoke into the system where a leak has
been determined. Shine the spotlight under the
dashboard, and look for smoke to pinpoint the leak.
Exhaust Cones
Tech Tips
Don’t forget that you may also identify leaks
by using an ultraviolet light (not supplied) to
look for traces of dye left behind by the smoke.
Theexitingsmokedepositsaresidualuidthat
is either bright green or bright yellow in color,
when viewed with a UV light.