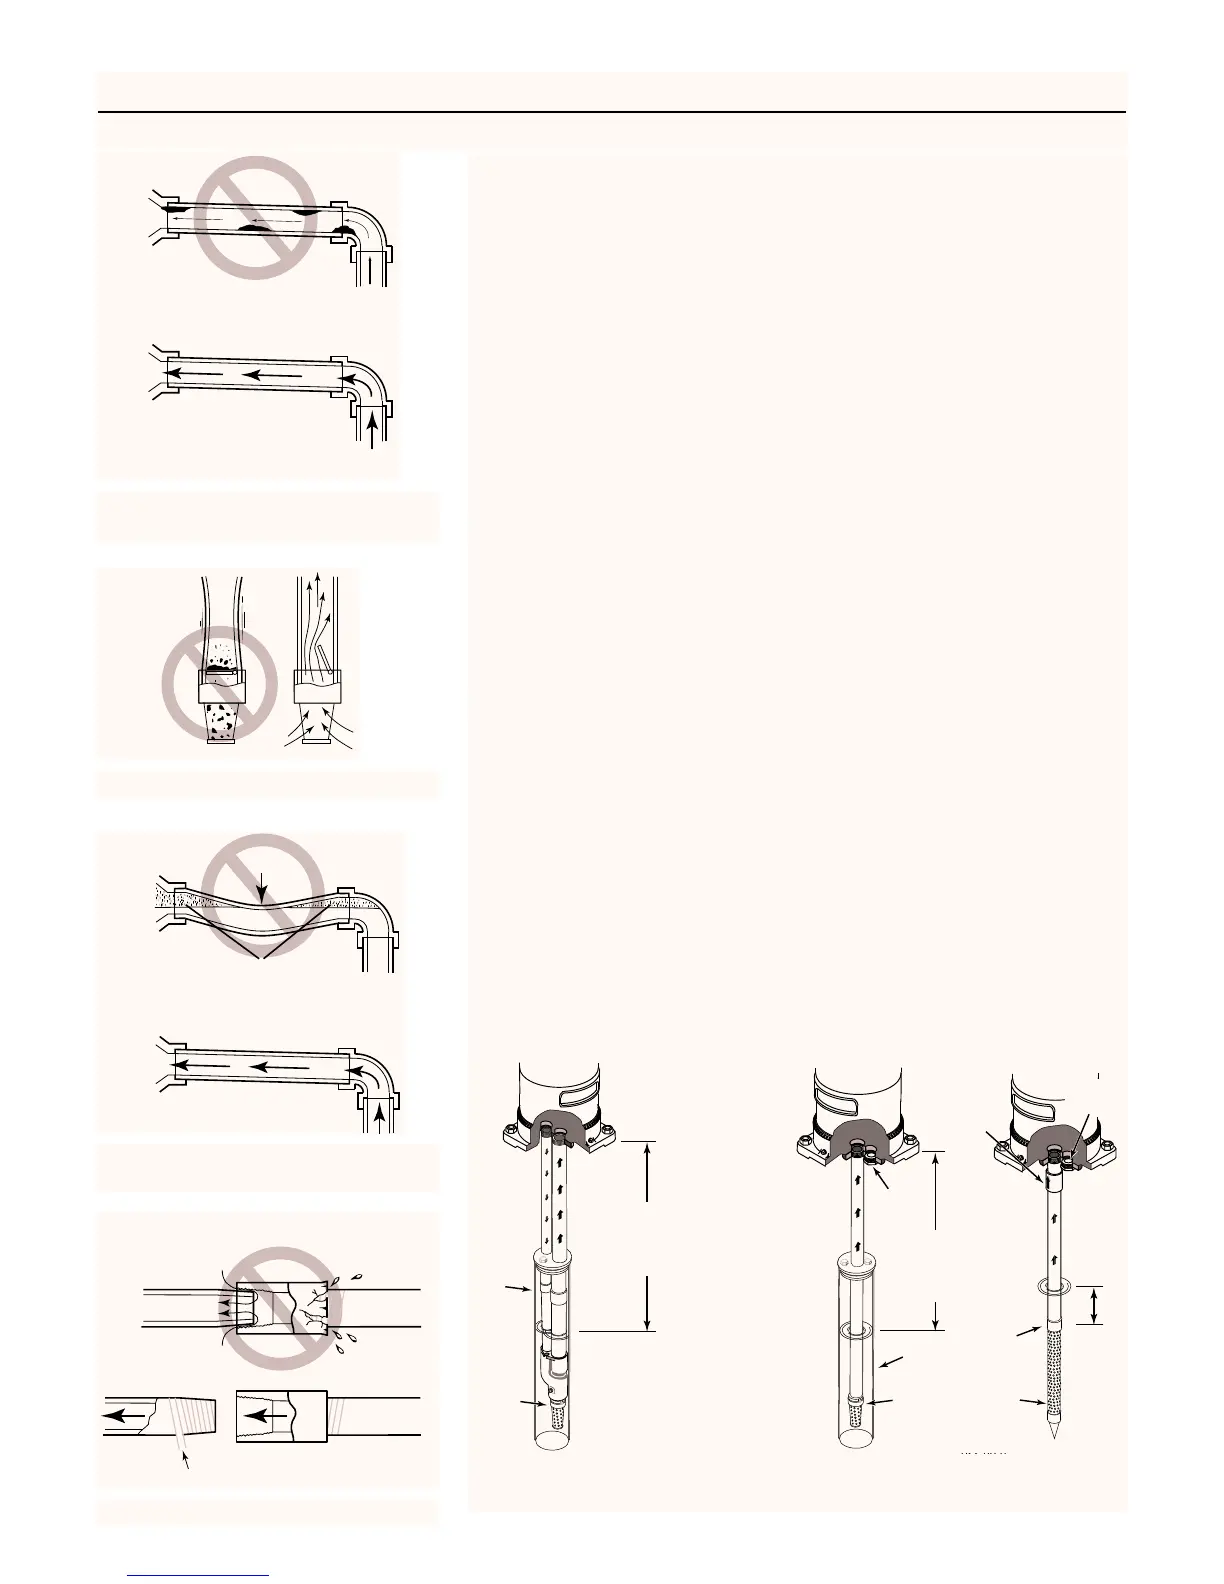
Use New Pipe for Best Results.
If Air Pockets Form, Water Won’t Flow.
Keep Pipe Straight and Angled up to Pump.
in Suction Pipe.
Damage Plastic.
Use Teflon Tape.
Figure 4: Suction Pipe Must Not Leak
BEFORE YOU INSTALL YOUR PUMP
NOTE: For proper performance, pump MUST be matched to ejector and to
well depth. Use shallow well installation for wells up to 25 ft depth to
water and deep well ejector for depths up to 130 ft.
Step 1. Long runs and many fittings increase friction and reduce flow.
Locate pump as close to well as possible: use as few elbows and fit-
tings as possible.
Step 2. Be sure well is clear of sand. Sand will plug the pump and void the
warranty.
Step 3. Protect pump and all piping from freezing. Freezing will split pipe,
damage pump and void the warranty. Check locally for frost protec-
tion requirements (usually pipe must by 12” below frost line and
pump must be insulated).
Step 4. Be sure all pipes and foot valve are clean and in good shape.
Step 5. No air pockets in suction pipe.
Step 6. No leaks in suction pipe. Use Teflon tape or Plasto-Joint Stik to seal
pipe joints.
Step 7. Match pump to well.
IMPORTANT: Flow into well must at least equal flow out through
pump!
Step 8. Unions installed near pump and well will aid in servicing. Leave
room to use wrenches.
Step 9. Plug 1” drive port when installing on shallow well.
SHALLOW WELL/CENTRIFUGAL INSTALLATION
No ejector is used in this case, plug the smaller of the two inlet ports, using
the larger for the suction pipe. Refer to Figure 6 for installation tips.
Maximum depth to water for shallow well/centrifugal operation is 25 feet.
NOTE: To avoid pump overloading and motor failure, install a flow control
valve at the discharge to limit flow to 20 gallons per minute.
pump running.
water.
pump running.