USAGE INFORMATION
11
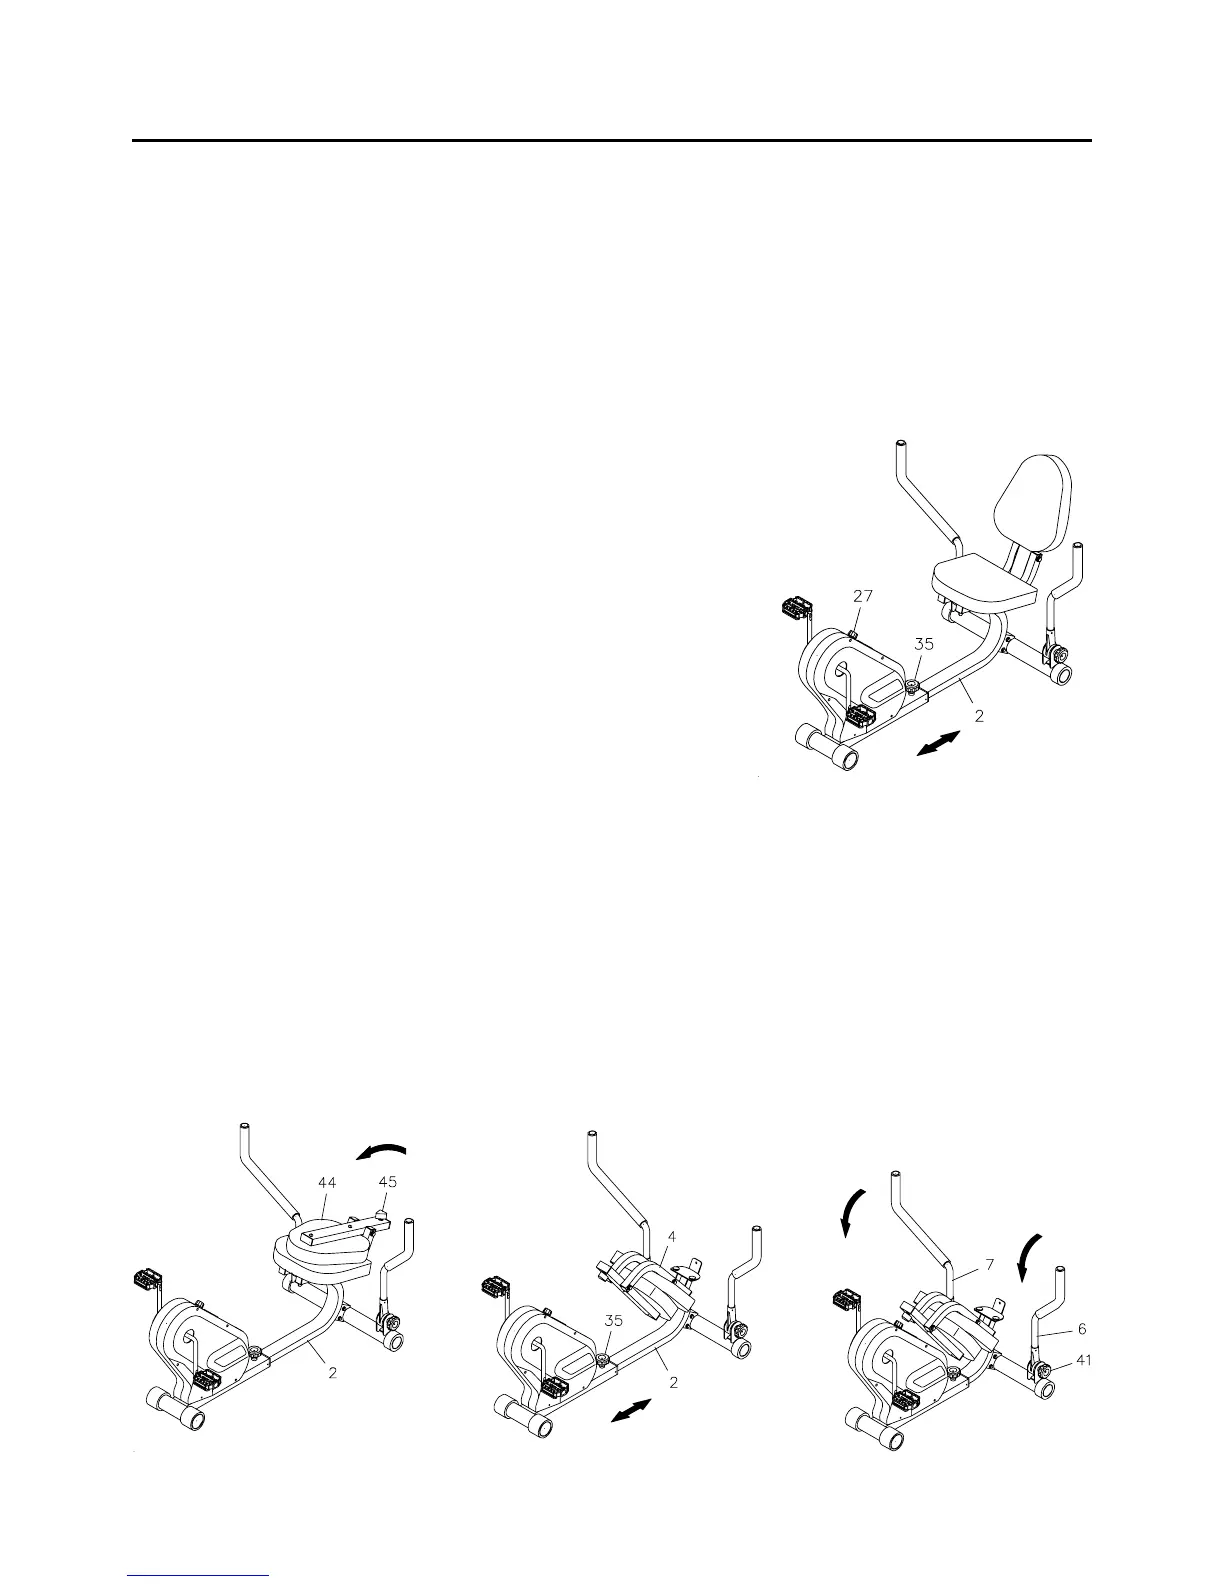
SEAT ADJUSTMENT
Loosen the ADJUSTMENT KNOB(35) and slide the REAR FRAME(2) to adjust the seat. Tighten
the
ADJUSTMENT KNOB(35) after adjusting the seat to a new position.
Sit on the seat and place the balls of your feet on the pedals. You should be able to move through the
bottom of the pedaling stroke without locking your knees or shifting your hips on the seat. The seat is
too close to the pedals if you have more than a slight bend in your knees at the bottom of the pedal
stroke. The seat is too far from the pedals if you have to completely straighten your knees at the bottom
of the pedal stroke.
Proper seat adjustment is important.
1.
2.
STEP 1: Loosening the LOCKING KNOB(45) and fold the BACK CUSHION(44) forward. Refer to
illustration 1.
STEP 2: Fold the SEAT FRAME ASSEMBLY(4) by lifting up the rear end of the BACK SUPPORT(5).
Loosen the ADJUSTMENT KNOB(35) and slide the REAR FRAME(2) forward as far as it will go, then
secure with the
ADJUSTMENT KNOB(35). Refer to illustration 2.
STEP 3: You can store your 4650 Dual-Action Recumbent Cycle as shown in illustration 3 after
folding. You can also fold the
HANDLEBARS(6, 7) by loosening the RESISTANCE KNOBS(41).
WARNING: When folding and unfolding the 4650 Dual-Action Recumbent Cycle, keep all children
away from the
4650 Dual-Action Recumbent Cycle and make sure your hands are clear of any folding
or pinch point.
1. 3.2.
WARNING:
1. Do not attempt to adjust the seat while you are on the 4650
Dual-Action Recumbent Cycle.
2. Always tighten the ADJUSTMENT KNOB(35) after adjusting
the seat to a new position.
HOW TO STORE YOUR 4650 Dual-Action Recumbent Cycle
LOAD ADJUSTMENT
To increase the load, turn the TENSION KNOB(27) clockwise. To
decrease the load, turn the
TENSION KNOB(27) counterclockwise.
NOTE: If the load cannot be adjusted high enough or low enough,
remove the
ELECTRONIC METER(29) and adjust the TENSION
BELT(25) at the BUCKLE(24).