ASSEMBLY INSTRUCTIONS
7
STEP 4
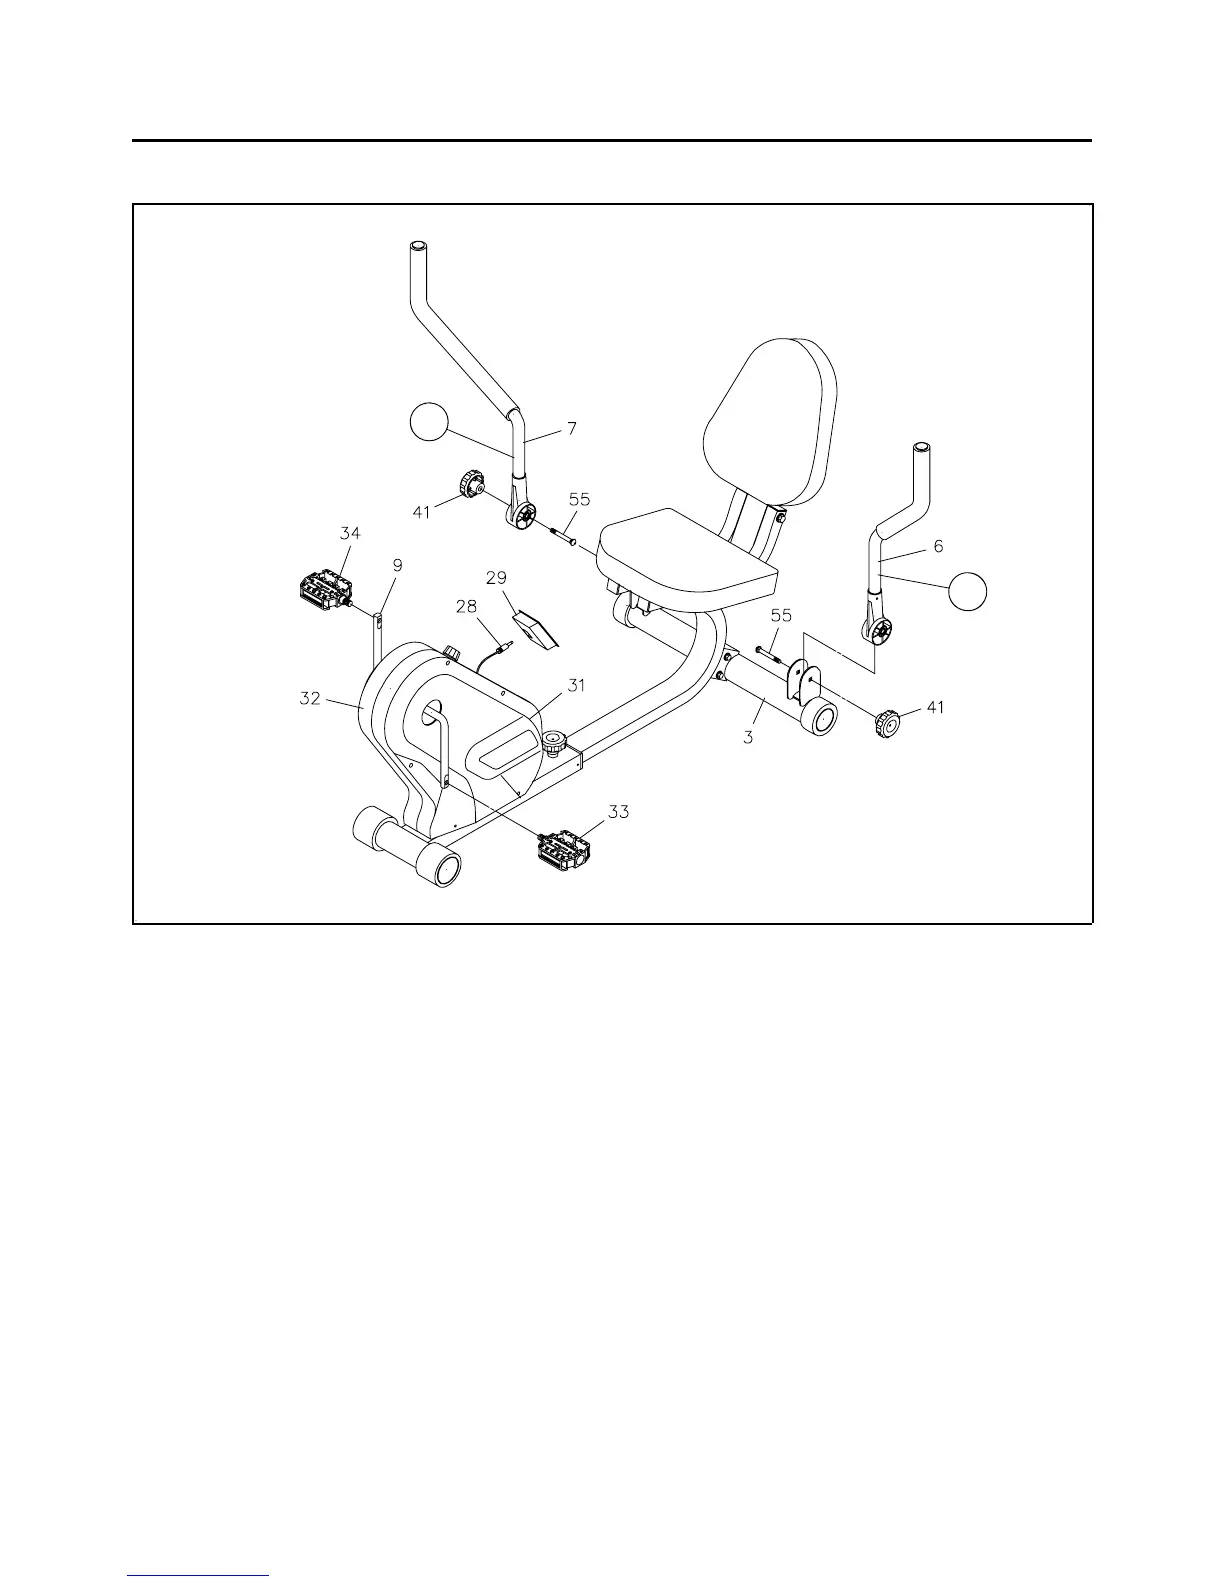
Attach the LEFT HANDLEBAR(6) onto the REAR STABILIZER(3) with CARRIAGE BOLT
(5/16" x 2")(55) and RESISTANCE KNOB(41). Repeat on the other side.
NOTE: There is a "L" decal on the
LEFT HANDLEBAR, and a "R" decal on the RIGHT HANDLEBAR.
STEP 5
NOTE:
Thread the
RIGHT PEDAL(34) onto the right side of the CRANK(9) as shown. Tighten the pedal securely.
Do the same way to attach the
LEFT PEDAL(33) onto the left side of the CRANK(9).
STEP 6
Install two "AA" batteries into the ELECTRONIC METER(29). Plug in the SENSOR WIRE(28) to the
ELECTRONIC METER(29). Press the ELECTRONIC METER(29) into the hole on the COVERS
(31, 32).
The RIGHT PEDAL(34) has R stamped on the end of the pedal shaft. The RIGHT PEDAL(34)
has right hand threads and is tightened by turning clockwise. The LEFT PEDAL(33) has L
stamped on the end of the pedal shaft. The LEFT PEDAL(33) has left hand threads and is
tightened by turning counter clockwise.
R
L