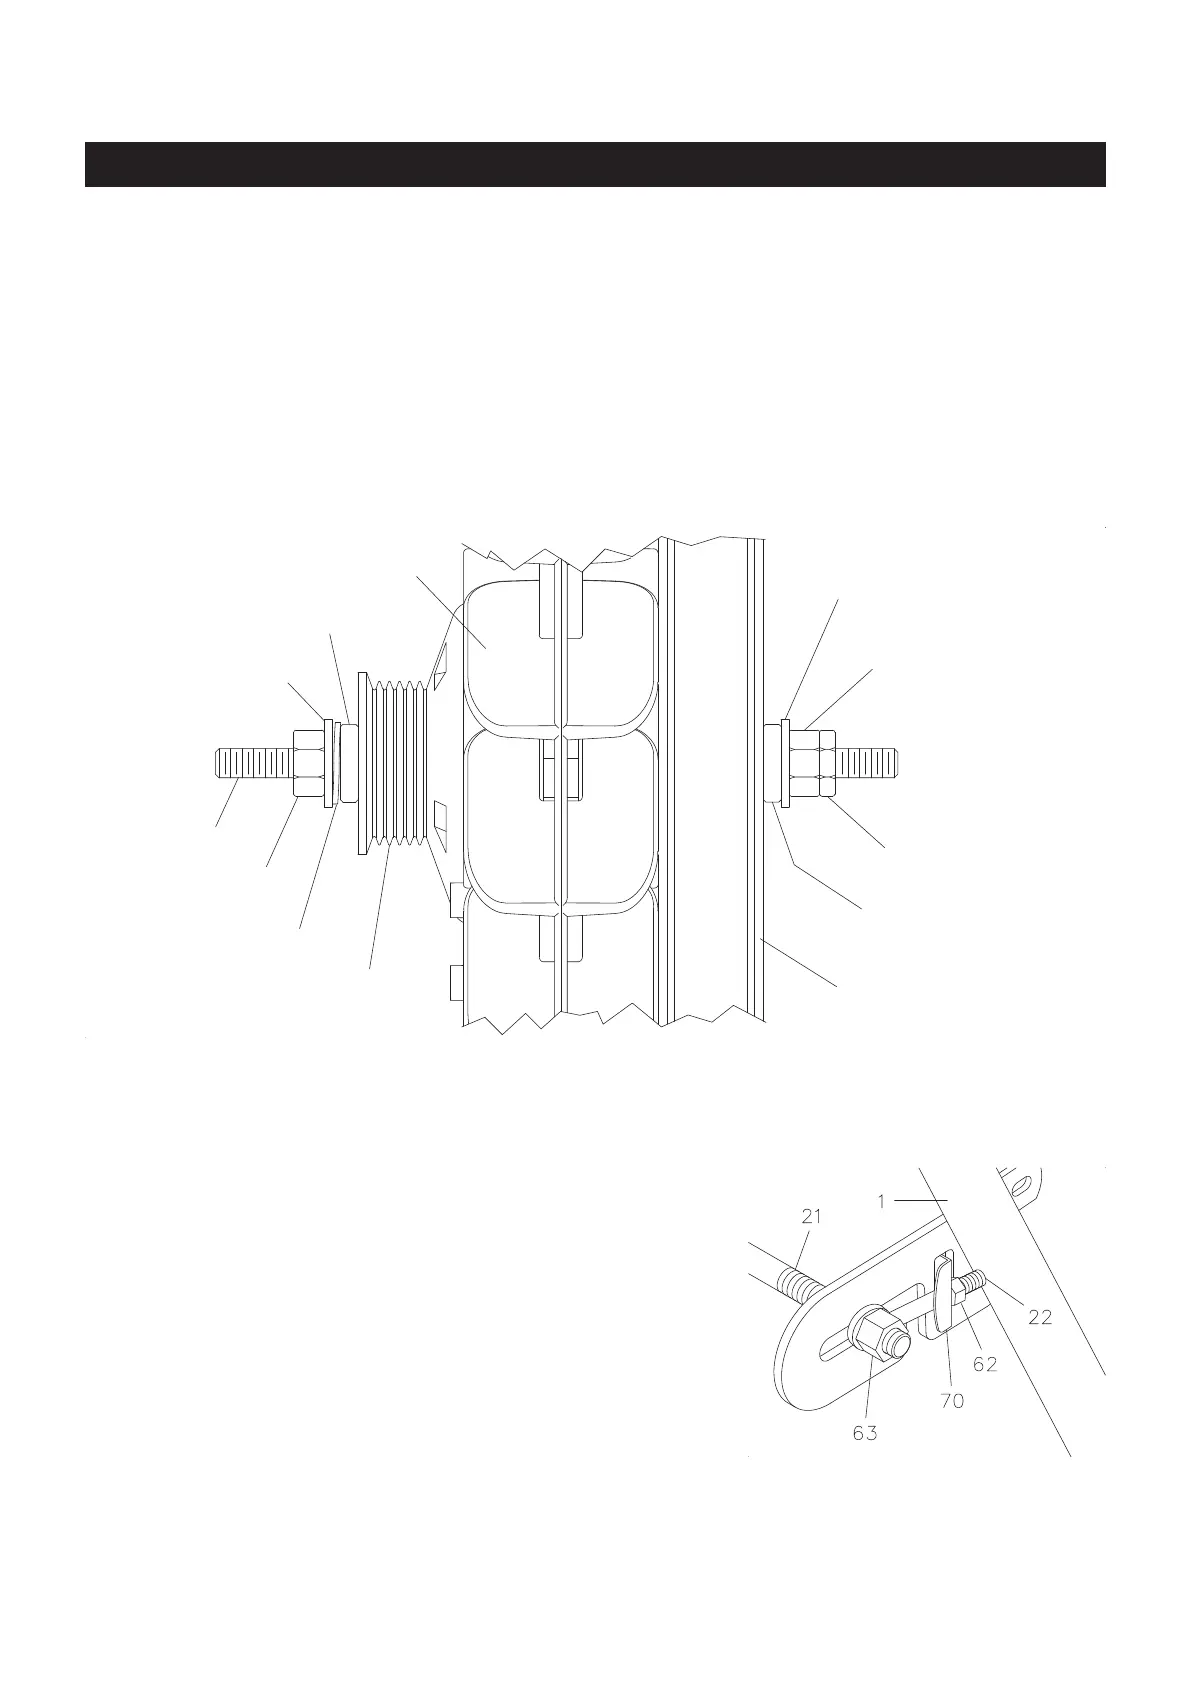
STEP 6: Hold the FAN(18) so that the FRONT PULLEY is on your left side as shown.
STEP 7: Loosen THIN NUT “C” and NUT “A” until at least 1/8” of FAN AXLE is showing between NUT
“A” and the FAN BUSHING.
STEP 8: Tighten NUT “B” completely until it bottoms out on the last FAN AXLE thread.
STEP 9: Tighten NUT “A” completely against FAN BUSHING, then back o 1/4 turn or until the FAN AXLE
has a very small amount of play side to side. Tighten THIN NUT “C” securely.
NOTE: The FAN should be able to spin freely on the FAN AXLE after completion of this step.
STEP 10: Reverse STEPS 1 through 4 to reinstall the FAN(18),
FAN CAGES(28), BELT(17), and LEFT and RIGHT
COVERS(29, 30).
NOTE: DO NOT tighten NUTS(3/8”-26)(63) and NUTS
(M6x1)(62) until STEP 11.
STEP 11: The BELT(17) must be adjusted as follows:
a. Make sure the BELT(17) is on both the FRONT and
BIG PULLEYS.
b. Tighten NUT(M6x1)(62) on EYE BOLTS(22) until all
slack is removed from BELT(17), and make sure the
BELT(17) is not slipping on the FRONT PULLEY.
Make sure the center of NUTS(3/8”)(63) are the same
distance from the TENSION BRACKET(70) on both
sides of BIKE.
c. Tighten NUTS(3/8”)(63).
FAN
NUT A
WASHER
FAN BUSHING
FAN AXLE
NUT B
FRONT PULLEY
WAVY WASHER
FAN BUSHING
RESISTANCE HUB
WASHER
16
ADJUSTMENT INSTRUCTIONS
THIN NUT C