ASSEMBLY INSTRUCTIONS
7
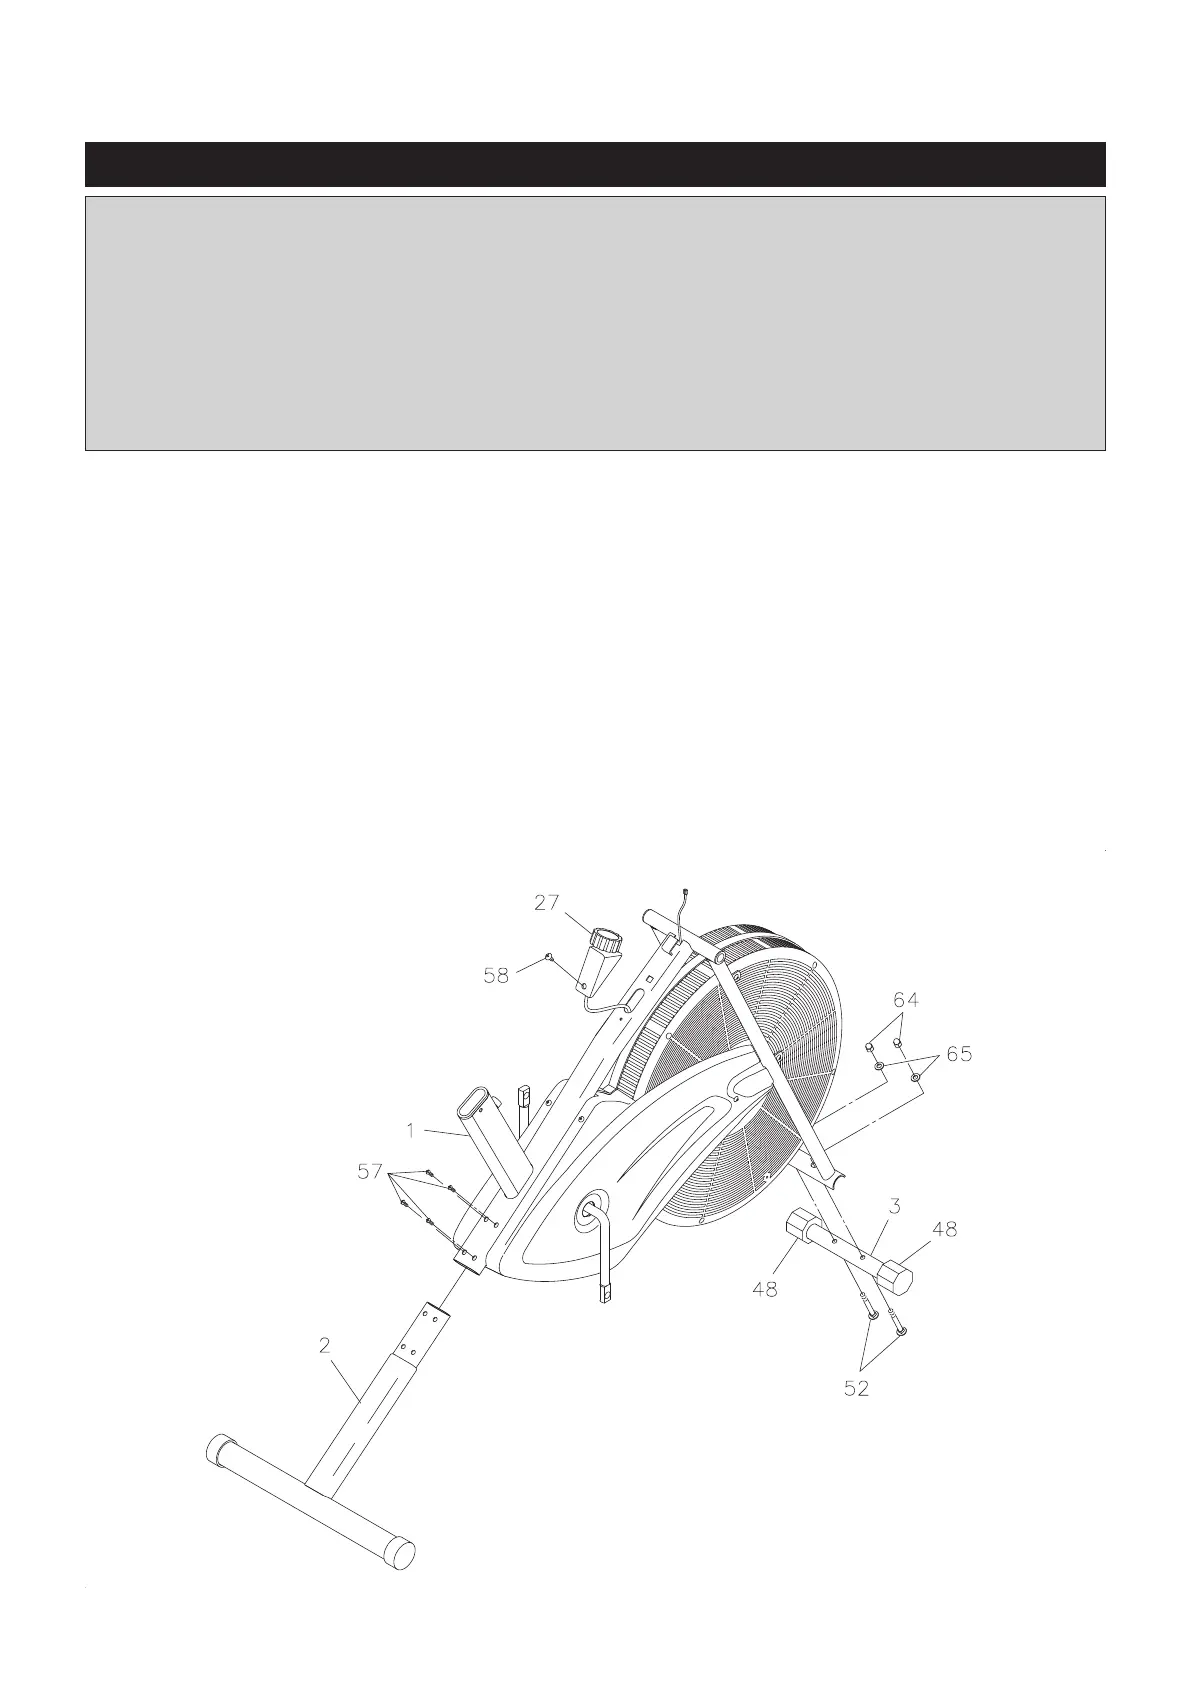
STEP 1
Insert REAR STABILIZER(2) into the MAIN FRAME(1) and fasten with ROUND HEAD BOLTS (M6x1x15mm)
(57).
STEP 2
Attach FRONT STABILIZER(3) to the MAIN FRAME(1) with CARRIAGE BOLTS(M8x1.25x38mm)(52),
ARC WASHERS(M8)(65), and ACORN NUTS(M8x1.25)(64). Turn the LEVELING CAPS(48) on the FRONT
STABILIZER(3) as needed until bike is steady and not rocking.
STEP 3
Attach the TENSION KNOB(27) to the MAIN FRAME(1) with FLAT HEAD SCREW(M5x0.8x15mm)(58).
Place all parts from the box in a cleared area and position them on the oor in front of you. Remove
all packing materials from your area and place them back into the box. Do not dispose of the packing
materials until assembly is completed. Read each step carefully before beginning. If you are missing
a part, please go to staminaproducts.com under the Customer Care section and order the part
needed, e-mail us at customer.care@staminaproducts.com, or call us toll free at 1-800-375-7520
(in the U.S.). Our Customer Care Sta is available to assist you from 7:30 A.M. to 5:00 P.M. (Central
Time) Monday through Thursday and 8:00 A.M. to 3:00 P.M. (Central Time) on Friday.
Some product parts are t tested at the factory to ensure proper t and alignment. Marks in
the paint may be noticeable, but are not an indication of damage.