5 6
S-A (x16)
Hex Head Screw
S-B (x20)
Phillips Head Screw
S-C (x2)
Phillips Head Screw
S-D (x3)
Cable Clip
Now let's start the installation.
S-F (x1)
Allen Wrench
S-E (x7)
Adhesive Pad
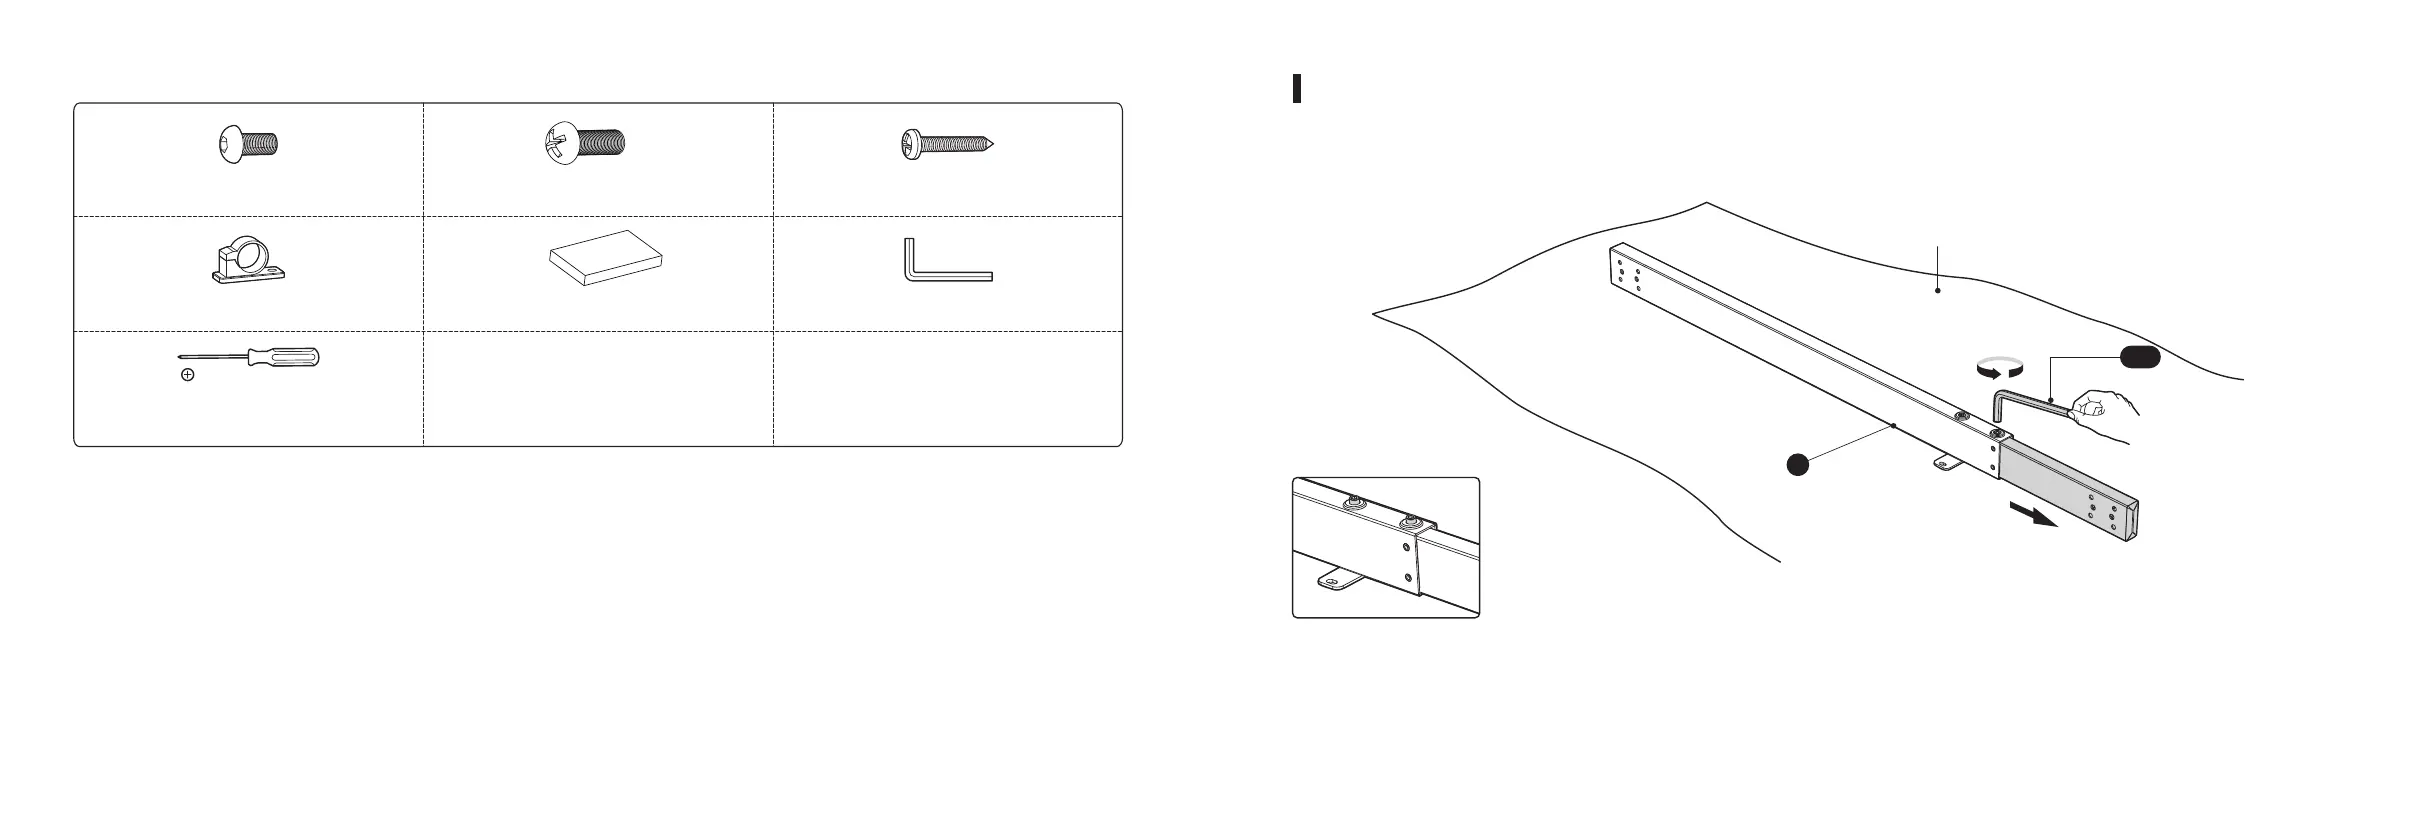
S-F
Shipping Blanket
A
Note: The drawing of the crossbar is the backside of it.
Assembling the Crossbar
• Please prepare a spacious area for installation, and put a shipping blanket on the area to prevent
scratches on the floor and the frame.
• Loosen the hex head screws that fix the adjustable junction, but don't completely take out the screws.
S-G (x1)
Phillips Screwdriver