6
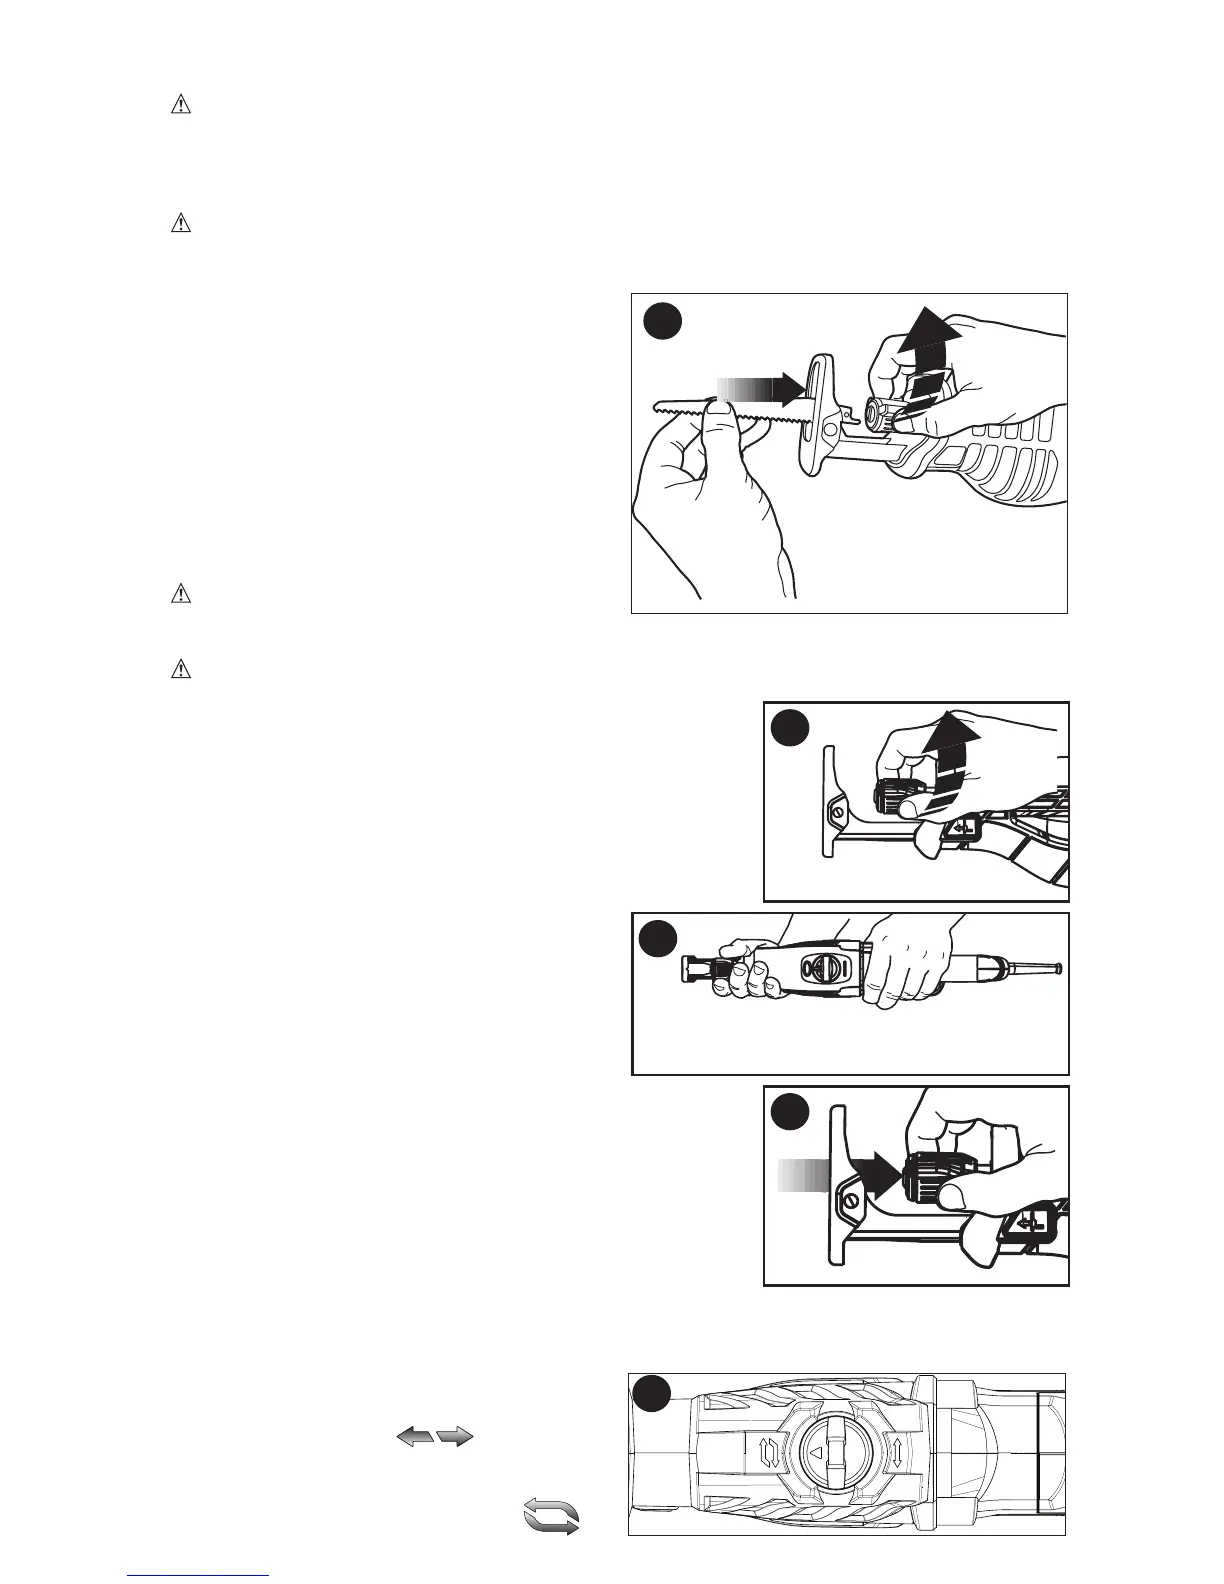
BLADE INSTALLATION AND REMOVAL (FIGURE 3)
WARNING: CUT HAZARD. Turn off and disconnect tool from power source before
making any adjustments or removing or installing attachments or accessories.
The blade should extend past the shoe and the thickness of the workpiece during the
cut. Select the blade best suitable for the material to be cut and use the shortest blade
suitable for the thickness of the material. Do not use jigsaw blades with this tool.
WARNING: CUT HAZARD. Blade breakage may occur if the blade does not
extend past the shoe and the workpiece during the cut. Increased risk of personal
injury, as well as damage to the shoe and workpiece may result.
TO INSTALL BLADE INTO SAW
1. Point tool away from body.
2. Rotate blade clamp collar in the direction
shown in figure 3.
3. Insert blade shank fully into blade clamp
collar.
4. Release blade clamp collar to lock blade
into position.
NOTE: Blade can be installed with the teeth
up to assist in flush-cutting.
TO REMOVE BLADE FROM SAW
WARNING: CUT HAZARD. Turn off and
disconnect tool from power source before
making any adjustments or removing or installing attachments or accessories.
WARNING: Burn hazard. Do not touch the blade immediately after use. Contact
with the blade may result in personal injury.
1. Rotate blade clamp collar to release position.
2. Remove blade.
TO REMOVE A BROKEN BLADE
If the blade breaks so that the broken piece is caught
inside the clamp, take the following steps to remove the
remainder of the blade from the saw.
1. Rotate blade clamp collar clockwise as viewed from the
back of the saw and hold in place (Figure 4).
2. Turn the saw on its left side as viewed
from the back of the saw (Figure 5).
3a. If the blade has broken inside the
clamp, slide a flat object into the opening of
the clamp
(Figure 6)
as far as it can go
,
then
remove the flat object. This will disengage the
pin inside the clamp.
3b. If the blade has broken outside the clamp, slide a
flat object into the opening of the clamp
(Figure 6)
to the
left of the blade as far as it can go
,
then remove the flat
object. This will disengage the pin inside the clamp.
4. While still holding the clamp collar open and the saw
on its side, face the clamp opening down and shake until
the broken blade falls out.
ORBITAL ACTION SELECTOR - (FIGURE 7)
The FME365 has dual blade motion: straight reciprocating motion or orbital motion.
Straight reciprocating motion is used for all metal cutting operations and for wood
cutting applications where finish is more
important than speed. To set the saw for
straight reciprocating motion, turn the selector
to the position marked
Orbital motion is used for fast cutting of
wood. To set the saw for orbital action, turn
the selector to the position marked
3
7
4
6
5

 Loading...


