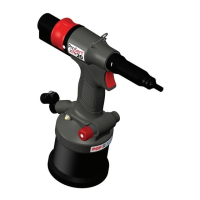
Now for assembly please see Fig. 3 Page 5 . Item numbers in bold refer to components in this drawing
t Retain items nr. 17, 18 and 19 from the base tool.
t Using a 2mm Hexagonal Wrench undo the grub screw in the T Joint 17, remove the Nose Rod and insert
into the locking ring 15. (As show in the drawing that comes with the adaption kit).
t Insert T Joint 17 followed by Nose Spring 18 into the new Mandrel Adaptor 16 supplied in the kit
t Tighten the new Mandrel Adaptor 16 up to the Lock Nut 19
To insert a Drive Screw:
t Pull back the Locking Ring 15, screw the Mandrel1 into the Mandrel Adaptor 16 and release the Locking
Ring 15 so it is in the fully returned position.
t Screw on the new Nose Casing 4 supplied in the kit and position the Nose Tip 2 and Locking Nut 3
accordingly.
ENGLISH
6

 Loading...