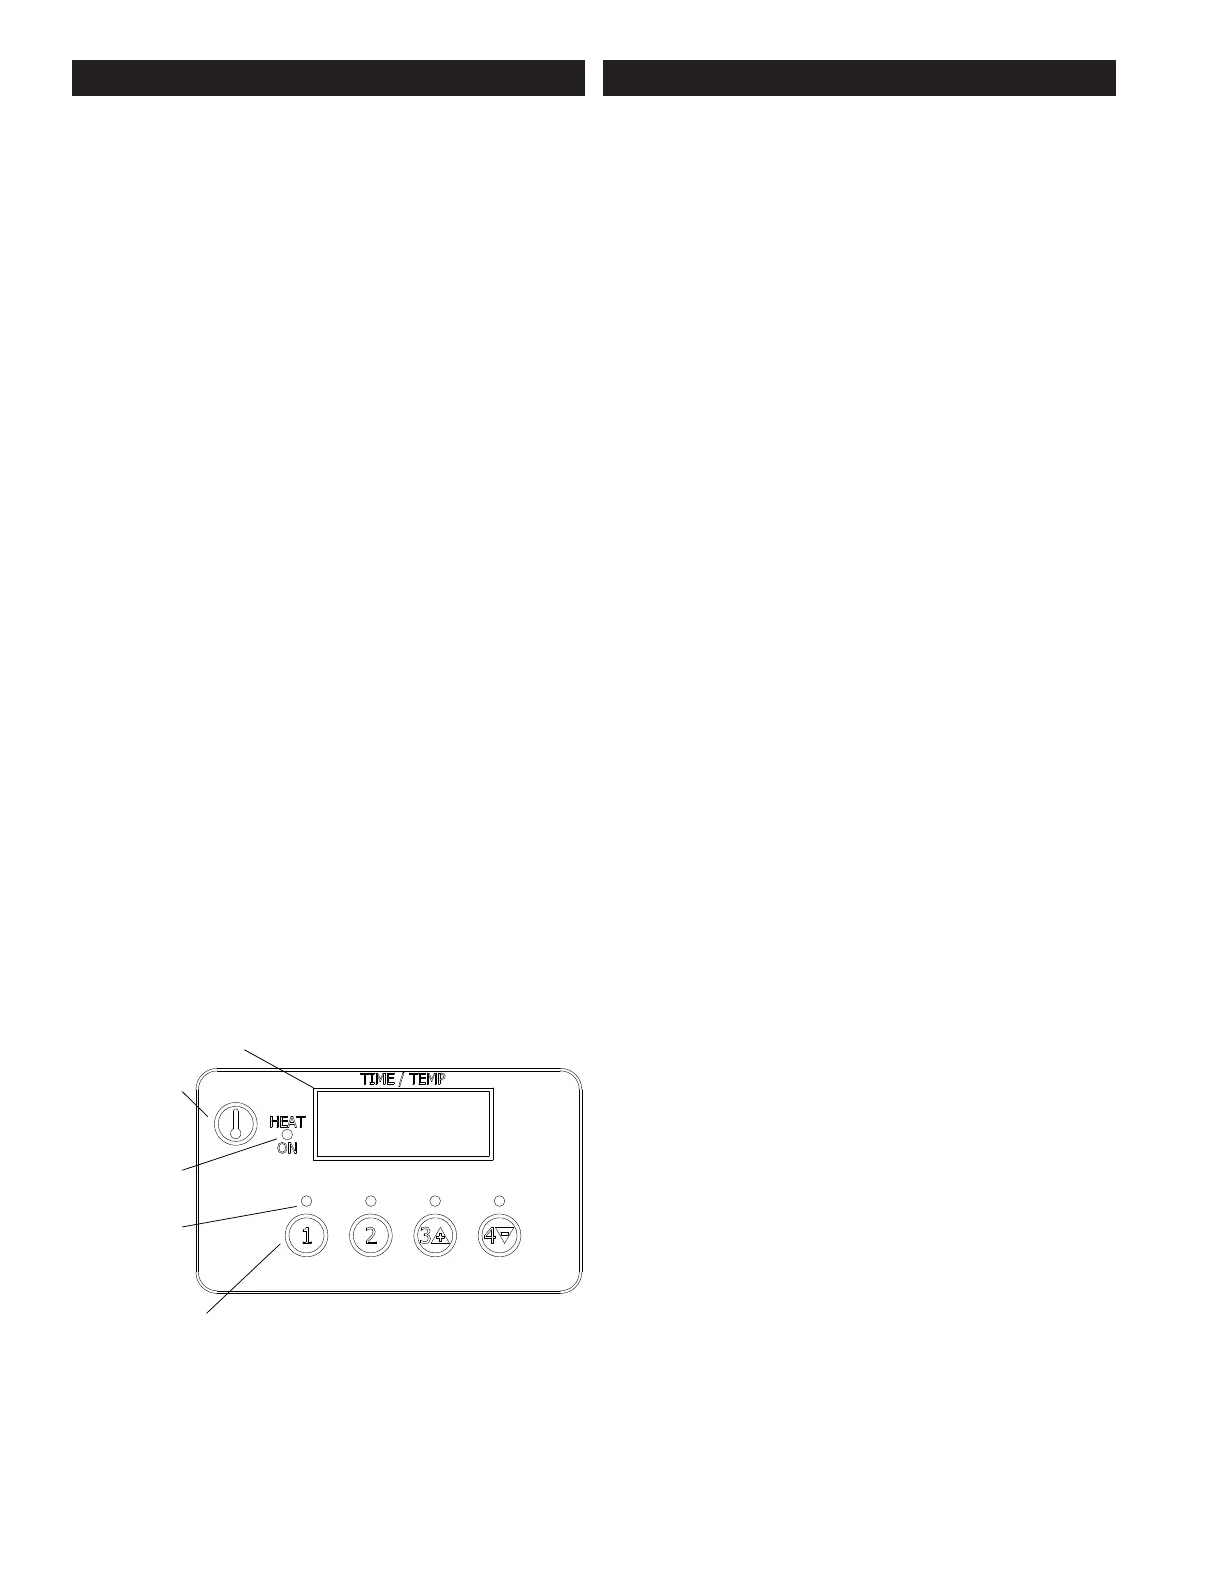
ELECTRONIC TEMP CONTROL OPERATION
Operating Instructions
1. Turn the unit on by placing the switch in the ON position.
The HEAT ON indicator, Time & Temp Display & the LED
indicator will ash until it reaches operating temperature.
Initial startup heating time is approximately 30 minutes.
When the unit reaches operating temperature, the heat
indicator LED will turn off and the program LED and the
Time & Temp Display will stop ashing.
2. Place product on the cooking surface of the unit and close
the lid.
3. Press the PROGRAM button to start the timer, the LED light
above the button will “FLASH” and the displayed time will
count down to “0” at which time the unit will display “done”
and beep. To turn off the beeper, press the PROGRAM
button again.
4. To CANCEL a program during the cooking process, press
and hold the PROGRAM button for 5 seconds.
5. Raise the lid and remove the food product. Using a spatula,
scrape residue into the grease catcher tray.
NOTE: Metal utensils may be used; however, using nonmetal
utensils will prolong the life of the cooking surface.
6. Turn the unit off when it is not in use.
Using Multiple Timers:
1. Place product on the cooking surface and close the lid.
2. Press the (1st) PROGRAM button to start the timer, the
LED light above the button will “FLASH” and the displayed
time will begin counting down.
3. Place second product on the cooking surface and close the
lid.
4. Press the (2nd) PROGRAM button to start the second timer,
the 1st LED will change from ashing to solid, and the 2nd
LED will be ashing. The time countdown will be for the
program with the ashing LED indicator.
5. Pressing the (1st) PROGRAM button will change that LED
indicator back to ashing and the countdown display will
represent this program button. The LED indicator for the
(2nd) program will change from ashing to solid.
6. When the (1st) program is completed, “done” will be displayed
and an alarm will sound. The display will change to the
remaining time on the (2nd) program and that programs
LED indicator will change to ashing.
7. When the (2nd) program is completed, “done” and an
alarm will sound. The countdown time for the last program
selected will be displayed and that programs LED indicator
will remain solid.
Temperature:
You can view the unit’s actual temperature by pressing the temp
button.
ALL UNITS
Initial Start Up
Level unit using the adjustable feet under the unit (approximately
1/2" adjustment).
Before using the unit for the rst time, clean and heat for
approximately 45 minutes. The grill may emit a small amount of
smoke as the cooking surfaces reach 300-350°F. Do not be alarmed,
as the smoke is caused by oils associated with the manufacturing
process and will stop when the grill reaches 400°F. Best to do this
in a well ventilated area.
Seasoning The Cooking Surfaces
First Time Seasoning
Follow your company/corporate guidelines for seasoning cooking
surfaces or:
1. Bring the grill to 275°F by placing the unit in “CLN” mode
by pressing the “TEMP” button and button’s 2 & 3 for 3
seconds.
2. Wait for unit to reach 275°F (press the “TEMP” button to
display units current temperature.
3. Brush the cooking surfaces with a SALT-FREE release
agent. If using an aerosol agent, rst apply into a cup and
then brush onto cooking surface.
4. Let sit for 20 minutes, and then wipe clean using a warm
damp cloth.
5. To Exit “CLN” mode, turn unit “OFF” then “ON” or press any
of the four (4) program buttons.
Daily Seasoning
The grill should not require much seasoning while in use. In most
cases, brush a light coating of a SALT-FREE baking release agent
in the morning and occasionally throughout the day will be enough
to prevent any sticking. It is not necessary to spray before grilling
each item.
Program Buttons
LED
Temp Button
Heat On
Indicator
Time & Temp Display
1:30
IL3001
 Loading...