These symbols are intended to alert the
user to the presence of important operating
and maintenance instructions in the manual
accompanying the appliance.
Go to:
www.star-mfg.com/scripts/manuals.aspx
to obtain this units installation & operations manual
along with other documents.
NOTICE
Using any part other than genuine Star factory supplied parts
relieves the manufacturer of all liability.
Star reserves the right to change specications and product
design without notice. Such revisions do not entitle the buyer to
corresponding changes, improvements, additions or replacements
for previously purchased equipment.
Due to periodic changes in designs, methods, procedures, policies
and regulations, the specications contained in this sheet are subject
to change without notice. While Star Manufacturing exercises
good faith efforts to provide information that is accurate, we are
not responsible for errors or omissions in information provided
or conclusions reached as a result of using the specications.
By using the information provided, the user assumes all risks in
connection with such use.
GENERAL SAFETY INFORMATION
This equipment is designed and sold for commercial use only by
personnel trained and experienced in its operation and is not sold
for consumer use in and around the home nor for use directly by
the general public in food service locations.
Before using your new equipment, read and understand all the
instructions & labels associated with the unit prior to putting it into
operation. Make sure all people associated with its use understand
the units operation & safety before they use the unit.
All shipping containers should be checked for freight damage both
visible and concealed. This unit has been tested and carefully
packaged to insure delivery of your unit in perfect condition.
If equipment is received in damaged condition, either apparent or
concealed, a claim must be made with the delivering carrier.
Concealed damage or loss - if damage or loss is not apparent until
after equipment is unpacked, a request for inspection of concealed
damage must be made with carrier within 15 days. Be certain to
retain all contents plus external and internal packaging materials
for inspection. The carrier will make an inspection and will supply
necessary claim forms.
GENERAL INSTALLATION INFORMATION
The unit time and temperature are preset by the factory to the
customer requirements. If adjustments are required, refer to the
time or temperature programming sections in this manual.
INSTALLATION
1. Plug unit into dedicated receptacle,
see nameplate for voltage requirements.
2.
DO NOT plug into incorrect voltage line.
Doing so will damage the unit and void the warranty.
3. Each unit has been properly wired and inspected at the factory
for operation on the voltage specied on the nameplate.
4. DO NOT operate without burn guards (Certian units only).
DO NOT CONNECT TO ANY OTHER
TYPE OF CURRENT OR THE MACHINE
WILL BE SERIOUSLY DAMAGED.
MAINTENANCE AND REPAIRS
Contact the factory, a service representative or a local
service company for service or required maintenance.
Go to www.star-mfg.com to nd a service agent near you.
Replacement cord sets must be purchased from Star Manufacturing
International, Inc. or our authorized agents.
Should you need any assistance regarding the operation or
maintenance of any Star equipment; write, phone, fax or e-mail
our service department. In all correspondence mention the
model number and the serial number of your unit, along with the
voltage.
Business Hours: 8 am to 4:30 p.m. Central Standard Time
Telephone: (314) 678-6303
Fax: (314) 781-2714
E-mail: Parts@star-mfg.com
Service@star-mfg.com
Warranty@star-mfg.com
Website: www.star-mfg.com
Mailing Address: Star Manufacturing International Inc.
10 Sunnen Drive
St. Louis, MO 63143
U.S.A.
®
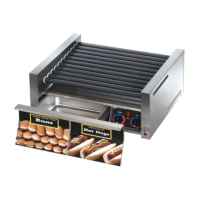
MODEL
7” Tabletop
Two-Sided Grill
Electronic Controls
TWO SIDED GRILLS INSTALLATION INSTRUCTIONS
2M-Z20466, Rev. - 5/26/15
CAUTION
WARNING