This document is an owner's manual and safety instructions for the STARK Plate Compactor, models 61006 and 61007. It provides essential information for safe operation, maintenance, and troubleshooting of the device.
Function Description
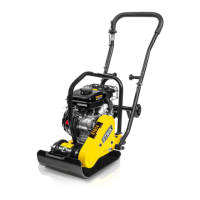
A plate compactor is a heavy-duty machine designed for compacting various materials, primarily granular soils like silt and clay, as well as bituminous surfaces. It operates by producing an impact force through a vibrating rammer, which helps to slide soil particles together, increasing density and load-bearing ability. The machine is self-propelled by its vibratory motion, and its forward movement is controlled by the operator. Proper compaction is crucial for construction and landscaping to ensure stable foundations and surfaces.
Important Technical Specifications
Models:
- MODEL #61006: Chinese Petrol Engine, 4.8 kW output.
- MODEL #61007: Petrol, Honda GXI60, 4.0 kW output.
Engine & Performance:
- Governed Speed: 3,500 r/min
- Drive Belt: 1 x 'A' section v belt
- Vibrator Frequency: 5,500 Vibration/min
- Vibrator Centrifugal Force: 13.0 kN
- Operation Mass: 84 kgs (Note: Nameplate shows 94 kg for Operation Mass)
- Power (kW): 3.2 (as per nameplate, likely for model 61007)
- Speed (cm/s): 40 (as per nameplate)
- Compaction Depth (cm): 30 (as per nameplate)
Acoustic Noise (According to 2000/14/EC):
- Measured sound power level: 102.2 dB
- Guaranteed sound power level: 105.2 dB
- Uncertainty: 3 dB
Vibration:
- Hand-Arm-Vibration (as per ISO8662, Part 1, m/s2): 4-9
Lubrication:
- Centrifugal clutch: grease lubricated
- Vibrator: oil bath lubricated
Usage Features
Pre-Start Inspection:
Before each work session or every four hours of use, a thorough inspection is required. This includes checking for signs of damage, ensuring components are present and secure (especially the belt drive safety guard), verifying engine oil and fuel levels, and checking for any fuel or oil leaks. Any discovered faults must be rectified before using the compactor.
Starting Procedure (Diesel Engine):
- Open the fuel cock.
- Turn the governor lever to "STARTING."
- Hold the recoil starter handle.
- Pull the starter handle until resistance is felt, then return slowly.
- Press the decompression lever to "Non-compression" (it will return automatically after starting).
- Hold the recoil starter handle with two hands and pull hard.
- For cold weather, remove the rubber plug on the cylinder head and fill with approximately 2CC engine oil before starting.
Stopping Procedure (Diesel Engine):
- Set the governor lever to the low speed position and run the engine at zero load for five minutes.
- Set the governor lever to "STOP" (do not use the decompression lever to stop).
- Set the fuel cock to "OFF."
- Pull the recoil starter handles slowly until resistance is felt (this closes intake/exhaust valves to prevent cylinder rust).
- For electric starting engines, turn the starting key to "CLOSE."
Starting Procedure (Petrol Engine):
- Open the fuel tap by moving the fuel ON/OFF lever fully to the right.
- For cold starts, set the choke ON (fully to the left). For warm starts, choke may not be needed or only partially.
- Turn the engine ON/OFF switch clockwise to the "1" position.
- Set the throttle to the idle position (fully to the right). Do not start on full throttle as the compactor will vibrate immediately.
- Grasp the control handle firmly with one hand and the recoil starter handle with the other. Pull the recoil starter until engine resistance is felt, then let it return.
- Pull the starter handle briskly, taking care not to pull it fully out.
- Repeat until the engine fires.
- Once the engine fires, gradually set the choke lever to the OFF position (to the right).
- If the engine fails to fire after several attempts, consult the troubleshooting guide.
Stopping Procedure (Petrol Engine):
- Set the throttle to idle.
- Turn the engine ON/OFF switch counter-clockwise to the "0" position.
- Turn the fuel off.
Operation Guidelines:
- Operate on flat, level surfaces only.
- The machine is best for compacting bituminous and granular materials.
- Correct soil moisture content is vital; water acts as a lubricant. Too little moisture leads to inadequate compaction, while too much causes water-filled voids. Dry materials can be moistened with a sprinkler-fitted water hose.
- Excessive watering can stall the machine.
- An optional water tank kit is recommended for bituminous surfaces to prevent material buildup on the plate's underside.
- Use unleaded grade petrol, free from contamination.
- Increase motor speed to maximum using the hand throttle lever before compacting.
- Control the machine by grasping the handle with both hands and applying restraint to control forward motion. Steer by moving the handle sideways.
- Maintain good footing to prevent slips and loss of control.
- If an optional water tank is fitted, the flow rate can be adjusted via the cock in the supply hose.
Safety Precautions:
- Carbon Monoxide Hazard: NEVER use indoors; engine exhaust contains deadly carbon monoxide. ONLY use outside and far from windows/doors/vents.
- Flammable Vapors: Engine may emit highly flammable gasoline vapors. DO NOT operate near open flames or smoke.
- Refueling: Turn off the compactor, allow it to cool for at least 2 minutes, and loosen the fuel cap slowly to relieve pressure. DO NOT overfill the tank; allow for expansion. Refuel in a well-ventilated area. Empty the fuel tank before storing or transporting.
- Hot Surfaces: DO NOT touch hot surfaces during or immediately after operation. Allow the unit to cool down.
- Protective Gear: Always wear proper protective clothing, shatter-proof ANSI-approved glasses, steel-toed boots, and other job site devices. Wear proper respiratory, hearing, and eye protection.
- Operator Restrictions: DO NOT allow children or non-qualified persons to operate. NEVER operate under the influence of medication, drugs, or alcohol.
- Machine Integrity: ALWAYS check for loosened bolts and threads before every use. DO NOT operate unless all protective guards are in place.
- Vibration Hazards: Exercise care; exposure to vibration or repetitive actions can harm hands and arms.
- Engine Speed: DO NOT increase the governed no-load motor speed above 3,500 r/min to avoid injury and machine damage.
- Environmental Checks: Before compacting near buildings or pipelines, check for vibration effects. Ensure trench walls are stable. Ensure the area does not contain "live" electrical cables, gas, water, or communication services.
- Accessories: NEVER use unrecommended accessories or attachments.
- Static Electricity: DO NOT add fuel if the compactor is on a plastic surface (e.g., pickup truck bed with a plastic liner) due to static electricity risk.
Maintenance Features
General Maintenance:
- Carry out inspections on hard, level ground with the engine shut down.
- Run the plate compactor engine at least once a month to maximize lifespan.
- Plate compactors are heavy; position with two people using lifting handles and correct techniques.
Daily/Regular Checks:
- Check engine oil level daily.
- Check vibrator oil level weekly.
- Inspect rubber anti-vibration mounts for wear/deterioration.
- If fitted, inspect the water hose and connections for leaks.
- Clean the underside of the plate regularly to prevent material buildup.
- Check for loose screws and tighten as per the tightening torque table.
Vibrator Oil Change:
- Remove the drain plug at the bottom-right of the vibrator.
- Tip the compactor to drain the oil (drains more easily when hot).
- Replace with 200ML of 10W-3C motor oil.
Air Filter Maintenance:
- A clogged air cleaner causes poor engine starting, lack of power, and shortens engine life.
- To clean/replace: Loosen the wing nut on the air filter housing, remove the cover, and take out the cartridge.
- To clean: Blow dry compressed air through the cartridge from the inside, moving up and down until dust is removed.
V-Belt and Clutch Maintenance:
- Safety: NEVER check the V-belt with the engine running; severe injury can occur. Always use safety gloves.
- Inspection (after 200 hours): Remove the upper belt cover. Check V-belt tension; it's proper if the belt bends about 10mm when strongly depressed between shafts. Loose/worn V-belts reduce power transmission and compaction efficiency.
- If vibration becomes weak or lost, check V-belt and clutch immediately.
- Replacing V-belt: Remove upper and lower belt covers. Engage an offset wrench (13mm) on the vibrator pulley fastening bolt. Engage waste cloth midway on the left side of the V-belt. While pulling back strongly, rotate the offset wrench clockwise to remove the V-belt.
- Re-installing V-belt: Engage the V-belt to the lower vibrator pulley and push it to the left side of the upper clutch. Rotate the offset wrench clockwise to put the V-belt back on.
- Clutch Checking: Simultaneously with V-belt checking, inspect the outer drum of the clutch for seizure and "V" groove wear/damage. Clean the "V" groove as needed. Check lining/shoe wear; if worn, power transmission will be deficient.
Tightening Torque Table (in/kg/cm) Diameter:
- Provides specific torque values for different bolt materials (4T, 6-8T, 11T) and diameters (6mm, 8mm, 10mm, 12mm, 14mm, 16mm, 18mm, 20mm).
- Special values for counter-parts made of aluminum.
- All threads are right-handed.
- Material and quality are marked on each bolt and screw.
Engine Oil Replenishment:
- First 20 hours, then every 100 hours.
Air Cleaner Cleaning:
Troubleshooting Guide:
A comprehensive table lists common problems, possible causes, and possible solutions, covering issues like:
- Travel speed too low/weak vibration
- Difficulty starting (fuel available, no spark)
- Difficulty starting (fuel available, spark present, normal compression)
- Difficulty starting (fuel available, spark present, low compression)
- Weak power/misfires
- Engine overheating
- Rotational speed fluctuations
- Recoil starter malfunction