Page 36
APPENDIX G
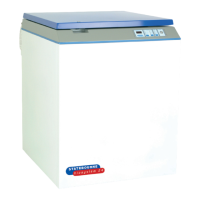
MAINTENANCE
It is essential that a regular maintenance program is initiated in order to prevent the Biosystem Series
Refrigerators from developing unnecessary faults.
Most common faults are caused by a build up of frost and ice which all liquid nitrogen storage vessels are
subject to.
The area which will require most attention is the underside of the lid particularly if the lid is left open frequently,
and the area which forms the seal between the refrigerator and the lid. Ice should be removed from these areas
as often as is necessary. Excessive build ups of ice may occur if the seal or gasket becomes damaged or the lid
mis-aligned and the unit is therefore not venting correctly. If this happens a service engineer should be called to
replace the seal or adjust the lid position.
The thermocouple housing which is the black corrugated PTFE tube located to the rear inside the refrigerator
(Biosystem Access Series only) is prone to collecting frost and ice and this should be removed as often as is
necessary in order to avoid possible damage when the lid is opened.
The filter near the fill connection may become clogged with debris and/or ice and should be thawed and cleaned
every six months and replaced every twelve months or as required. (See procedure below)
After the first twelve months the thermocouple should be re-calibrated (see Appendix D) and then subsequently
every twenty-four months.
Filter Cleaning Procedure
1. Turn off the liquid nitrogen supply line to the Biosystem.
2. Release any pressure in the liquid nitrogen line by opening the Biosystem solenoid valves briefly using the
manual fill facility.
3. Turn off the power supply to the Biosystem.
4. Loosen the lower blank nut on the filter assembly using a suitable spanner.
5. Remove the nut and filter mesh from the filter body.
6. Remove any solid matter from the mesh and dry any moisture present using hot air.
7. Dry out the filter body internally using a dry, lint free cloth and hot air.
8. Re-fit the mesh into the filter body and tighten the blank nut securely.
9. Re-start system and check filter for leaks
G-1