pro 40 assembly
PRO 40 Assembly Guide Connued
5. Remove the SteakAger Hanging Rack from the accessory box and slide it into
the top most rack slot of the fridge with the SteakAger logo facing towards you.
6. Using the supplied 12vdc power supply, plug the connector end into the other
side of the Power Pass Through on the back side of the fridge. Plug in the wall
plug side, and then check to be sure the fans are running on the interior of the
unit. Once you have conrmed that the fans are running plug in the 120vac wall
plug to turn on the fridge controls.
12vdc Power Supply
120vac for Compressor
PRO 40 Assembly
Owners of the Standard PRO 40 unit will receive the fridge shipping box with
the SteakAger accessory box aached. Please separate the accessory box from
the outer fridge and follow the steps below.
1. Remove all packing materials that enclose the fridge, then remove all
packaging materials from the interior of the unit. Remove all beverage racks
and store or dispose. DO NOT use beverage racks for meat aging.
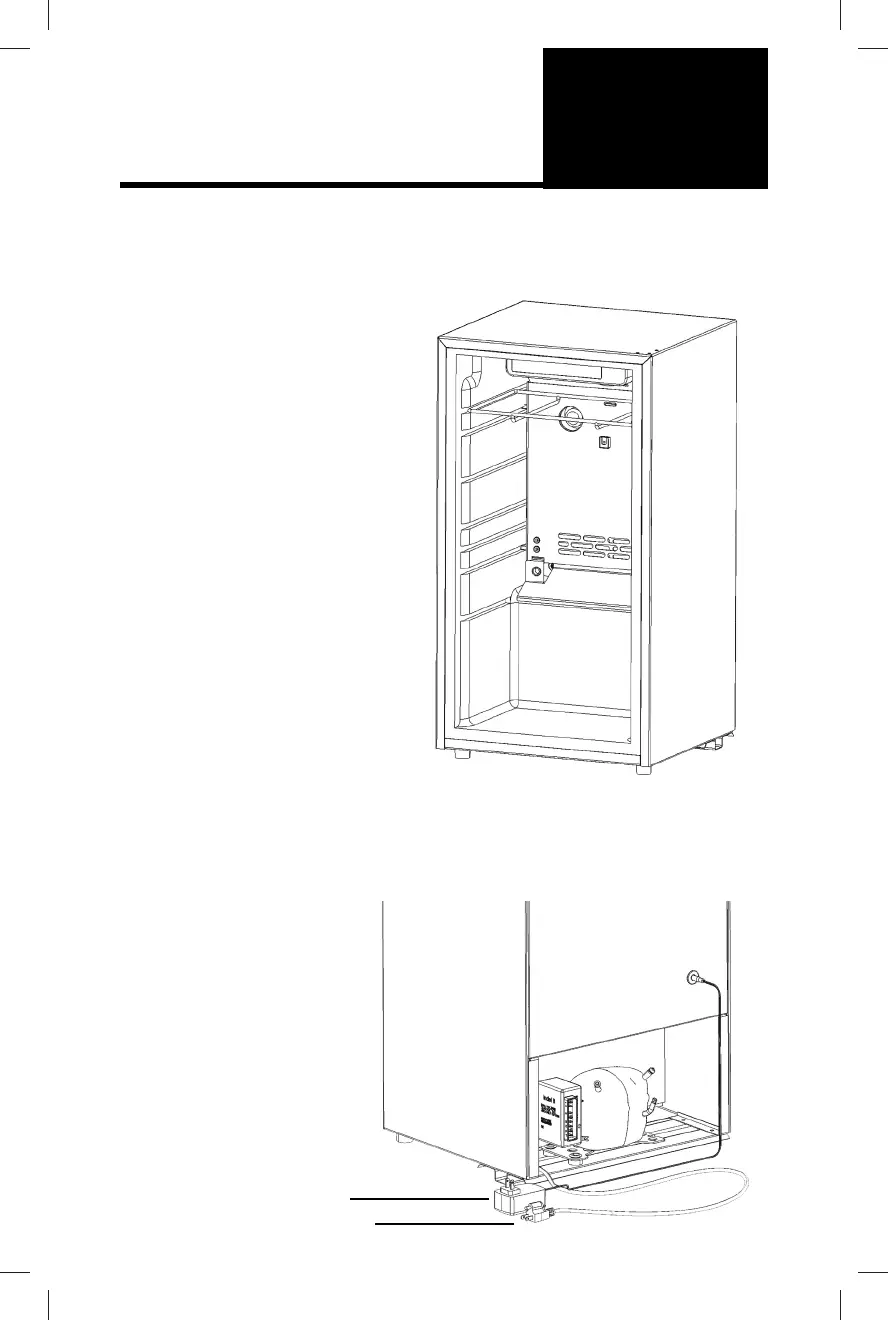
2. Open the SteakAger accessory box and locate the Backplate Insert, Bae,
Hanging Rack, Hooks, Power Supply, and Extension Connector.
3. Slide in the SteakAger Backplate Insert making sure to use the second
highest rack slot from the top. (Refer to the below image). Push the Backplate
Insert to the back unl you feel it seat in the pocket at the back of the rack
slot. (You will feel a slight “ca-chunk” when it rests in place)
PRO 40 Assembly Guide
9
Use this rack slot as top slot
when inserng Backplate
4. Locate the Bae and install it using the tabs to lock in into place on the
Back Plate. When installing the Bae, you will rst want to run the Extension
Cable through the wire groment and plug it into the Power Pass Through on
the fridge. With the Extension Cable plugged into the Power Pass Through
lock in the Bae using the tabs and slots on the Back Plate. Once locked in
place, plug in the Extension Cable to the Back Plate.
10
OPERATING
INSTRUCTIONS
The plug has one 90 degree elbow
and one straight end. The 90 degree
goes to the Back Plate and the stright
end goes to the Power Pass Through.
Step 1 Step 2
The Hanging Rack has been designed
to include 2 hooking sections that run
front to back to allow the use of our
hooks as well as V2 Hanger Bars.
 Loading...