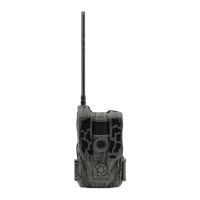
Do you have a question about the Stealth Cam Reactor and is the answer not in the manual?
Explains the meaning of different LED status indicators for battery, network, and account.
Versatile screw-in mount for securing trail cameras at various heights and angles.
Powers camera in all weather, uses rechargeable battery for maintenance-free operation.
Keeps camera safe from theft with a cut-resistant braided steel cable and locking mechanism.
Access camera remotely from any location via the COMMAND PRO app.
Enhanced low light performance for extended night time coverage and range.
Advanced blur reduction for sharper, clearer images, especially in low light.
Covers multiple zones of angle and distance for improved triggering accuracy.
Control camera via iOS/Android app or web platform.
Ultra-fast trigger speed (<0.4s) to capture crucial moments.
Track and recall locations using optional GPS tagging.
Captures 1-9 exposures per triggering for rapid sequence shots.
Download and install the Stealth Cam COMMAND PRO app from app stores.
Open app, follow guides to set up your Stealth Cam account and sign in.
Use app's menu to begin setup, access QR code on camera, follow on-screen instructions.
Use app's 'Camera Setup' or website for custom camera configurations.
Insert 8 AA batteries, match orientation, ensure external power is 12V.
Insert Class 10 SD card with label facing you; feel minimal resistance and a click.
Screw antenna hand-tight to ensure camera is sealed from water; avoid overtightening.
Power on camera for auto-sync; press SYNC button to take and upload a test photo.
Explains sequences of LED lights indicating camera status during connection and upload.
Update via app; LEDs flash red during update, solid red upon completion.
Download update from website, clear SD card, insert for automatic detection and process.
Set camera 3-4 ft high, facing North, angled slightly downward for best results.
Mount away from metal, obstructions, and ensure antenna is screwed in tight for optimal reception.
Provides 3 predefined configurations (QSET 1, 2, 3) for camera settings.
Set camera's time zone and display format (12/24 hr).
Select operating mode: PIR Photo, PIR Video, or Time Lapse.
Choose image resolution (4 MP to 26 MP) affecting quality and memory usage.
Select video quality (1920x1080) impacting video quality and memory.
Set delay time for PIR sensor after taking a photo.
Configure number of photos (1-9) and interval between burst shots.
Enable MATRIX Blur for reduced blur and improved sharpness.
Assign a custom name (up to 13 characters) to your camera.
Configure continuous recording (delete oldest) and temperature display format.
Manually set location and define active/inactive time ranges for the camera.
Control info bar display and configure video length, audio, and SD card erase.
Adjust delay between photos, start, and stop times for time-lapse mode.
Set photo upload resolution and frequency (instant to once daily).
Schedule photo upload time and enable/disable data transmission.
Identifiers for physical camera (IMEI) and SIM card (ICCID).
Recommended operating temperature range and humidity levels for the camera.
Guidelines for storage, cleaning, battery use, and avoiding damage.
Addresses common issues like SD card formatting, photo reception problems.
Explains red LED indicators for battery, network, and account issues.
Covers data loss on battery death, motion detection, weather resistance, and battery types.
Answers questions about syncing, app display on new phones, and data overages.
| Resolution | 26 MP |
|---|---|
| Flash Range | 80 feet |
| Power Source | 8 AA batteries |
| Recovery Time | 1 second |
| Time Lapse | Yes |
| Video Resolution | 1080p |
| Memory Card | Up to 32GB SD card |
| Flash Type | Infrared |
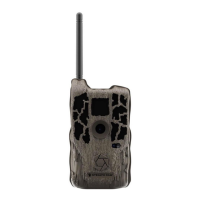
| Wireless Connectivity | Cellular (Verizon or AT&T) |