E-3
LISTENING TO RADIO
MANUAL TUNING
1. Switch the unit on with the Standby/On button (17).
2. Press the
FUNCTION button (18) to select “TUNER” mode.
3. Select the desired band with the
BAND/ button (9 or 56 on the remote control).
4. To tune into the required station press the
TUNE or button (13 or 56).
5. Rotate the VOLUME knob to adjust the volume level (ranging from “0 – 30” – shown on the display).
AUTO TUNING
1. Press the FUNCTION button (18) to select “TUNER” mode
2. Select the desired band with the
BAND/ button (9).
3. Press and hold the TUNE
or button (13) for 1-2 seconds and then release it.
4. The unit will start searching automatically and stop when a radio station has been found.
5. Repeat step 2 until the desired radio station has been reached.
6. Rotate the VOLUME knob to adjust the volume level (ranging from “0 – 30” as shown on the display).
PRE-SETTING STATIONS
You can store up to 50 radio stations into memory (FM-30 / MW-20). To do so, follow the procedure below:
1. Select the Tuner mode with the
FUNCTION button (18).
2. Turn to the desired radio station with the “MANUAL” or “AUTO” tuning method as described above..
3. Press the “
MEM/CLK-ADJ” button (5) to enable programming and the “MEM” indicator appears on the display.
4. Press the “
FOLDER/PRE-UP” button (7) to select the desired station memory for storage.
5. Press the “
MEM/CLK-ADJ” button again to confirm the setting.
6. Repeat steps 2 to 5 above to store other stations.
7. If you wish to return to normal Tuner mode, do not press any keys.
8. You can now select the pre-set stations in the set order by pressing the “
PRE -UP” button.
Notes:
¾ The pre-set memories will be cancelled completely if the unit is disconnected from the mains power.
It is recommended to switch the system into Standby Mode instead for your convenience.
¾ There are 5 seconds in which to start the programming procedure, if after 5 seconds programming has not
started, the unit will automatically re
sume normal Tuner mode.
¾ You can overwrite a pre-set station by storing another frequency in its place.
FM & FM-STEREO RECEPTION
z Press the “ST/MO/ ” button (11) repeatedly and the FM programmes will be received in mono or stereo
mode. If stereo signals are weak, it is preferable to receive the FM programme in mono sound.
z If a stereo signal is being received, the Stereo indicator “
” will appear on the LCD display to show the
radio is now receiving an FM stereo programme.
HINTS FOR BEST RECEPTION:
– AM (= MW): The receiver has a built-in AM bar antenna.
If AM (Medium Wave) reception is weak, slightly rotating or re-positioning the unit will usually improve it.
– FM: The receiver has an FM wire antenna (39) hanging at the rear of the cabinet.
This wire should be totally unravelled and extended for best reception.
TURNTABLE OPERATION
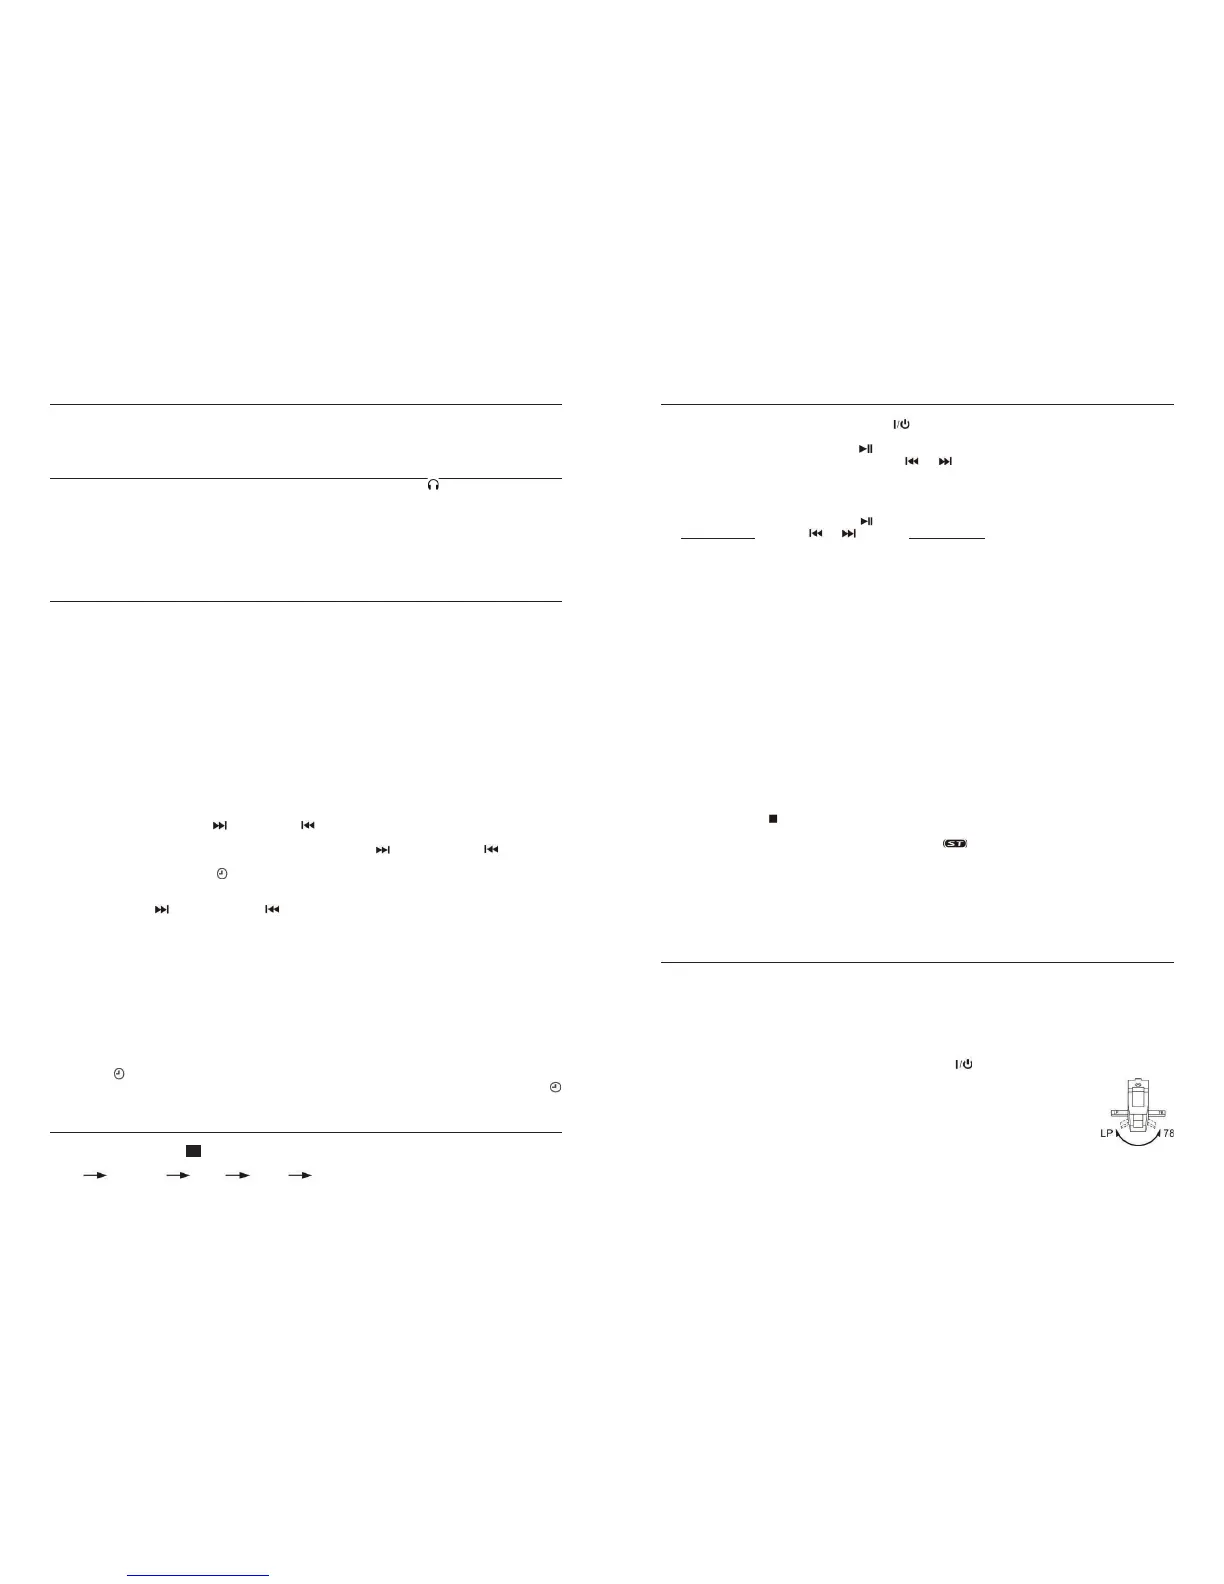
BEFORE PLAYING A RECORD:
This product has been upgraded with a flip-over stylus, which has two different needles built into one
Stylus Holder, so before playing a record, select the correct needle for the correct RPM/size record (‘78’
for a 78rpm record or ‘LP’ for 33
1
/
3
& 45rpm records should be visible, whichever is applicable). To do
so, first remove the white Stylus Protector/cover by pulling it gently off the Stylus Holder and Cartridge
and towards you (keep this for future use to protect the Stylus when not using the Record Player), then push
the white ‘handle’ down and over to the other side.
1. Turn the Power on with the STANDBY/ON/OFF button (17)
.
2. Press the FUNCTION button (18) repeatedly to select the Phono (Turntable) function – on
the display it will show: ‘PHON’.
3. Ensure that the Tone Arm Clip (c) has been pushed up and to the right to release the Tone
Arm before operating (re-secure the Tone Arm after playing and before moving the unit to
a different location).
4. Flip the Stylus Holder handle down and over to select either the “LP” or “78” setting,
depending on the type of record to be played.
5. Set the Speed Selector Switch (b) to the correct setting, depending on the type of record to be played (33
1
/
3
,
45 or 78rpm).
E-14
LINE OUT CONNECTION
You can connect this system to another Hi-Fi system and play the music through the Amplifier and speakers of
that unit.
Connect the two plugs of an RCA cable (not supplied) from the Line Out socket on the rear (41) to the Auxiliary
Input socket of the other unit.
HEADPHONE CONNECTION
Connect your headphones (not included) to the 3.5mm dia. Headphone Jack (26) for private listening.
Before listening, make sure the volume is adjusted to a safe and comfortable level.
CAUTIONS:
- Avoid extended play at a very high volume as it may impair your hearing.
- If you experience ringing in your ears, reduce the volume or shut off your unit.
- Keep the volume at a reasonable and safe level - even if your headset is an open-air type designed to allow
you to hear outside sounds. Please note that excessively high volume may still block outside sounds.
MORE FEATURES
A. Sleep setting (by remote control)
The sleep function enables the system to switch to standby mode automatically at a pre-set time.
As an example, in TUNER mode:
1. Press the “
SLEEP/TIMER” button (57) and the sleep indicator “zzz” will show on the LCD display (2).
2. Press the button repeatedly to adjust the Sleep Timer in the following sequence:
90 > 80 > 70 > 60 > 50 > 10 minutes.
3. If for instance 60 has been selected, the system will stop and go into standby mode automatically after the
selected time of 60 minutes has been reached.
4. To cancel the Sleep Mode, press the “
SLEEP/TIMER” button until the “zzz” indicator has disappeared from the
LCD display.
B. Alarm Clock setting (by remote control)
This function allows the system to switch on automatically and wake you up by Radio (see **Notes below),
(Tuner), CD (in CD
I), USB or SD, as selected. Firstly, put the unit in Standby Mode and then press and hold
the “
SLEEP/TIMER” button (57) to enter the alarm setting mode, the ‘hour’ digits “00” will be flashing on the LCD
display.
1) To set the Wake up time:
z Press the skip up
TUNE / or skip down /TUNE button (57) to set the ‘hour’ and then press
“
SLEEP/TIMER“ again to confirm the ‘hour’.
z Then the ‘MINUTES’ digits will be flashing: Press the skip up
/TUNE or skip down /TUNE“ button
to set the ‘minutes’ and press the “
SLEEP/TIMER“ button to store the ‘TIMER ON’ time.
On the display “TUNE” and
will flash.
2) To set the Wake up source :
z Press skip up
/TUNE or Skip down /TUNE “ button (57) to select the ‘timer on’ mode.
z Then press the “
SLEEP/TIMER“ button to confirm the setting.
Notes:
– The wake up volume is preset at level 20.
– If there is no music source being detected (such as USB/SD/CD) when the pre-set wake-up time has been
reached, the system will **default to Radio mode automatically.
– To wake up by Radio, the system will be pre-set at the latest radio frequency that was being listened to
before switching the unit off.
– It is necessary to switch the system off manually during alarm wake up mode as it will not turn off
automatically after the timer has been activated.
z Activate/de-activate the Timer function (by remote control)
1. To activate the Timer function, press the “SLEEP/TIMER” button (57) on the remote handset until the timer
indicator
appears on the LCD display (2).
2. To cancel the Timer function, press the “
SLEEP/TIMER” button (57) again until the timer indicator
disappears.
PRE-SET EQ FUNCTION
This unit allows 5 different sound modes to enhance your listening experience. You can select the desired
effect by pressing the pre-set EQ button (20) repeatedly in the following sequence:
Flat classic rock pop jazz
 Loading...