E-6
PLAYING COMPACT DISC IN CD I
The system is equipped with two CD players, the function for CD I is described below and all the CD I playback
information will show in the top part of the LCD display:
z GETTING STARTED
1. Press the Function button to select, “CD 1” and “NO” will appear on the LCD display (2).
2. Press the CD
I “Open/Close” button (8) to open the CD I trady door (14).
3. Place a CD with the printed side facing up inside the tray and then close the CD door
.
4. The unit will start reading the disc, the LCD display will show the total number of tracks for a second, then
playback will start automatically. On the LCD display the current track number and the track time will show
alternately. (the Folder number and track time will show alternately during playback of an MP3 CD).
z CD
I PLAY / PAUSE MODE /
1. If the CD
I Play/Pause button (9) is pressed when the CD is not playing, the first track will be played.
2. If the Play/Pause
button (9) is pressed during playback, the music will pause temporarily and the play
indicator “
“ will flash on the LCD display.
3. Press the button again to resume playback.
4. If the Stop
button (11) is pressed during playback, the music will stop playing and the display will show the
total number of tracks on the Disc.
z SKIP MODE (SKIP UP
/SKIP DOWN )
1. While the CD is playing or is paused, press the CD
I “Skip Up” button (13) to skip to the next track - the
track number will be displayed. It will then play this track or remain paused.
2. Press the CD
I Skip Down button (13) to go back to the previous track- this will play or remain paused.
z PLAYING AN MP3-CD
1. Press the “
FOLDER PRE-UP“ button (7), the folder number will go up.
2. Press the CD I “Skip up“ or “Skip down“ (13) button, the track number will change.
3. When the desired track has been selected, press the CD
I “ Play/Pause” button (9) to start playback.
MP3 TRACK FORMAT REQUIREMENT:
– MP3 Bit rate: 32 kbps ~ 256 kbps.
– The sound quality of an MP3 CD varies from that of a pre-recorded Audio CD - the quality depends on the
method of recording.
COMPACT DISC CARE
To remove a disc from its storage case, press down on the centre of the case and lift the disc out, holding it
carefully by the edges. Fingerprints and dust should be carefully wiped off the disc’s reco
rded surface with a
soft cloth. Unlike conventional Vinyl or Shellac records, compact discs have no grooves to collect dust and
microscopic debris, so a gentle wipe with a soft, lint-free dry and clean cloth should remove most particles.
Wipe in a straight line from the inside to the outside of the disc. Never use detergents or abrasive cleaners to
clean the disc. If necessary, use a CD cleaning kit. Small dust particles and light stains will have absolutely no
effect on sound reproduction quality. Never fix labels to the surface of compact discs or write on them, except
very gently with a specialist CD-R Pen.
REPEAT/RANDOM MODE (on the remote control only)
Press the
PLAY MODE button on the remote control before or during playback - a file, folder (for an MP3 disc only)
or all files can be played repeatedly, in random order - in the following order:
FOR CD I
(1) repeat 1 (2) repeat all tracks (3) random (4) off mode
Play Mode Indicator on LCD display
Repeat 1 track
Repeat all tracks
Random RAN
Off mode --------------
E-11
iv) ERASING OR UN-FINALIZING A CD-RW DISC
It is possible to erase the last recorded track or erase all tracks recorded on a “CD-RW” (re-writeable) disc.
Notes: It is not possible to un-finalize or delete tracks from a CD-R disc.
If you wish to erase the last track of a finalized CD-RW, you must un-finalize the whole CD-RW first.
A) UN-FINALIZING A CD-RW DISC
1. Select the CD II function and place the CD-RW disc you would like to un-finalize in the CD II tray.
2. With the CD
II player stopped (26), press the “ERASE“button (32) (or ERASE on the remote) – the display
will show “UNFin-d”.
3. Then press the “CD
II Play/Pause ” button (24) to start erasing - “bUSY“ will appear on the CD Recorder
display during erasing.
4. When the unit has finished un-finalizing the recorded disc, the display will show the total number of track
numbers and total playing time of the disc and the “NO TOC” indicator will appear on the display.
B) ERASING ONE TRACK
1. Select CD II function and place the un-finalized CD-RW you wish to delete one track from in the CD II tray.
2. With CD
II stopped (25), press the “ERASE“ button once - “ Er “ and the last track number will appear on
the CD Recorder operation display.
3. Press the “CD
II Play/Pause ” button (24) to erase the last track – while erasing, “bUSY“ will show on the
CD Recorder display.
4. When finished erasing, the track erasing display will show the total track numbers and the total playing time of
the disc and the “NO TOC” indicator will appear on the display.
5. Repeat steps 2 to 4 to continue erasing more tracks.
C) ERASING ALL TRACKS
1. Select CD II function and place the un-finalized CD-RW you wish to erase all tracks from in the CD II tray.
2. With CD
II stopped (25), press the CD “ERASE“ button (32) twice - “Er ALL“ will appear on the CD Recorder
operation display.
3. Press the “CD
II Play/Pause ” button (24) to start erasing all the tracks on the CD-RW - “bUSY” will show
on the display during erasing.
4. Once erasing has finished, the CD Recorder operation display will show “000 00:00“ to confirm the erasing
process is complete.
Notes:
– Once the tracks are erased, this cannot be undone.
– It is not possible to erase one track at a time on this unit from a copied CD-RW disc recorded on another
system, but it may be possible to erase all tracks.
AUX-IN CONNECTION & PLAYBACK
Connect another audio device, e.g. a (portable) CD or Cassette Player, or other tape player, MP3 player or Radio
to this system via a cord with 3.5mm dia. plugs (not supplied). Connect one end of this cord to the 3.5mm dia.
Headphone Jack on the external device and the other end to the Aux-in jack (27) on the front panel of this unit.
When connected in this way it is possible to either play back or record the music on the connected device.
1. Press the Function button (18) to select AUX mode.
2. Plug the external device’s connection lead into the Aux-in jack (27) of this unit.
3. Start playing back the music on your external device and adjust the volume by turning the
VOLUME knob (21)
(volume level ranges from 0 – 30 on the display) or press the VOL -/+ buttons on the Remote Control (55).
Notes: If you experience any sound distortion, reduce the volume level on your auxiliary device.
Please unplug the external device if you wish to play a record or the turntable will not be able to rotate.
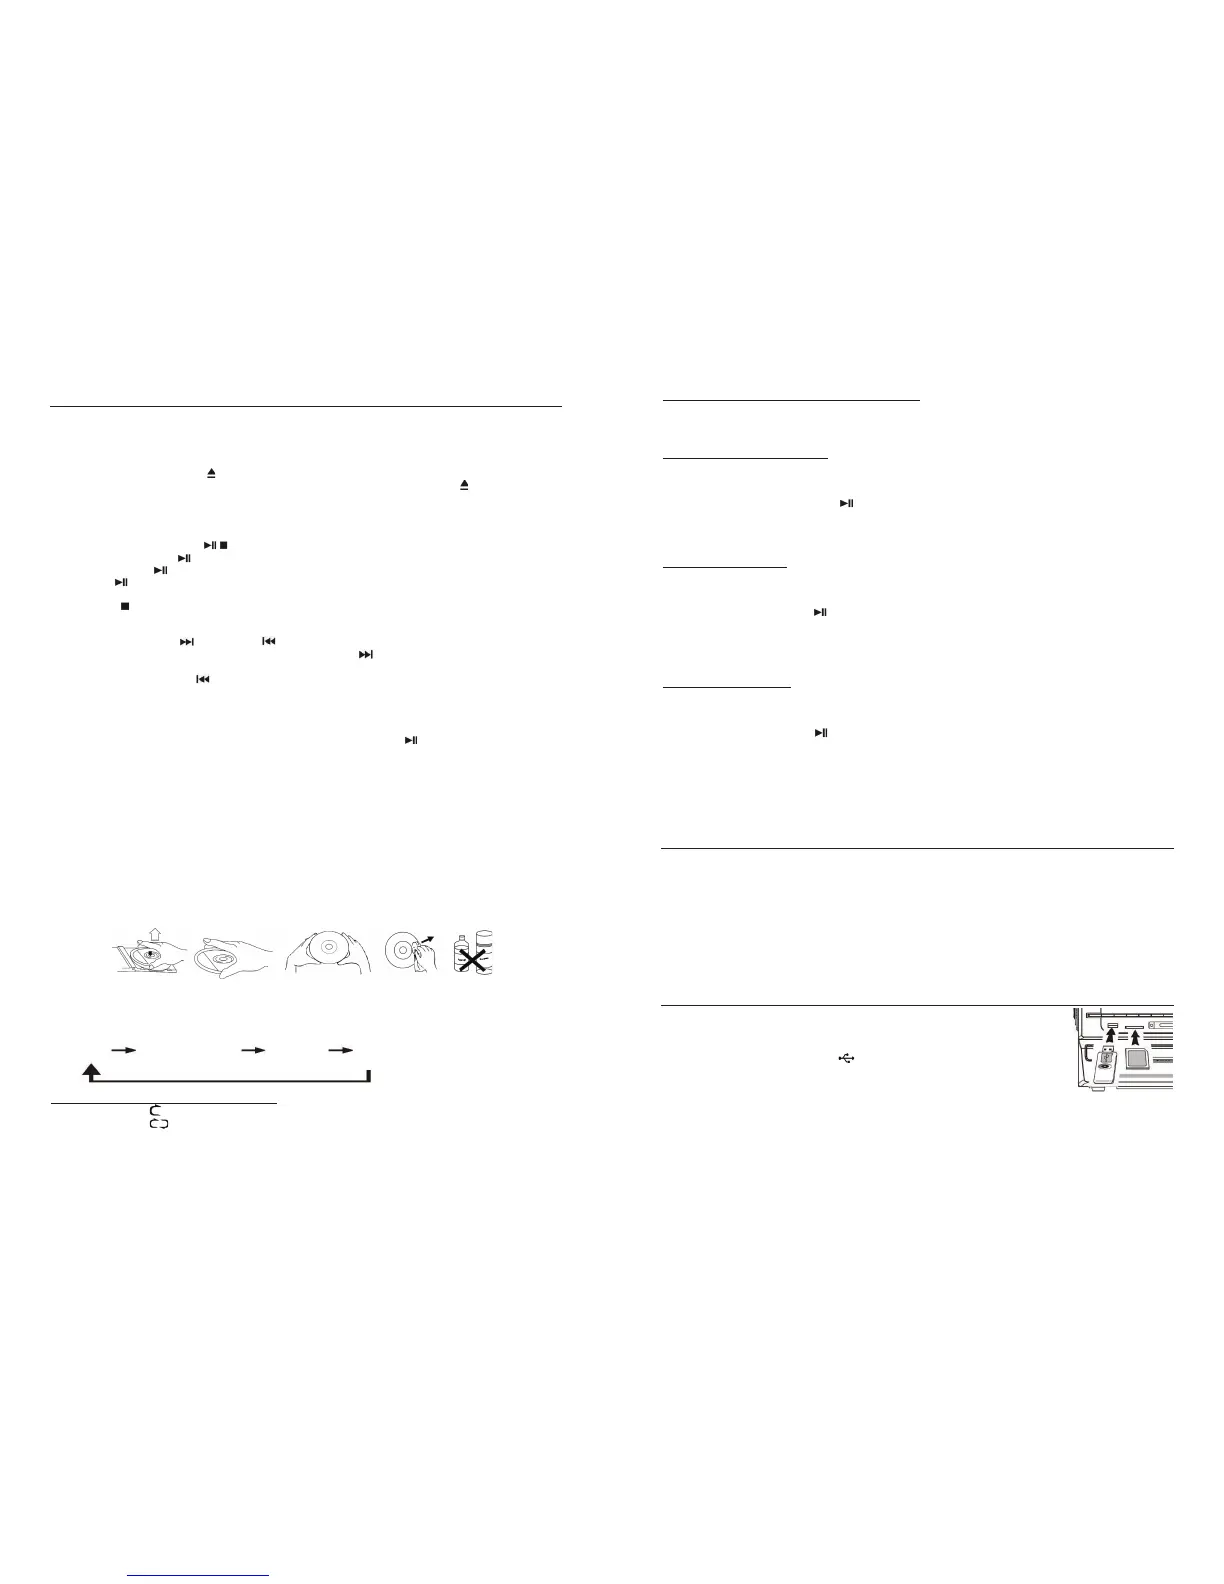
PLAYBACK OF MP3 SONGS ON A USB STORAGE DEVICE OR SD MEMORY CARD
CONNECTING THE DEVICE OR SD CARD
The system is able to decode and play back all MP3 music files which are stored on the
USB device or SD card. A storage medium of up to 16GB max. can be connected.
1. Press the function button (18) to select either “USB or SD Card” mode.
2. Plug in the USB plug face side up
making sure it is completely inserted (10), or
insert the SD card in the direction of the arrow as indicated by the printing above the
SD Card Slot (12). Insert it straight without bending it.
z CAUTION: Connecting the USB plug/Card upside down or backwards could
damage the audio system or the storage media (USB flash drive / SD/MMC card). Make sure the
direction is correct before insertion.
3. After connection, the system will start reading
the storage medium automatically, and the USB/SD operation
display will show the total number of MP3 files and total number of folders being detected.
4. The system will automatically start playback of the MP3 music files.
 Loading...