E-7
FOR MP3 (USB/SD)
(1) repeat 1 (2) repeat 1 folder (3) repeat all (4) random (5) off mode
Indicator on USB/SD
Play Mode operation display
repeat single track
repeat single folder
repeat all tracks
random mode RAN
off mode -----------------
z Repeat play
With this function you can listen to the desired file or folder repeatedly.
z Random play
With this function you can listen to all files in random order.
CD or MP3 PROGRAMMING (by remote control)
Up to 20 tracks can be programmed for CD (100 tracks for MP3 files). Before programming, ensure the system
is in Stop mode:
1. Press the FUNCTION button to select CD
I mode and stop playback .
2. Press the “
MEM/CLK-ADJ” button (5), “ MEM “ will appear on the display (2).
It will also indicate the program number and track number digits for the track to be
programmed.
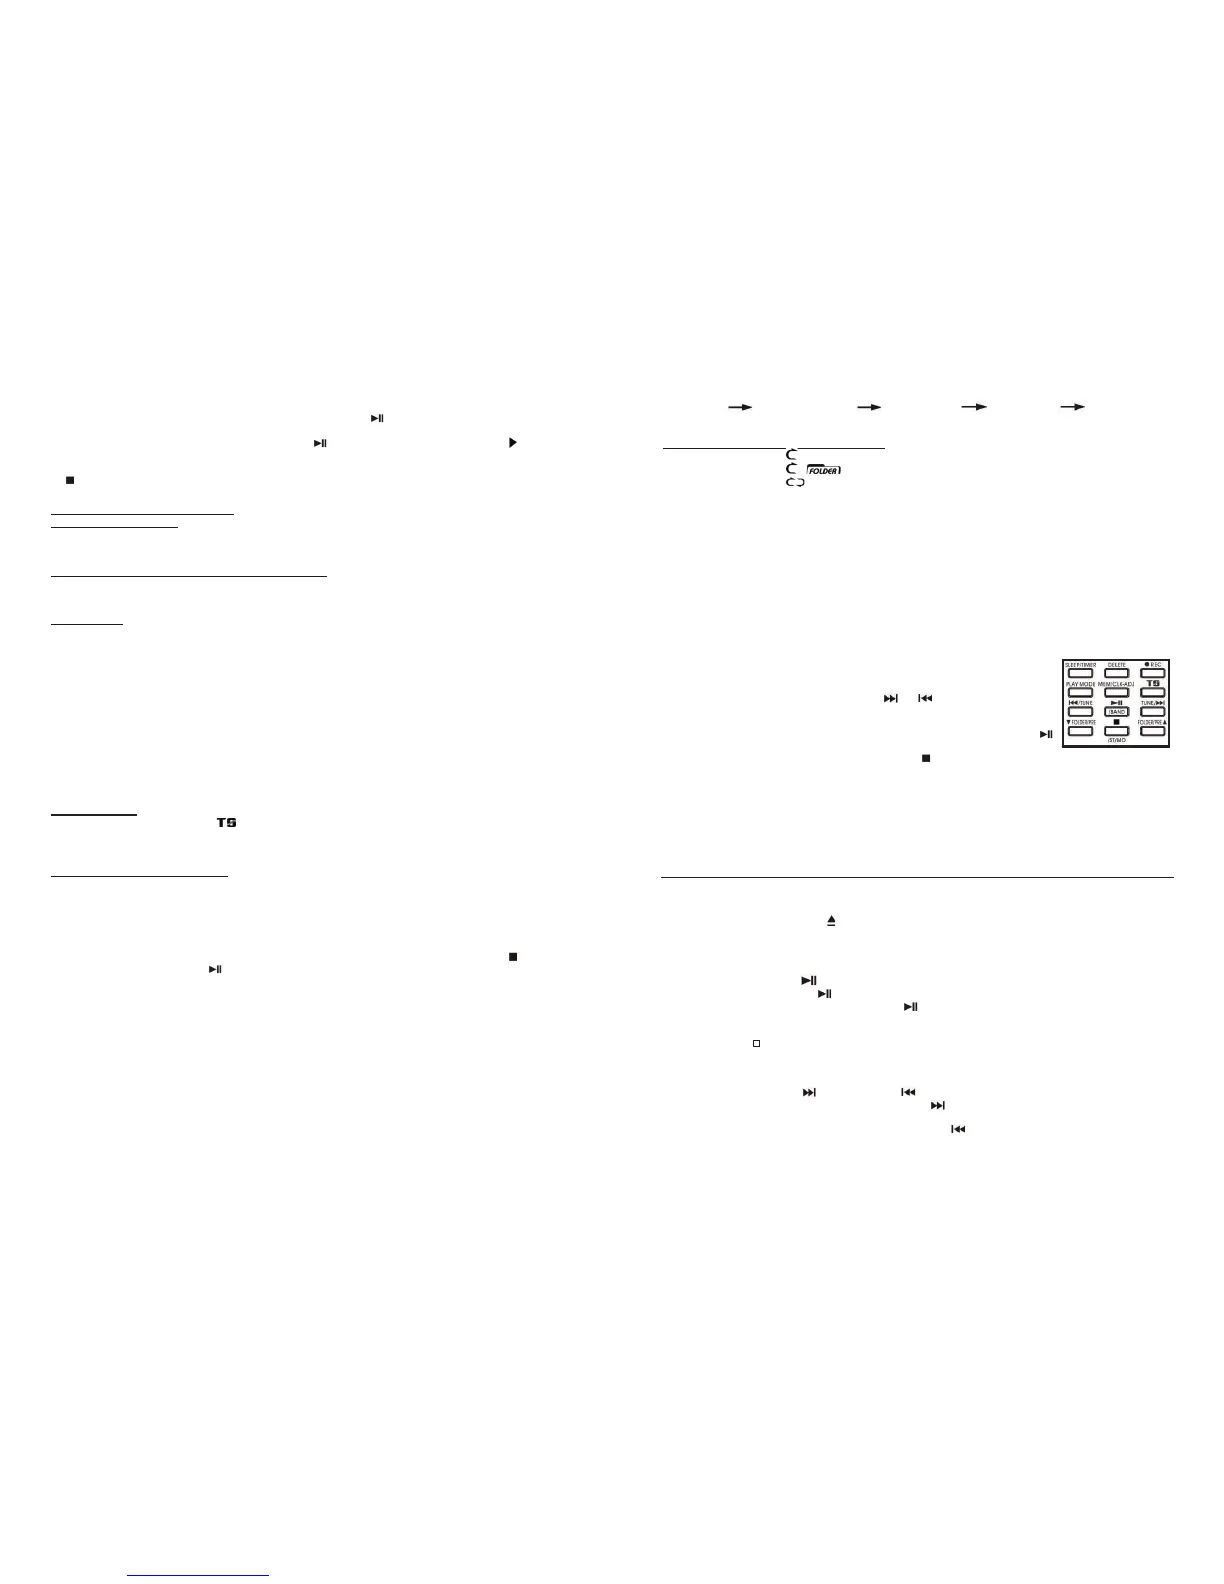
3. Select a track by pressing the USB/SD skip
or buttons (13).
4. Press the “
MEM/CLK-ADJ” button to store the track into memory.
5. Repeat steps 3 and 4 to enter additional files into the memory if required.
6. When all the desired files have been programmed, press the CD
I Play/Pause
button (9) to play the files in the designated order.
7. To cancel the programmed files, press the “CD Stop
” button (11) until “MEM“ disappears from the display.
Notes:
– A file in MP3 format can be detected and read only via the CD
I Player, USB Port or SD Card Slot on this
system.
– Due to variances in MP3 encoding format, some MP3 players may not play when connected to the USB
socket. Please note this is not a malfunction of the system, but due to incompatibility with this unit of the
MP3 player or the songs stored on it.
PLAYING A COMPACT DISC IN CD II
z GETTING STARTED
1. Press the Function button (18) to select CD II mode, the LCD display will briefly show “ --- bUSY “ and then
change to “NO dISC”
2. Then press “CD
II Open/Close ” button (23) to open the CD II tray (28).
3. Place an audio CD with the printed side facing up inside the tray and then close the CD tray.
4. The unit will start reading the disc, the display will show “bUSY“ and then display the total number of tracks
and total playing time of the disc.
z PLAY / PAUSE MODE
1. Press the CD II “Play/Pause ” button (24) to start playback, the first track will start playing.
2. To interrupt play, press the CD
II “Play/Pause ” button once, the playing time will freeze on the LCD
display, press it again to resume normal playback.
z STOP MODE
If the “CD II Stop “ button (25) is pressed during play or pause mode, the disc in CD II will stop playing and
show the total number of tracks on the CD Recorder operation LCD display.
z SKIP MODE (SKIP UP / SKIP DOWN )
1. While a CD is playing or paused, if the “CD II Skip up ” button (30) is pressed, it will go to the next track,
the display will show the track number and play it.
2. While a CD is playing or paused, if the “CD
II Skip down ” button (30) is pressed, it will go back to the
previous track and play it.
E-10
Notes:
– The recording speed is 1:1 and the same as the actual playing time of the playing source.
– To suspend the recording process, press the “ CD
II Play/Pause ” button (24), “ bUSY “ will flash for a
second on the LCD display - a new recording track number will be generated and the recording will be paused.
To re-start the recording, press the CD
II “Play/Pause ” button (24) again, the play indicator “ “will show
on the LCD display.
– When the capacity of the disc CD-R is full, the word “FULL” will appear on the display – press the “ CD
II Stop
” button (25) and change to another empty/blank CD-R disc to continue recording.
B) RECORDING SETTINGS
i) RECORDING LEVEL
The recording level can be adjusted with the REC LEVEL -/REC LEVEL + buttons (52/53) to avoid distortion if the
record source level is too high.
ii
) TRACK SEPARATION DURING CD RECORDING
It is possible to separate the music tracks that are being recorded track-after-track during recording by using
either the Auto (a) or Manual (b) mode:
a) Auto mode
Press the “ AUTO/MANUAL“ button (19) when getting ready to use the recording function, the LCD display will
show -20db, -30db, -40db, and the “AUTO TRACK” icon will appear on the LCD display.
When the recording sound level has dropped below the -20 / -30 / -40dB (recording signal) respectively, the track
that is currently being recorded will end and at that moment a new track will be generated – after which recording
the next track will automatically continue.
Note: It is recommended to set a lower recording level for a music source with clear performance - such as a
USB device, and a higher recording level for a higher noise music source - such as a vinyl record (Phono):
“ – 20db or – 30db “ – for recording from USB or Aux-in with a digital music source.
“ – 30db or – 40db “ – for recording from Tape or Phono mode.
“ ------- “ – auto mode off.
Note: The above is just a recommendation, the actual performance varies and is affected by the differences in
music source. If the cut-off is always misjudged for certain music files, please use the Manual Mode (b) instead.
b) Manual mode
Press the “CD II track separation “ “ button (16) on the front panel (or on the Remote Control) once - at
anytime during recording - in any mode - and the system will generate a new track and continue recording. The
word “bUSY “ will briefly show on the LCD display, which indicates the unit is successfully creating a new track.
iii
) FINALIZING A CD-R(W) DISC
You must convert the CD-R(W) disc into a standard Audio CD before you can play it back in any another Audio
CD player, including CD
I. This process is known as “FINALIZING” - a table of contents (TOC) will be written
on the CD at the same time. The procedure is as follows:
1. Select the CD
II function mode, ensure the recorded CD-R(W) disc to be finalized is in the CD II tray.
2. Ensure the CD is not playing, and then press the
FINALIZE button (22). “ Fin-d “ appears on the CD Recorder
operation display. (If you wish to quit the finalizing mode for any reason, press the “CD II Stop ” button).
3. Press the “CD II Play/Pause ” button (24) to start finalizing and the CD Recorder operation display will
show “ bUSY“ during this process.
4. After finalizing has completed, the CD tray will open automatically and “OPEN“ will appear on the CD
Recorder operation display.
Notes:
– The time it takes to finalize a disc depends on the contents of the recorded disc - this may take up to 15
minutes, but usually less.
– No buttons will be working during the finalizing process.
– Never turn the power off or unplug the power cord during the finalizing process.
– Once recorded on and after finalizing a disc you cannot record again on a “CD-R” disc or erase any tracks.
– Although a finalized “CD-R” disc may play on other CD Players, remember that a finalized “CD-RW” disc is
not guaranteed to play on all other CD Players.
– Due to differences in compatibility with the unit of CD-R or CD-RW discs, please change to another brand, or
even another one in the pack, if you find the performance of the recording not satisfactory. This is not a
system malfunction.
 Loading...