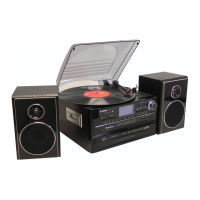
Connection
1. Connect the speaker wires to the speaker terminals (R + L) (42) located on the rear of the unit. Push the red right hand
side socket switch upwards to expose the hole in which to insert the red
speaker cable – insert the wire and release the switch. Push down the
right hand side black socket switch and insert the black cable wire.
Repeat this process for the other speaker, ensuring only the metal part of
the wire is inserted.
2. Connect the power cord (45) to a 230V AC Mains outlet.
3. Switch the Off/Source/Tuner selector (7) to the Radio position, if the red
power LED indicator (5) lights up and sound is coming out of the
speakers, this indicates the unit is correctly connected to the power
supply. Your system is now ready to play your music.
Listening to Radio
Manual tuning
1. Switch the Off/Source/Tuner selector (7) to Tuner position.
2. Select the desired band by sliding the Band switch (6) to AM or FM or FM-Stereo.
3. Tune into the required station by turning the Tuning knob (23) – the yellow LED Dial pointer light (35) on the Radio Dial
Scale will indicate the station reached.
4. Adjust the volume by pressing the VOLUME “+” / “-“ buttons (20) until the desired volume level has been reached.
FM & FM-stereo reception
Set the Band selector (6) to the “ FM ” position. Programmes are received in Mono sound. When a Stereo signal is
particularly weak, it is preferable to receive the broadcast in Mono.
Set the Band selector (6) to the “FM-ST” position to receive programmes broadcast in Stereo. The red FM-stereo LED
indicator (4) will light up to show when an FM stereo programme is received.
Hints for best reception:
- AM (=MW): The receiver has a built-in AM bar antenna. If AM reception is weak, slightly rotating or re-positioning of the
unit will usually improve the AM (Medium Wave) reception.
- FM: The receiver has a built-in FM wire antenna (41) hanging at the rear of the cabinet. This wire should be totally
unravelled and extended for best reception.
Playing compact disc at CD I
The system equipped with 2 CD player, here below describe the function for CD I :-
GETTING START
1. Switch the Off/Source/Tuner selector (7) to “Source’ position LCD display (2) will appear “PLS SELECT FUNCTION“ then
press the CD I button (21) to “CD I “ mode the display will mention “---BUSY”, “ENCODE” it means the CDR and
encoding system in booting mode and it takes few seconds, then display will show “NO DISC”.
2. Press “CD I Open/Close” button (9) to open the CD I door (15).
3. Place a CD with the printed side facing up inside the tray & then close the CD door.
4. Focus search is performing, the LCD display (2) will show the total number of tracks on CD I /USB/SD operation display
area .
PLAY / PAUSE MODE /
1. If Play/Pause/Stop / button (10) is pressed during stop mode, the
first track will be played.(Figure 1)
2. If Play/Pause/Stop / button (10) is pressed during playback, system
go to pause mode and the play indicator “ “ will start flashing at the LCD
display (2). Press again to resume normal playback.
3. If Play/Pause/Stop / button (10) is pressed and hold a second during
playback, it will go to stop mode and display total number of track on the
LCD display (2). (Figure 1)
SKIP MODE (SKIP UP /SKIP DOWN )
1. During play or pause mode, if CD I Skip Up button (12) is pressed it will go to next track and display the track no.
and then continuous the play or pause mode.
2. During play or pause mode, if CD I Skip Down button (12) is pressed, it will go back to the beginning of the track,
same track no. is display and continuous the play or pause mode.
3. After step 2, press CD I Skip Down button (12) again, it will go to the previous track and continuous the play or
pause mode.
FOR MP3 DISC
1. Press “ Folder up “ button (14), the folder no. Will goes up
2. Press “ Skip up “ or skip down (12) button, the track no. change.
3. When the desired track is being selected, press the CD I “ Play/Pause/Stop ” button (10) to start playback.
 Loading...