– 12 –
– 13 –
GB
1. About this document
– Under copyright. Reproduction either in whole or
in part only with our consent.
– Subject to change in the interest of technical
progress.
– All product dimensions in mm.
2. General safety precautions
!
Failure to observe these operating
instructions presents hazards!
These instructions contain important information on
the safe use of this product. Particular attention is
drawn to potential hazards. Failure to observe this
information may lead to death or serious injuries.
• Read instructions carefully.
• Follow safety advice.
• Keep instructions within easy reach.
– Working with electrical current may produce haz-
ardous situations. Touching live parts can result
in electrical shock, burns or death.
– Work on mains voltage must only be performed
by qualified, skilled personnel.
– National wiring regulations and electrical
operating conditions must be observed (e.g.
D: VDE 0100, A:ÖVE-ÖNORM E8001-1,
CH:SEV1000).
– Only use genuine replacement parts.
– The floodlight enclosure heats up when the
light is on. Only align the LED panel once it has
cooled down.
– Repairs must be made by specialist workshops.
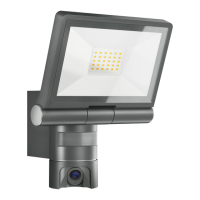
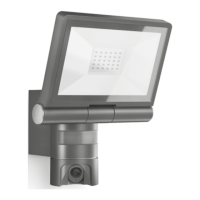
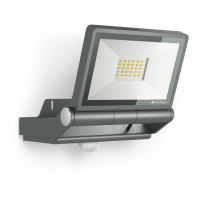
3. LS150LED / LS300LED
Proper use
LED floodlight with infrared motion detector and
suitable for wall mounting indoors and outdoors.
Features
– Tilting and turning LED panel.
– Moveable sensor housing (±80°).
– Operation via control dial.
– Infrared motion detector.
Operating principle
– The integrated infrared sensor detects the heat
radiated from moving objects (e.g. people,
animals).
– The heat detected in this way is converted elec-
tronically into a signal that automatically switches
ON a connected load (e.g. a light).
– The most reliable way of detecting motion is to
install the unit with the sensor aimed across the
direction in which a person would walk.
– Reach is restricted when the unit is approached
head on.
– Obstacles (e.g. trees, walls etc.) interrupt the line
of sensor vision.
– Heat radiation is not detected through obstacles
(e.g. walls or panes of glass), the sensor is not
triggered.
– Sudden fluctuations in the temperature from
changes in weather are not distinguished sourc-
es of heat.
– Wide-area lighting from ecient LED technology
in combination with the opal panel.
Models
– LS150LED
– LS300LED
Package contents (Fig.3.1 / 3.2)
Floodlight adjustment range (Fig.3.3 / 6.7)
Product dimensions for LS150LED (Fig.3.4)
Product dimensions for LS300LED (Fig.3.5)
Product components (Fig.3.6)
A LED panel
B Enclosure
C Wall mount
D Time setting
E Twilight setting
F Sensor unit
G Ring cover
Technical specifications
– LS150LED dimensions (H×W×D):
215×155×170mm
– LS300LED dimensions (H×W×D):
241×213×186mm
– LS150LED output:
20.5W / 1760lm / 86 lm / W
– LS300LED output:
30.6W / 3120lm / 102 lm / W
– Power supply: 220 – 240V, 50 / 60Hz
– Colour temperature: 4000K (neutral white)
– Life expectancy (L70 B10): 50000hours
– Sensor technology: Passive infrared
– Angle of coverage:
240° with 180°angle of aperture
– Sensor unit swivelling range: ± 80°
– Area illuminated to the front by LS150LED:
240cm²
– Area illuminated to the front by LS300LED:
355cm²
– Floodlight swivelling range:
horizontally ± 40°
vertically + 110° to -40°
– Time setting: 10s - 15min
– Twilight setting: 2-1000lux
– Reach: max. 12m
– Mounting height: 1.8 - 2m
– Temperature range: -10°C to +30°C
– IP rating: IP44
– Protection class: I
4. Electrical installation
Connection
The supply lead is a 2 or 3-core cable:
L = phase conductor (usually black, brown or grey)
N = neutral conductor (usually blue)
PE = protective-earth conductor (green / yellow)
Note:
The protective-earth conductor need not be con-
nected for this product.
Wiring diagram (Fig.4.1)
The light source of this LED floodlight cannot be
replaced. If the light source needs to be replaced
(e.g. at the end of its service life), the complete LED
floodlight must be replaced.
5. Installation
Hazard from electrical power.
Touching live parts can result in electrical shock,
burns or death.
• Switch OFF power and interrupt power supply.
• Using a voltage tester, check to make sure the
light is disconnected from the power supply.
• Make sure power supply remains interrupted.
Risk of damage to property!
Mixing up connection leads may produce a short
circuit.
• Identify connection leads.
• Re-connect connection leads.
Preparing for installation
• Check all components for damage. Do not use
the product if it is damaged.
• Select an appropriate site to install the product.
– Take reach into consideration. (Fig.5.1)
– Take reach and motion detection into consid-
eration. (Fig.5.2 / 5.3)
– Vibration-free.
– No obstacles in detection zone.
– Not in explosive atmospheres.
– Not on normally flammable surfaces.
– Do not look into the LED light from a short
distance (<20cm).
– Installing LED floodlight in horizontal
position (±15°).
• Correctly aiming LED floodlight. (Fig.5.4)
Mounting procedure
• Check to make sure the power supply is
switched OFF. (Fig.4.1)
• Unscrew retaining screw. (Fig.5.5)
• Detach enclosure from wall mount. (Fig.5.5)
• Detach plug-in terminal from wall mount.
(Fig.5.6)
• Mark drill holes. (Fig.5.7 / 5.8)
• Drill holes and fit ground plugs. (Fig.5.9 / 5.10)
• Pierce web. Fit sealing plug, feed cable through
(concealed power supply lead). (Fig.5.11 / 5.12)
• Break o one of the two lugs.
Pierce web.
Feel through cable (surface-mounted power
supply lead). (Fig.5.13 / 5.14)
• Connect conductors. (Fig.5.15)
• Connect plug-in terminal. (Fig.5.15)
• Fit enclosure onto wall mount. (Fig.5.16)
• Screw in locking screw. (Fig.5.17)
• Switch ON power supply. (Fig.5.17)
• Make settings ➜ "6.Function"
6. Function
Factory settings
Time setting (E): 10seconds
Twilight setting (F): 1000lux, (daytime mode)
All functions can be set after removing the ring
cover.
Time setting (Fig.6.1 / D)
The time you want the LED floodlight to stay on
for (main light) is infinitely adjustable from approx.
10seconds to a maximum of 15minutes. Any
movement detected before this time elapses will
restart the timer.
– Control dial set to + = longest time, approx.
15minutes
– Control dial set to - = approx. 10seconds
Twilight setting (Fig.6.1 / E)
The LED floodlight's chosen response threshold
can be infinitely varied from approx. 2 to 1000lux.
– Control dial set to
= daylight operation
(independent of ambient brightness)
GB
 Loading...