INSSQBF0700607
C) INSTALLATION USING A MOUNTING BRACKET
1
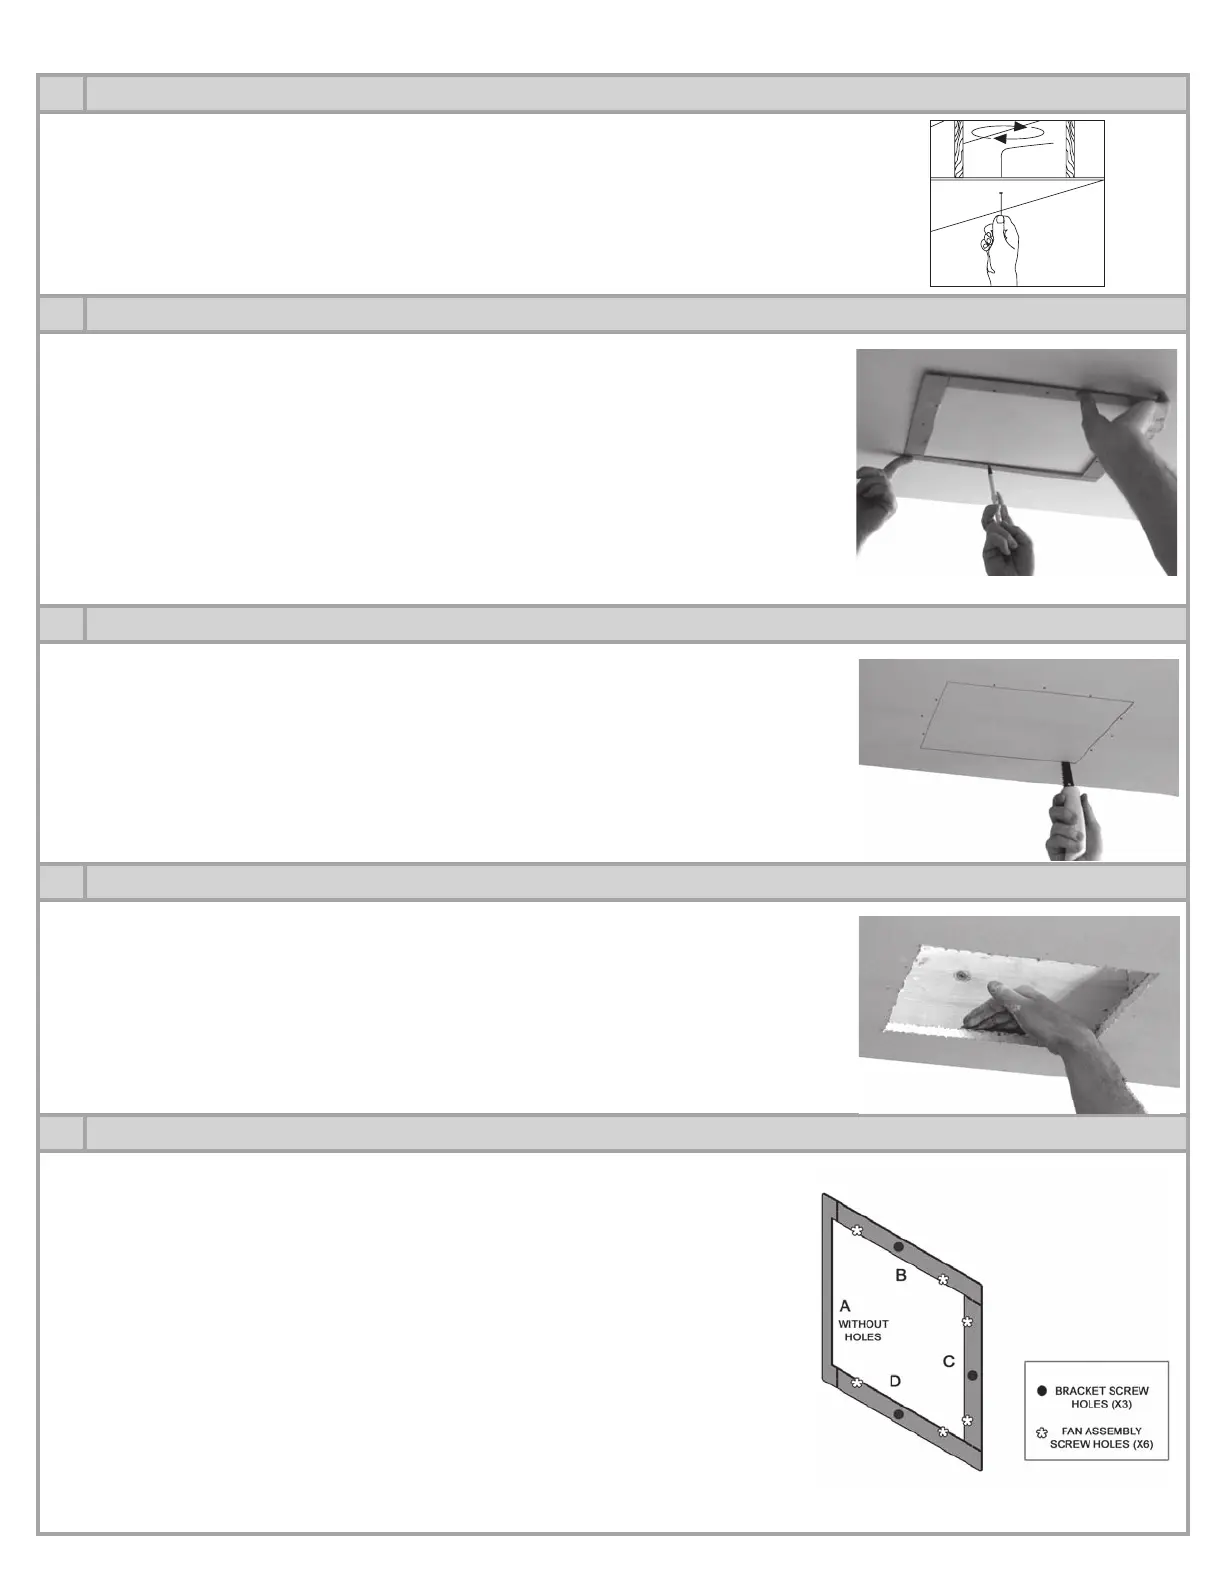
SEARCHING FOR SPACE BETWEEN CEILING JOISTS
Use an electronic stud/joist locator to determine the exact location of the ceiling joists. Oth-
erwise, drill a small hole in the ceiling and poke a bent coat hanger through the hole to feel
where the joists are located.
N.B. If joists are less than 8 inch height, add furring strips to achieve the installation height
requirement.
2
CUT-OUT SHAPE
Note – This step is easier to complete with the help of a co-worker.
Using the mounting bracket as a template, take a pencil to trace the shape of the cut-out.
• Side C of the mounting bracket must be facing the ductwork (see step 5).
• Trace along the inner edges of the template to achieve the proper cut-out dimensions.
• Pencil-in the position of the 9 pre-drilled screw holes.
3
CUT ALONG CUT-OUT LINES
Cut inside the lines which were traced.
4
CLEANING OF THE INSTALLATION ZONE
Before installing the mounting bracket, prepare the surface by dusting off any excess debris
from the ceiling opening.
5
INSTALLATION OF THE MOUNTING BRACKET
Important – Side C of the mounting bracket must be facing the ductwork.
Fig. 1.1
Fig. 2.1
Fig. 3.1
Fig. 4.1
Fig. 5.1
8