EasyManua.ls Logo

Stern Pinball JURASSIC PARK User Manual

Stern Pinball JURASSIC PARK
32 pages
To Next Page IconTo Next Page
Page #1 background imageLoading...
Page #1 background image
Stern Pinball machines are assembled in Elk Grove Village, Illinois,
USA; each pinball machine has unique characteristics that make it
a one-of-a-kind American-made product. Each machine will have
variations in appearance resulting from differences in the machine’s
particular wood parts, digital art and mechanical assemblies. Stern
Pinball has inspected each game element to ensure it meets our quality
standards.
SETUP GUIDE
1-800-KICKERS - service@sternpinball.com
www.sternpinball.com - facebook.com/sternpinball
© Universal City Studios LLC and Amblin Entertainment, Inc. All Rights Reserved.
Question and Answer IconNeed help?

Do you have a question about the Stern Pinball JURASSIC PARK and is the answer not in the manual?

Stern Pinball JURASSIC PARK Specifications

General IconGeneral
GenreAdventure
ManufacturerStern Pinball
Release Year2019
Players1-4
DisplayLCD
DesignerKeith Elwin
TypeSolid State Electronic
ThemeJurassic Park
Notable FeaturesMultiball
ArtworkZombie Yeti
Production RunLimited Edition

Summary

SETUP GUIDE

IMPORTANT SAFETY INSTRUCTIONS

CLEANING AND CARE

GLASS SURFACE CARE

Instructions for cleaning the glass surface of the pinball machine.

PLAYFIELD AND PLASTICS SURFACE CARE

Guidelines for cleaning playfield and plastic surfaces using appropriate materials.

LIMITED CONSUMER WARRANTY

STERN PINBALL, INC. LIMITED WARRANTY

PARTS RETURN PROCESS

WARRANTY DISCLAIMER

WARNINGS AND NOTICES

PHOTOSENSITIVE SEIZURES HEALTH WARNING

Warning about potential seizures from flashing lights or patterns.

PARTS SUBSTITUTIONS AND WARRANTY

Discourages non-Stern parts and explains warranty voiding due to modifications.

PERCHLORATE MATERIAL NOTICE

Information regarding special handling for perchlorate material.

PARTS LIST

MANUAL INDEX

SETUP AND INITIALIZATION GUIDE

Covers initial setup, tilt adjustment, leveling, and game initialization.

SERVICE MENU AND DIAGNOSTICS

Details on accessing, navigating, and performing tests within the service menu.

COMPONENT REFERENCES AND IDENTIFICATION

Guides for electrical, driver, switch, light, and motor components.

PLAYFIELD ASSEMBLY AND PARTS INFORMATION

Information on playfield top/bottom assemblies, rubber, and maintenance parts.

INITIAL SETUP PROCEDURES

OPENING THE SHIPPING CARTON

Instructions for opening the game's shipping carton.

UNBOXING THE GAME UNIT

Procedure for carefully removing the game from its packaging.

REMOVING THE GAME LEGS

Steps for taking the four legs out of the shipping carton.

STANDING THE GAME ON END

Guidance on how to stand the game unit on its end for assembly.

INITIAL SETUP CONTINUED

ROCKING THE CABINET FORWARD

Instructions requiring assistance to rock the cabinet forward onto its legs.

LIFTING THE CABINET BACK WITH ASSISTANCE

Steps for lifting the back of the cabinet with assistance and placing it on support.

CUTTING THE BACKBOX SECURING STRAP

Instructions for cutting the strap that secures the backbox.

LIFTING THE BACKBOX UPRIGHT

Procedure for lifting the backbox to an upright position.

BACKBOX INSTALLATION

SECURE THE BACKBOX WITH BOLTS

Instructions for securing the backbox using provided bolts.

INSTALLING THE PINBALLS

ACCESSING CABINET LATCHES

Steps to access latches inside the cabinet for front molding.

PLACING BALLS ON PLAYFIELD

Procedure for sliding playfield glass and placing pinballs onto the playfield.

TILT ADJUSTMENT PROCEDURE

LOCATING AND PREPARING TILT SENSOR

Locating the tilt sensor and removing its shipping material.

ADJUSTING TILT SENSITIVITY

Adjusting tilt sensitivity by loosening the thumb screw and adjusting the plumb bob.

GAME LEVELING

SETTING PLAYFIELD PITCH

Adjusting levelers to set the playfield pitch using a bubble level.

SIDE-TO-SIDE LEVELING

Using a pinball or level app for side-to-side leveling.

GAME INITIALIZATION

PLAYFIELD ACCESS FOR SERVICE

UNSCREWING THE PLAYFIELD KNOB

Unscrewing the knob at the bottom center of the playfield to access it.

LIFTING THE PLAYFIELD

Lifting the playfield by the middle of the plastic arch and resting it.

BACKBOX ACCESS PROCEDURE

ACCESSING THE BACKBOX COMPONENTS

Removing screws and glass bracket to access the backbox.

VOLUME ADJUSTMENT

SERVICE MENU NAVIGATION

SERVICE MENU DIAGNOSTIC TESTS

DIAGNOSTICS, SWITCH, AND COIL TESTS

Tests for general diagnostics, switch functionality, and coil operations.

LAMP AND NODE STATUS CHECKS

Procedures for testing lamp functionality and checking node board status.

SERVICE MENU GAME FUNCTIONS

GAME FUNCTION AND TROUGH TESTS

Tests for game functions like drop targets and trough detection.

DOT MATRIX AND ADJUSTMENTS MENU

Dot matrix display test and menu for gameplay setting adjustments.

SERVICE MENU ADJUSTMENTS LIST

STANDARD ADJUSTMENT OPTIONS

List of standard adjustable settings for the game.

FEATURE ADJUSTMENT OPTIONS

List of adjustable feature settings for the game.
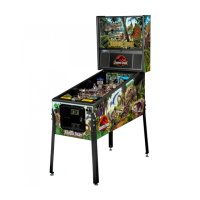
PLAYFIELD AND CABINET ELECTRICAL

NODE REFERENCE TABLE

DRIVER REFERENCE TABLE

SWITCH REFERENCE TABLE

SWITCH REFERENCE CONTINUED

SWITCH REFERENCE CONTINUED

LIGHT REFERENCE TABLE

LIGHT REFERENCE CONTINUED

LIGHT REFERENCE CONTINUED

MOTOR REFERENCE TABLE

PLAYFIELD TOP ASSEMBLIES

PLAYFIELD BOTTOM ASSEMBLIES

PLAYFIELD RUBBER PARTS LIST

MAINTENANCE PARTS LIST

Related product manuals