EasyManua.ls Logo

Stern Pinball MANDALORIAN - User Manual

Stern Pinball MANDALORIAN
62 pages
Print Icon
To Next Page IconTo Next Page
Loading...
THE MANDALORIAN
SERVICE AND OPERATION MANUAL
Games congured for North America operate on 60 cycle electricity only. These games will not operate in countries with 50 cycle electricity (Europe, UK, Australia).
WARNING
IMPORTANT HEALTH WARNING: PHOTOSENSITIVE SEIZURES - A very small percentage of people may experience a seizure when exposed to certain visual images,
including ashing lights or patterns. Even people with no history of seizures of epilepsy may have an undiagnosed condition that can cause “photosensitive epileptic
seizures” due to certain visual images, ashing lights or patterns. Symptoms can include lightheadedness, altered vision, eye or face twitching, jerking or shaking of arms or
legs, disorientation, confusion, momentary loss of awareness, and loss of consciousness or convulsions that can lead to injury from falling down or striking nearby objects.
IMMEDIATELY STOP PLAYING AND CONSULT A DOCTOR IF YOU EXPERIENCE ANY OF THESE SYMPTOMS.
1-800-KICKERS - parts.service@sternpinball.com
www.sternpinball.com - facebook.com/sternpinball
MANUAL #780-50S6-00
THE MANDALORIAN LE #500-55S6-01
THE MANDALORIAN PREMIUM #500-55S7-01
Stern Pinball machines are assembled in Elk Grove Village, Illinois, USA. Stern Pinball has inspected each game element to ensure it meets our quality standards.
Each pinball machine has unique characteristics that make it a one-of-a-kind American made product. Each will have variations in appearance resulting from differences
in the machine’s particular wood parts, individual printed art and mechanical assemblies. No playeld is perfectly at and varies depending on the season. Game play will
result in playeld dimpling as the harder steel ball contacts the wood and coating; over time multiple dimples will blend to make them less noticeable. Normal plastic insert
crazing (tiny stress cracks) and ghosting (small cloudy areas around insert edges) are often seen in pinball machines, due to a combination of plastic mold stress, pushing of
inserts into purposely undersized holes, and heating and breaking of inserts’ plastic “skin” when the playeld is sanded.
SERVICE AND OPERATION MANUAL
ATTENTION! IMPORTANT WARRANTY INFORMATION
The electronics system, node network architecture, mechanical devices and associated software control systems in this pinball machine are designed to work with genuine
Stern Pinball accessories and devices.
Installation of non-authorized accessories, lamps, LED’s, motors or other devices or modication of electro-mechanical devices may damage the system and will void your
warranty.
© & ™ Lucaslm Ltd.

Table of Contents

Question and Answer IconNeed help?

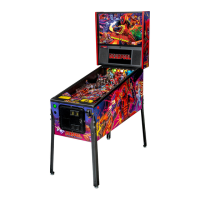
Do you have a question about the Stern Pinball MANDALORIAN and is the answer not in the manual?

Summary

The Mandalorian Service and Operation Manual

Important Health Warning: Photosensitive Seizures

Warning about potential epileptic seizures from flashing visual images.

Important Warranty Information

Crucial details regarding warranty coverage and product limitations.

1. Setup and Moving

1.1 First-Time Setup Instructions

Detailed steps for initial game setup and unpacking.

Locating, Leveling, and Final Setup

Instructions for selecting a location and leveling the pinball machine.

Spike Pinball Software Update Instructions

Procedure for updating the game's software using a USB drive.

1.2 Adjustments Menu

Access and overview of the game's adjustment menus.

Standard Adjustments

Configuration settings for game behavior and scoring.

Feature Adjustments

Game-specific adjustments for unique features and options.

1.3 Transporting the Game

Guidelines and procedures for safely moving the pinball machine.

Secure the Backbox

Steps to secure the backbox during game transport.

Remove the Legs and Stand Up

Procedure for safely removing legs and positioning the game.

1.4 Maintenance

Procedures for maintaining the pinball machine.

Regular Maintenance - (Monthly;500 Games)

Routine checks and cleaning for optimal game performance.

Overhaul Maintenance - (5000 Games)

Comprehensive maintenance tasks for long-term reliability.

Common Pinball Tools

List of essential tools for pinball machine maintenance.

Maintenance Kits

Recommended kits for maintaining pinball machines.

2. SPIKE System and Node Guide

2.1 SPIKE System Overview

Introduction to Stern's SPIKE pinball system architecture.

2.2 Node Bus Cabling

Details on connecting SPIKE nodes using Ethernet-style cabling.

2.3 System Power

Explanation of the 48V DC power supply for the SPIKE system.

2.4 SPIKE Node Addresses

Information on assigning unique addresses to SPIKE nodes via DIP switches.

2.5 SPIKE Node Programming

How SPIKE nodes are automatically programmed by the CPU.

2.6 SPIKE System Terminology

Definitions for terms related to SPIKE system lighting and components.

2.7 COMMON SPIKE NODE BOARDS

List of standard SPIKE node boards and their part numbers.

3. LIGHT, SWITCH, AND DRIVER REFERENCE

3.1 SPIKE NODE BOARDS

Details on SPIKE node boards, their DIP addresses, and part numbers.

3.2 DRIVER REFERENCE

Table listing drivers, their connections, and associated coils/motors.

3.3 SWITCH REFERENCE

Cross-reference of switches, their nodes, connections, and part numbers.

3.4 LIGHT REFERENCE

List of all lights, their nodes, connections, and part numbers.

3.5 MOTOR REFERENCE

Details on motor types, wiring, and control for the pinball machine.

4. ELECTRONIC PINOUTS AND SCHEMATICS

4.1 SPIKE-2 CPU NODE 0

Pinout and wiring for the main CPU node (Node 0).

AUDIO PINOUTS

Connector pinouts for audio output on the CPU node.

COIN DOOR SERVICE SWITCH WIRING

Wiring diagram for coin door service switches.

USA & INTERNATIONAL (NON-EURO) STANDARD PRICING SELECT TABLE

Configuration table for pricing and coin settings in non-Euro countries.

EURO SUMMARY & INTERNATIONAL (EURO) STANDARD PRICING SELECT TABLE

Configuration table for pricing and coin settings in Euro countries.

4.2 CABINET NODE 1

Pinout and wiring for the Cabinet Node (Node 1).

4.3 LOWER PLAYFIELD 48 V DRIVER PINOUT NODE 8

Pinout details for the Node 8 driver board on the lower playfield.

4.4 MID UPPER PLAYFIELD 48 V DRIVER PINOUT NODE 9

Pinout details for the Node 9 driver board on the mid-upper playfield.

4.5 LOWER CENTER LED BOARD 8 B

Pinout for the Lower Center LED Board (8B).

4.6 3-W LED BOARD 8 B1

Pinout for the 3-Watt LED Board (8B1).

4.7 2-W 1-RGB LED BOARD 8 B2

Pinout for the 2-Watt 1-RGB LED Board (8B2).

4.8 CENTER MIDDLE LED BOARD 8 C

Pinout for the Center Middle LED Board (8C).

4.9 3-RGB LED BOARD 8 C1

Pinout for the 3-RGB LED Board (8C1).

4.10 CENTER RIGHT LED BOARD 9 A

Pinout for the Center Right LED Board (9A).

4.11 2-W 1-RGB LED BOARD 9 A1

Pinout for the 2-Watt 1-RGB LED Board (9A1).

4.12 DUAL MOTOR DIRECT DRIVER BOARD 9 A2

Pinout for the Dual Motor Direct Driver Board (9A2).

4.13 MINI PLAYFIELD LED BOARD 9 B

Pinout for the Mini Playfield LED Board (9B).

4.14 TROUGH SERIAL OPTO RECEIVER 8 A

Pinout for the Trough Serial Opto Receiver (8A).

4.15 TROUGH SERIAL OPTO TRANSMITTER

Pinout for the Trough Serial Opto Transmitter.

4.16 MAIN POWER SUPPLY

Details of the main power supply unit and its connections.

4.17 POWER DISTRIBUTION BOARD

Diagram and pinout for the power distribution board.

4.18 POWER PLUG WIRING

Wiring specifications for North American and International power plugs.

5. PARTS REFERENCE

5.1 PLAYFIELD RUBBER PARTS

List and diagram of playfield rubber parts and their sizes.

5.3 PLAYFIELD ASSEMBLIES, TOP

Diagram and part numbers for major top playfield assemblies.

5.4 PLAYFIELD ASSEMBLIES, BOTTOM

Diagram and part numbers for major bottom playfield assemblies.

5.5 BACKBOX PARTS

List of internal and external backbox components.

5.6 SPEAKER PANEL PARTS

Components for the speaker panel assembly.

5.7 CABINET PARTS

List of all cabinet assemblies and their corresponding part numbers.

5.8 BALL SHOOTER ASSEMBLY

Parts list and diagram for the ball shooter assembly.

5.9 AUTO LAUNCH ASSEMBLY

Parts list and diagram for the auto launch assembly.

5.10 BALL TROUGH ASSEMBLY

Parts list and diagram for the ball trough assembly.

5.11 SLINGSHOT ASSEMBLY

Parts list and diagram for the slingshot assembly.

5.12 FLIPPER ASSEMBLY, LEFT

Parts list and diagram for the left flipper assembly.

5.13 FLIPPER ASSEMBLY, RIGHT

Parts list and diagram for the right flipper assembly.

5.14 POP BUMPER ASSEMBLY

Parts list and diagram for the pop bumper assembly.

5.15 SCOOP ASSEMBLY

Parts list and diagram for the scoop assembly.

5.16 SCOOP COIL ASSEMBLY

Parts list and diagram for the scoop coil assembly.

5.17 EJECT VUK ASSEMBLY

Parts list and diagram for the eject VUK assembly.

5.18 CHILD OPTO 01 ASSEMBLY

Parts list and diagram for the Child Opto 01 assembly.

5.19 CHILD OPTO 02 ASSEMBLY

Parts list and diagram for the Child Opto 02 assembly.

5.20 RAZOR CREST ASSEMBLY

Parts list and diagram for the Razor Crest assembly.

5.21 RAZOR CREST SHIP ASSEMBLY

Parts list and diagram for the Razor Crest Ship assembly.

5.22 PLAYFIELD MAGNET ASSEMBLY

Parts list and diagram for the playfield magnet assembly.

5.23 BALL DEFLECTOR ASSEMBLY

Parts list and diagram for the ball deflector assembly.

5.24 PLASTIC 05 ASSEMBLY

Parts list and diagram for Plastic 05 assembly.

5.25 PLASTIC 07 ASSEMBLY

Parts list and diagram for Plastic 07 assembly.

5.26 RIVETED PLASTIC 06 ASSEMBLY

Parts list and diagram for Riveted Plastic 06 assembly.

5.27 RIVETED PLASTIC 07 ASSEMBLY

Parts list and diagram for Riveted Plastic 07 assembly.

5.28 PLASTIC 09 ASSEMBLY

Parts list and diagram for Plastic 09 assembly.

5.29 RIVETED PLASTIC 13 ASSEMBLY

Parts list and diagram for Riveted Plastic 13 assembly.

5.30 RIVETED PLASTIC 19 ASSEMBLY

Parts list and diagram for Riveted Plastic 19 assembly.

5.31 RIVETED PLASTIC 21 ASSEMBLY

Parts list and diagram for Riveted Plastic 21 assembly.

5.32 RIVETED PLASTIC 24 ASSEMBLY

Parts list and diagram for Riveted Plastic 24 assembly.

5.33 BALL GUIDE 01 ASSEMBLY

Parts list and diagram for Ball Guide 01 assembly.

5.34 BALL GUIDE 02 ASSEMBLY

Parts list and diagram for Ball Guide 02 assembly.

5.35 BALL GUIDE SPINNER ASSEMBLY

Parts list and diagram for Ball Guide Spinner assembly.

5.36 LEFT RAMP ASSEMBLY

Parts list and diagram for the left ramp assembly.

5.37 CENTER RAMP ASSEMBLY

Parts list and diagram for the center ramp assembly.

5.38 RIGHT RAMP ASSEMBLY

Parts list and diagram for the right ramp assembly.

5.39 REAR BACKPANEL RAMP ASSEMBLY

Parts list and diagram for the rear backpanel ramp assembly.

5.40 MINI PLAYFIELD ASSEMBLY

Parts list and diagram for the mini playfield assembly.

5.41 MINI PLAYFIELD MOTOR ASSEMBLY

Parts list and diagram for the mini playfield motor assembly.

5.42 MINI PLAYFIELD CHUTE ASSEMBLY

Parts list and diagram for the mini playfield chute assembly.

5.43 MINI PLAYFIELD FLIPPER PLATE ASSEMBLY

Parts list and diagram for the mini playfield flipper plate assembly.

6. SPECIFICATIONS

SPECIFICATIONS, MECHANICAL, GAME SETUP

Mechanical specifications for game setup and dimensions.

SPECIFICATIONS, ENVIRONMENT

Environmental operating conditions for the pinball machine.

SPECIFICATIONS, MECHANICAL, BOXED

Mechanical specifications for the game when it is boxed.

SPECIFICATIONS, ELECTRICAL

Electrical specifications including voltage, frequency, and current.

6.1 GAME DIMENSIONS

Diagram showing the physical dimensions of the game.

6.2 WARRANTY

Stern Pinball Inc. limited warranty terms and conditions.

6.3 WARNINGS, COMPLIANCE, AND LEGAL NOTICES

Important safety warnings, compliance information, and legal notices.

6.4 STERN PINBALL END USER LICENSE AGREEMENT

Terms and conditions for using Stern Pinball Software.

Stern Pinball MANDALORIAN Specifications

General IconGeneral
ManufacturerStern Pinball
Release Year2020
DisplayLCD Screen
Number of Players1-4
ThemeStar Wars
WeightApproximately 250 lbs
TypeSolid State
Notable Featurescustom speech
SoundOriginal music and sound effects from Star Wars

Related product manuals