18
6
5
5
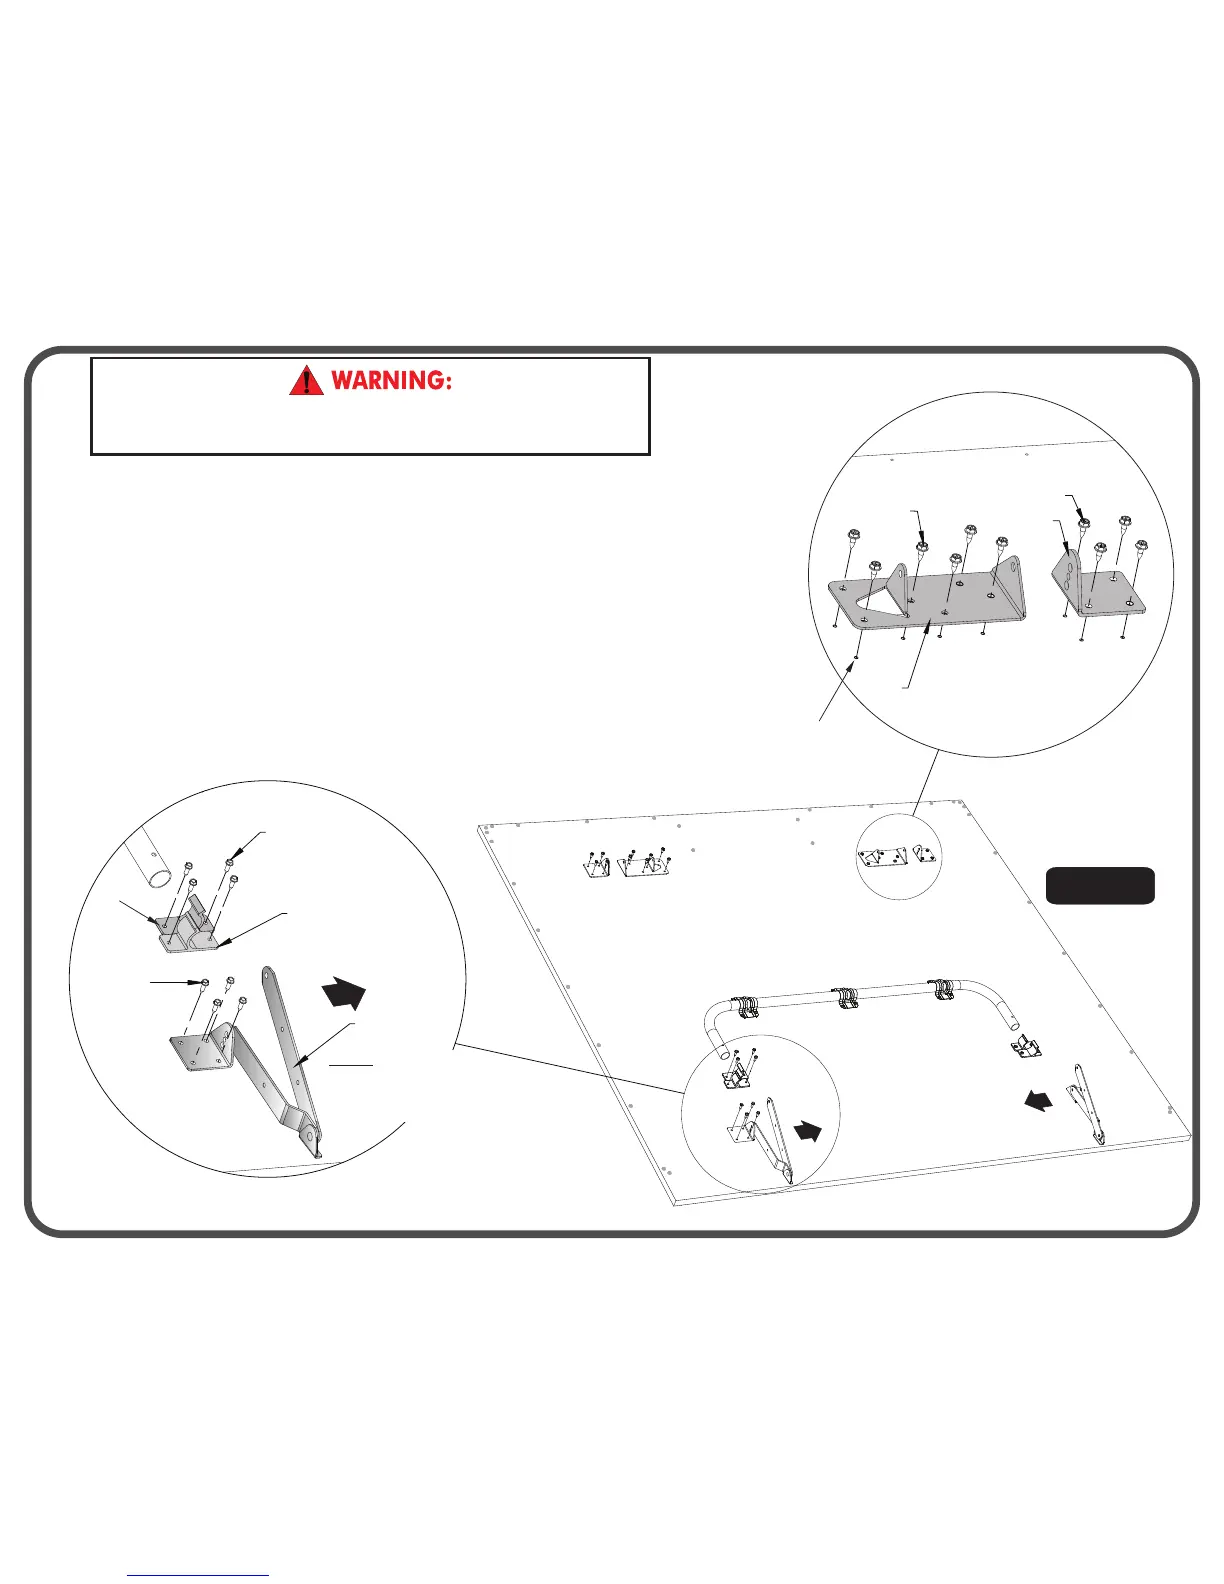
10. Assemble parts to the bottom of the table top with Screws (#5) as shown in Figure 6, Detail
C and Detail D.
a) Align the holes in the Mounting Brackets (#25) & (#20) with Indentations in table top
assembly and secure with screws (#5) as shown. All holes in each Mounting Bracket must
align with Indentations in the top. See Figure 6 and Detail C.
b) Align the holes in the two U-Support Clips (#6) with Indentations in table top. Be sure that
the two U-Support Clips (#6) are positioned exactly as shown in Figure 6 & Detail D.
Figure 6
Detail D
6
6
DO NOT USE A POWER DRIVER TO ATTACH HINGE BRACKET ASSEMBLIES (#18)
YOU COULD STRIP SCREW IN WOOD AND DO IRREPARABLE DAMAGE TO THE
TABLE. DO NOT OVER TIGHTEN SCREWS CAUSING THEM TO STRIP THE WOOD!
DO NOT USE A POWER DRIVER TO ATTACH HINGE BRACKET ASSEMBLIES (#18) YOU
COULD STRIP SCREW IN WOOD AND DO IRREPARABLE DAMAGE TO TABLE. DO NOT
OVER TIGHTEN SCREWS CAUSING THEM TO STRIP THE WOOD!
c) Align the holes in the Hinge Bracket Assembly (#18) with Indentations in table top. Be sure
that Hinge is facing the inside of the table and placed exactly as shown in Figure 6 & Detail D.
NOTE: DO NOT use
a power driver to
attach hinge bracket
assemblies (#18).
20
25
5
5
Detail C
Note: Indentations
in table top are small
so look closely.
 Loading...