3..5 Reassembly of Piston
and Cylinder
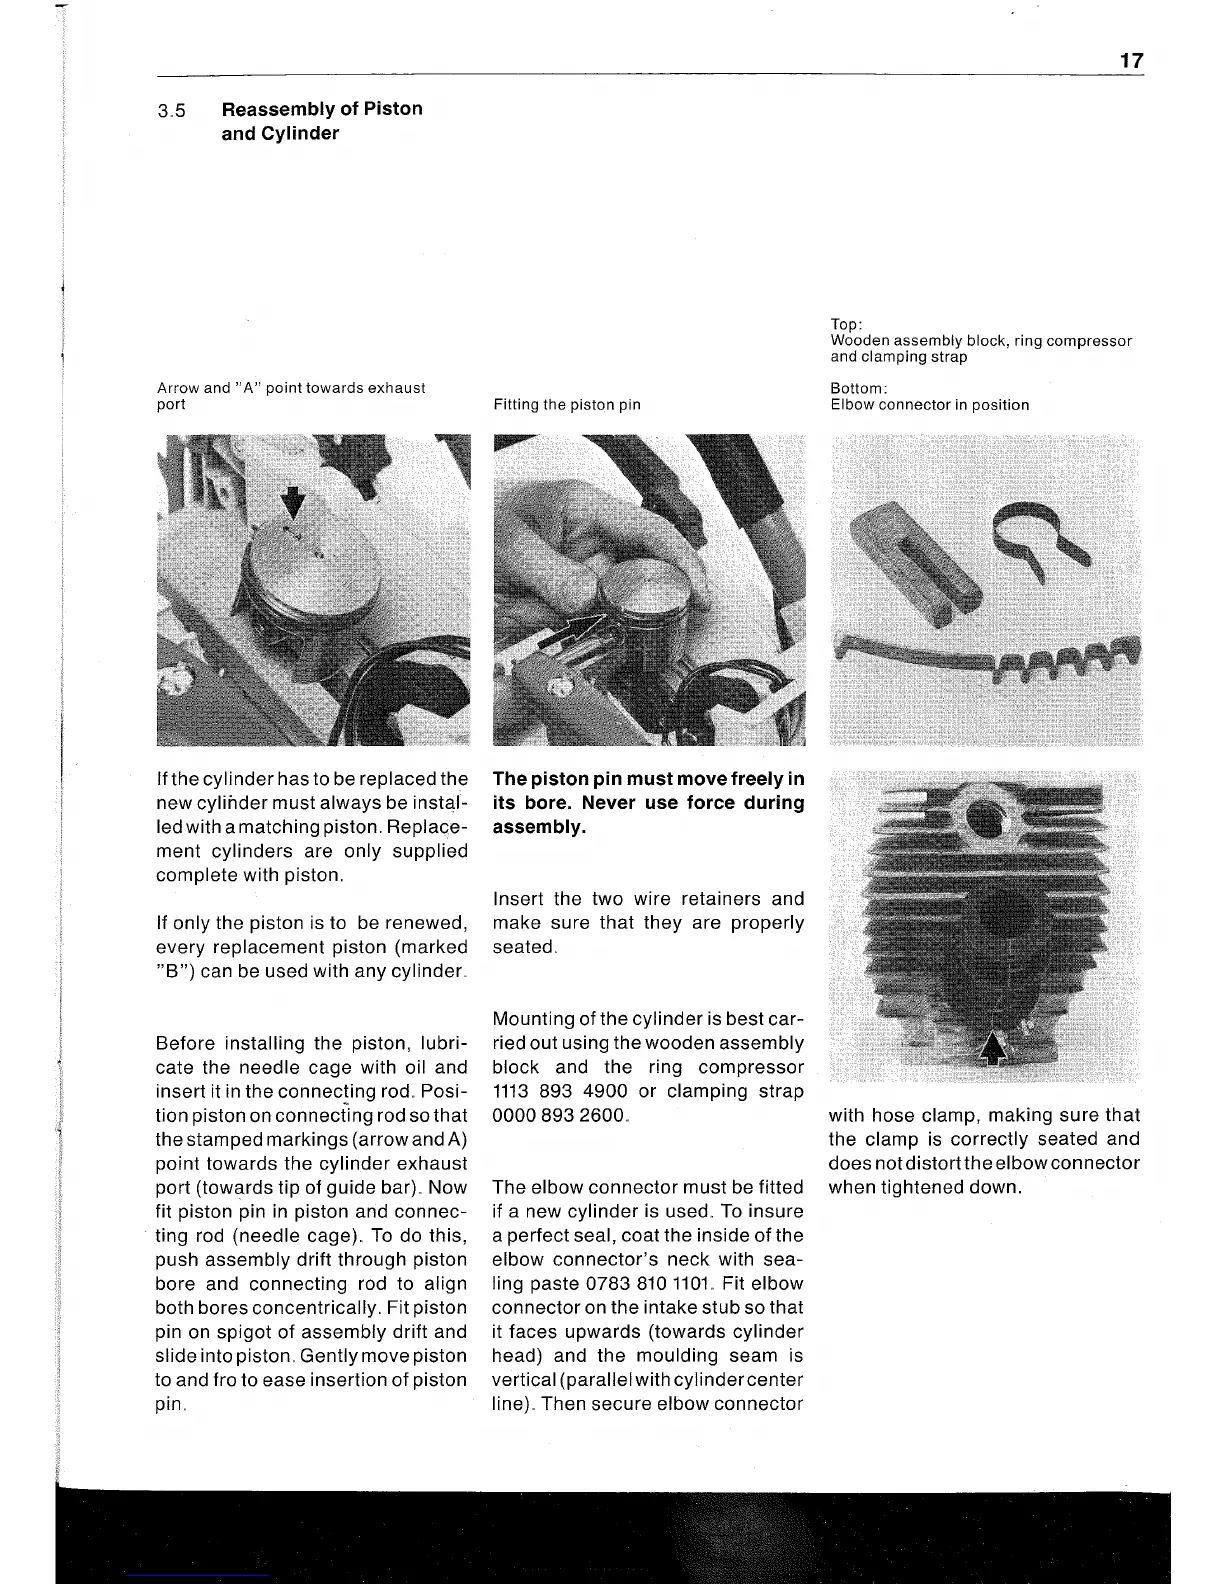
Arrow
and"
A"
point
towards
exhaust
port
If the
cylinder
has to be replaced the
new
cylinder
must always be instal-
led with a matching piston" Replace-
ment cylinders are only supplied
complete with piston"
If only the piston is to be renewed,
every replacement piston (marked
"B")
can be used with any cylinder"
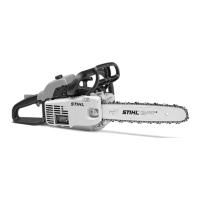
Before installing the piston, lubri-
cate the needle cage with oil and
insert it in the connec!ing
rod"
Posi-
tion piston on connecting rod
sothat
the stamped markings (arrow and A)
point
towards
the cylinder exhaust
port (towards tip of guide bar)" Now
fit piston pin in piston and
connec-
ting rod (needle cage)"
To
do this,
push
assembly
drift
through piston
bore and connecting rod to align
both bores concentrically" Fit piston
pin on spigot of assembly drift and
slide into piston" Gently move piston
to and fro to ease insertion
of
piston
pin,
Fitting
the
piston
pin
The piston pin must move freely in
its bore. Never use force during
assembly.
Insert the two wire retainers and
make sure
that
they
are properly
seated,
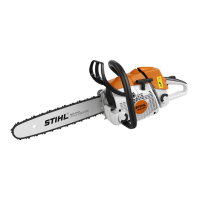
Mounting of the cylinder is best
car-
ried out using the wooden
assembly
block and
the
ring
compressor
1113
893 4900 or clamping strap
00008932600"
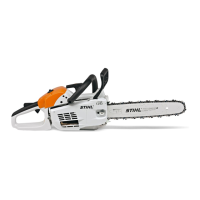
The
elbow
connector
must
be fitted
if a new cylinder is used"
To
insure
a perfect seal, coat the inside
of
the
elbow
connector's
neck
with
sea-
ling paste 0783
810
1101"
Fit
elbow
connector
on the intake stub so that
it faces upwards (towards
cylinder
head) and the moulding seam is
vertical (parallel with
cylindercenter
line)" Then secure elbow
connector
17
Top:
Wooden
assembly
block,
ring
compressor
and
clamping
strap
Bottom:
Elbow
connector
in
position
with hose clamp, making
sure
that
the clamp is
correctly
seated and
does not
distortthe
elbow
connector
when tightened down.