34 FS 240 C, FS 260 C, FS 360 C, FS 410 C, FS 460 C-M
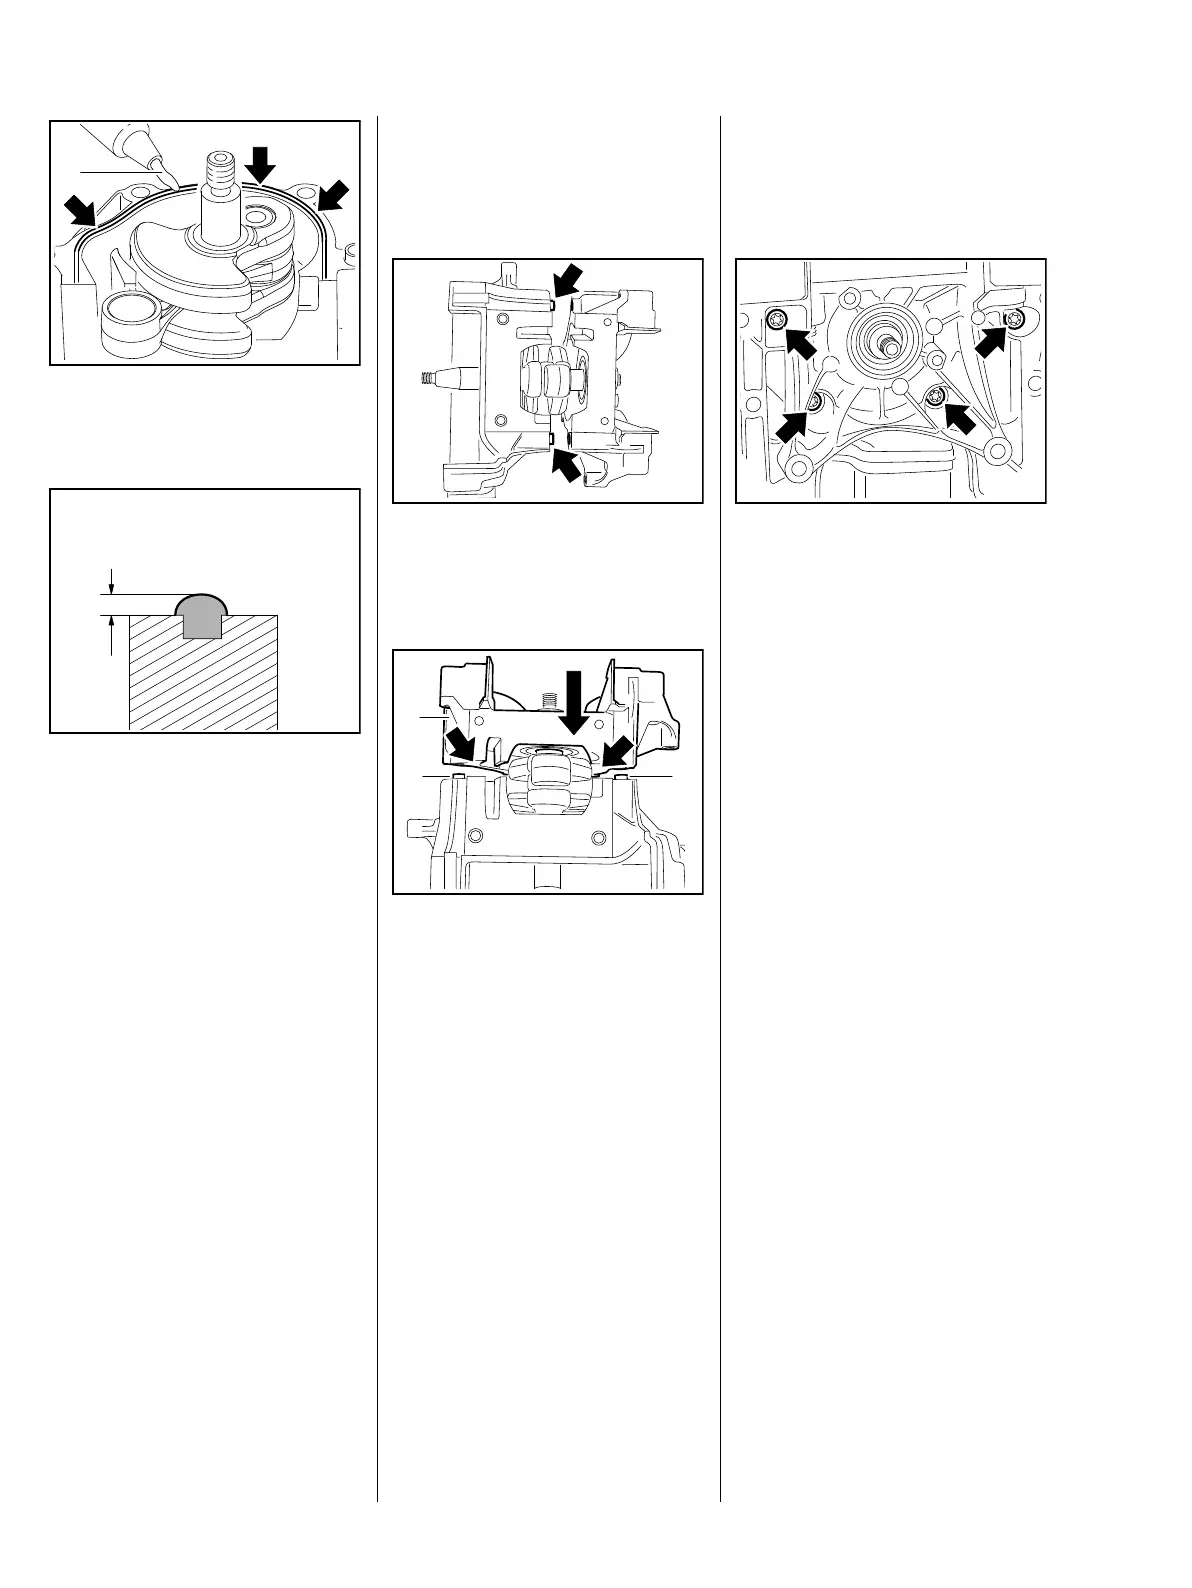
: Apply sealant (1) to the groove
on the circumference (arrows)
: Apply sealant so that a bead with
a height of a = 2 - 3 mm is formed
Sealant must not protrude into the
inside of the crankcase.
– Coat the cylindrical crankshaft
stub with oil
5904RA075 TG
1
a
938RA098 TG
Starter-side half of the crankcase
Avoid damage to the crankshaft
stub.
: Make certain that the guide
sleeves (arrows) lineup with the
holes
: Position the clutch-side half of the
crankcase on the cylindrical
crankshaft stub so that the
cylinder mating surfaces (arrows)
match
– Heat only the inner race of the
ball bearing to approx.
120 °C (250 °F)
: Slide the crankcase half (1) on
until the guide sleeves (2) are in
as far as they will go
5904RA076 TG5904RA077 TG
1
2
2
The crankcase must be fitted
rapidly, as the heat is transmitted to
the crankshaft stub and the inner
bearing race contracts.
: Fit screws (arrows) and tighten
evenly and alternately on
opposite sides until the halves of
the crankcase are completely
assembled
: Tighten screws (arrows)
– Examine and install the piston,
b 5.7
– Examine and install the cylinder,
b 5.5
– Reassemble remaining parts in
reverse order
5904RA068 TG
 Loading...