24 Series 4144 Powerhead
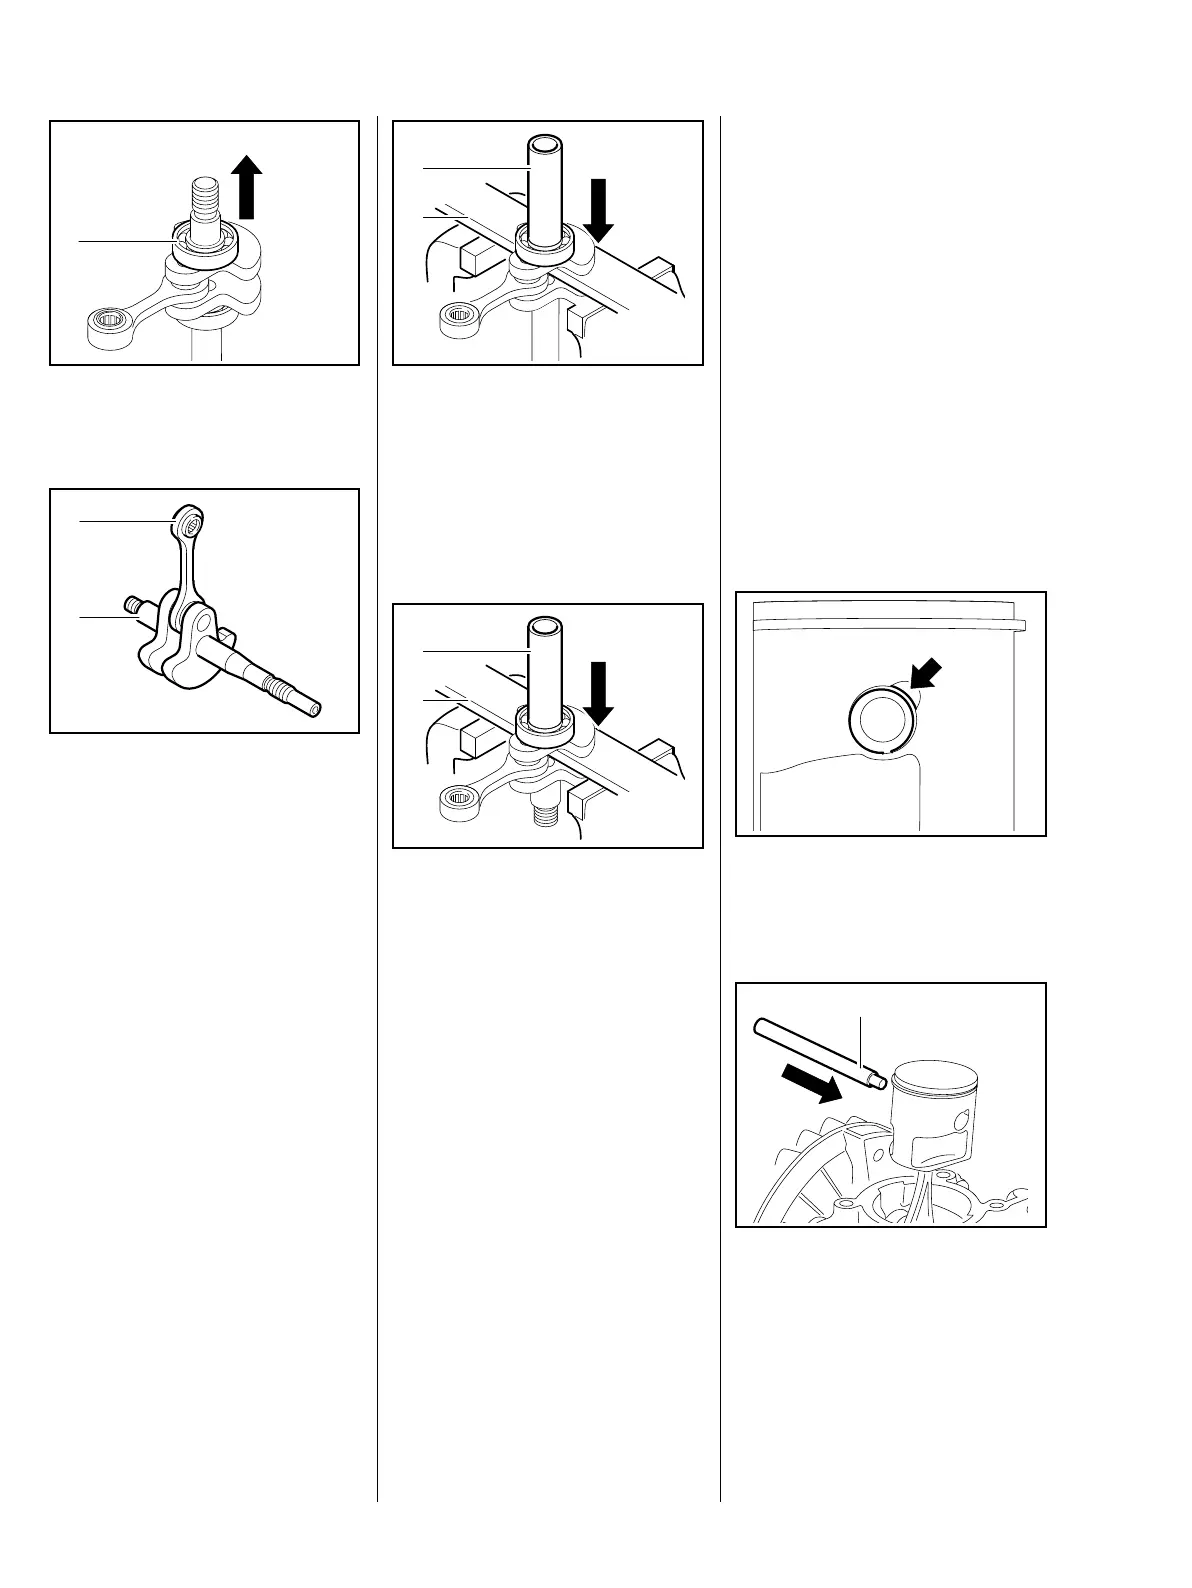
: Pull the ball bearing (1) off the
straight crankshaft stub.
The crankshaft (1), connecting rod
(2) and needle bearing form an
inseparable unit.
When fitting a replacement
crankshaft, always install new ball
bearings and oil seals.
– Before installing, clean the
crankshaft, b 9
938RA058 TG
1
1
938RA059 TG
2
Use a firm base (2) to protect the
crankshaft.
: Apply a suitable sleeve (1) to the
inner race of the ball bearing at
the carrier side and press it home
as far as stop.
Use a firm base (2) to protect the
crankshaft.
: Apply a suitable sleeve (1) to the
inner race of the ball bearing at
the ignition side and press it
home as far as stop.
– Lubricate needle bearings in
small end and on crankshaft with
oil.
– Install the piston, b 6.7
– Fit new oil seals and install the
crankshaft, b 6.5.1
– Install the engine – see service
manual for "Series 4144
Components – FS, FC, KM"
938RA060 TG
1
2
938RA061 TG
1
2
– Tightening torques, b 3.3
– Reassemble all other parts in the
reverse sequence.
6.7 Piston
– Remove the engine – see service
manual for "Series 4144
Components – FS, FC, KM"
– Remove the cylinder, b 6.4
The piston has only one snap ring. It
is fitted at the carrier side (short
crankshaft stub).
: Use a suitable tool to grip the
hookless snap ring at the recess
(arrow) and ease it out.
: Apply assembly drift (1)
1130 893 4700, small diameter
first, to the ignition side of the
piston.
938RA062 TG
1
938RA063 TG

 Loading...