Hedge Trimmer Safety Manual
English
5
Different models may be equipped with
different fuel caps.
Toolless cap with grip
To do this with this STIHL cap, raise the
grip on the top of the cap until it is upright
at a 90° angle. Insert the cap in the fuel
tank opening with the raised positioning
marks on the grip of the cap and on the
fuel tank opening lining up. Using the
grip, press the cap down firmly while
turning it clockwise as far as it will go
(approx. 1/4 turn).
Misaligned, damaged or broken cap
N If the cap does not drop fully into the
opening when the positioning marks
line up and/or if the cap does not
tighten properly when twisted, the
base of the cap may be prematurely
rotated (in relation to the top) to the
closed position. Such misalignment
can result from handling, cleaning
or an improper attempt at
tightening.
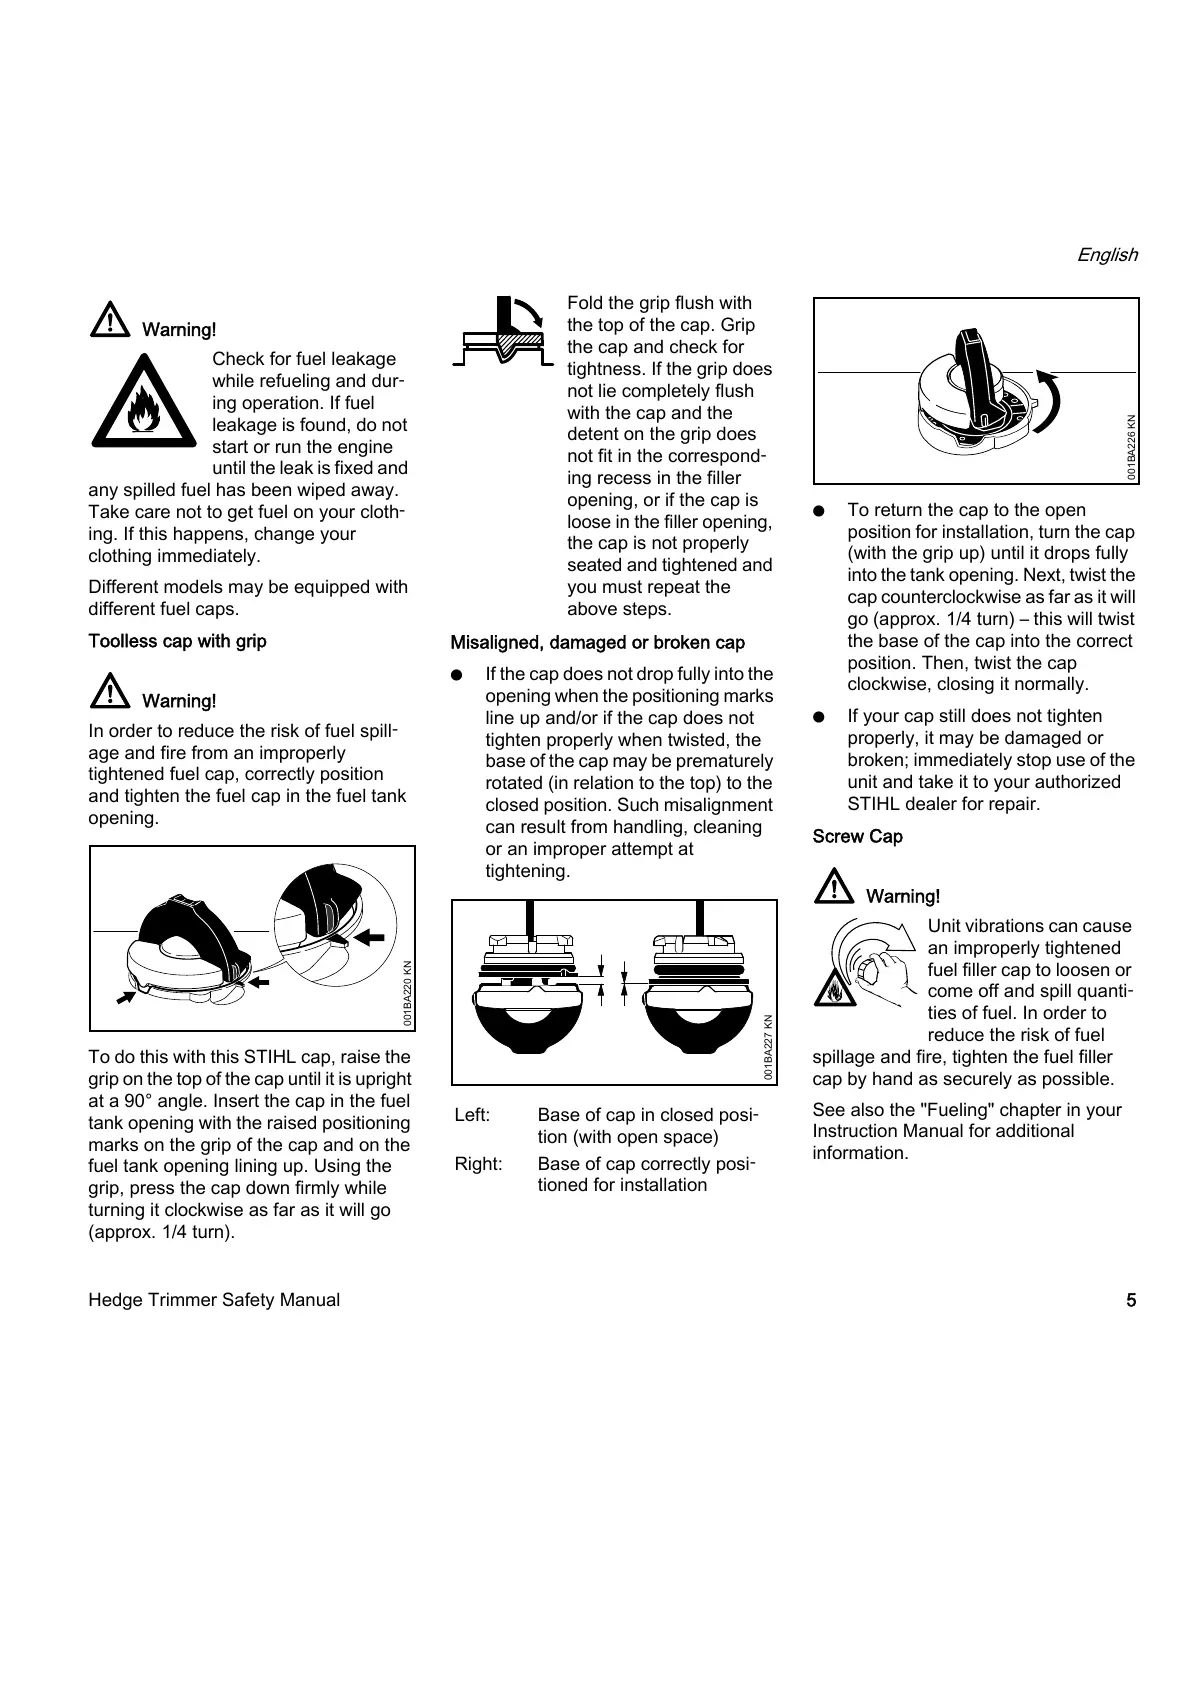
N To return the cap to the open
position for installation, turn the cap
(with the grip up) until it drops fully
into the tank opening. Next, twist the
cap counterclockwise as far as it will
go (approx. 1/4 turn) – this will twist
the base of the cap into the correct
position. Then, twist the cap
clockwise, closing it normally.
N If your cap still does not tighten
properly, it may be damaged or
broken; immediately stop use of the
unit and take it to your authorized
STIHL dealer for repair.
Screw Cap
See also the "Fueling" chapter in your
Instruction Manual for additional
information.
Warning!
Check for fuel leakage
while refueling and dur
-
ing operation. If fuel
leakage is found, do not
start or run the engine
until the leak is fixed and
any spilled fuel has been wiped away.
Take care not to get fuel on your cloth
-
ing. If this happens, change your
clothing immediately.
Warning!
In order to reduce the risk of fuel spill
-
age and fire from an improperly
tightened fuel cap, correctly position
and tighten the fuel cap in the fuel tank
opening.
 Loading...