12
NUTS
SPACERS
STUDS
HEAT SHIELD
HANDLE
ASH
CANISTER
Fig. 12
SCREW
FIREBOX
HANDLE
Fig. 11
ASSEMBLY
CAUTION:
Do not overtighten screws when attaching handles.
Overtightening screws could damage the firebox.
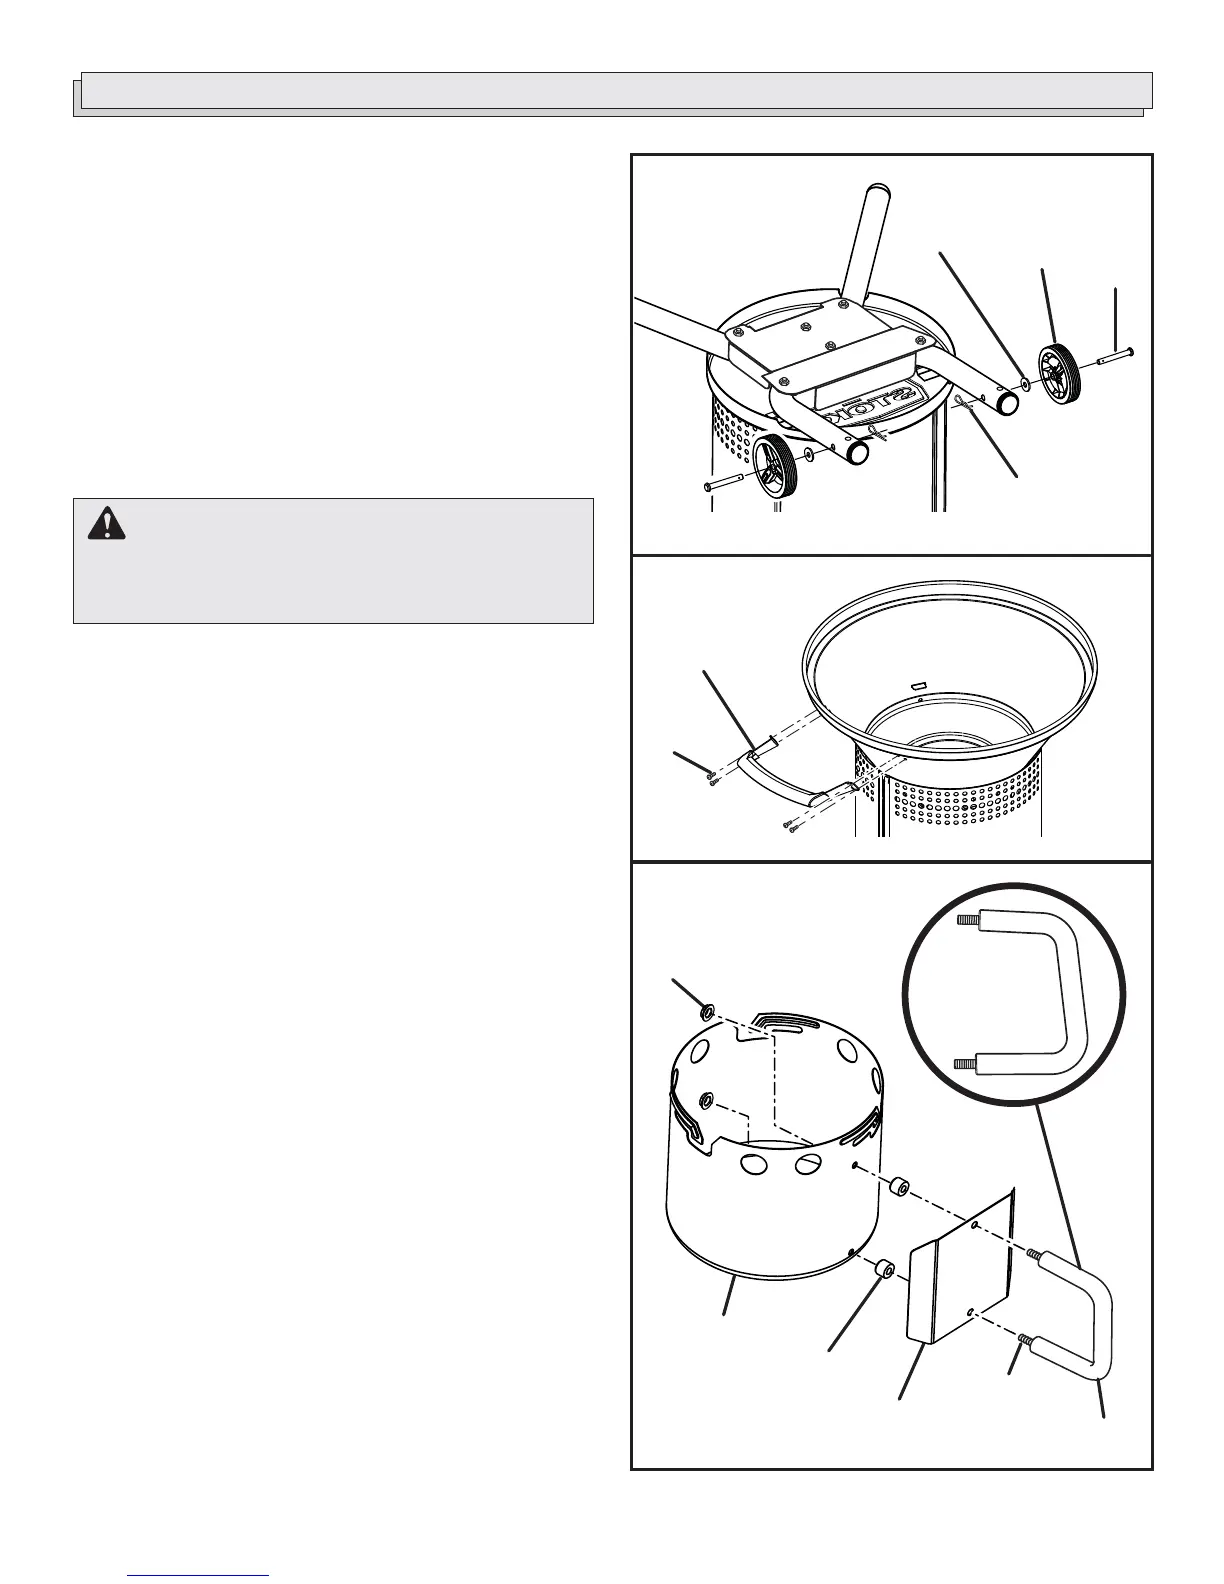
STEP 4: ASSEMBLING THE WHEELS TO THE
LEGS
See Figure 10.
Remove the following hardware from the blister pack:
EE - 2 Cotter Pins
FF - 2 Flat washers -10 mm
GG - 2 Axles
Insert an axle (GG) through each wheel. Slide a washer
(FF) over each axle.
Insert an axle through each rear leg.
Insert a cotter pin (EE) through the hole in each axle as
shown.
STEP 5: ATTACHING FIREBOX HANDLE
See Figure 11.
Turn the grill over and set it upright.
Remove the following hardware from the blister pack:
MM - 4 Round head screws
Insert round head screws (MM) through the holes in the
handle.
Securely tighten the screws to the firebox.
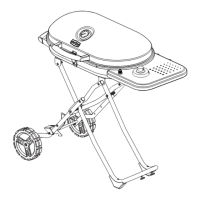
STEP 6: ASSEMBLING THE ASH CANISTER
See Figure 12.
Remove the following hardware from the blister pack:
AA - 2 Nyloc nuts
BB - 2 Spacers
Hold the ash canister handle as shown.
Insert the threaded studs on the handle through the holes
in the heat shield.
Place the spacers (BB) over the studs.
Insert the studs through the holes in the ash canister.
Slide the nyloc nuts (AA) over the studs and tighten with
an adjustable wrench or 10 mm socket.
AXLE
WHEEL
WASHER
COTTER
PIN
Fig. 10