Rev: 2020 – 3A ©2020 Store It Cold, LLC 7
Hysteresis in your cooler may be of a higher value and that is not a bad thing. Just adjust your set temperature so
that the high and low values stay within acceptable ranges for your product. Remember that the sensors of the
CoolBot are very sensitive to air changes, and the fact that the air temperature changes rapidly at a given point,
doesn’t mean that your product is changing temperature at the same rate.
Your product has significantly more mass than the CoolBot sensors and it will take a much longer time to gain
temperature when exposed to higher air temperatures.
If you were to measure your product temperature you would see that it remains essentially constant while the air
temperature in your cooler fluctuates up and down.
INSTALLING YOUR COOLBOT
Watch our CoolBot Installation Video at www.storeitcold.com/support
CONNECTING YOUR COOLBOT TO YOUR AIR CONDITIONER
See installation diagram on page 9.
ATTENTION!
We understand how important this investment is for you, and we understand the value behind the product
that you will store in your cooler. We highly recommend that you read your A/C and CoolBot installation
manual, follow the setup guide step by step, and familiarize yourself with the use and troubleshooting of the
CoolBot as well as your A/C unit.
After installing your CoolBot, we strongly advise you to run your cooler for a test period (at least 24 hours) and
place some buckets of water or non-perishables to add mass. This is to assure the system is performing
correctly and to your needs.
If you are installing your CoolBot to a Mini Split air conditioner system please use this step by step guide
along with our Mini Split Installation Guide available at our library at: www.storeitcold.com/support-library
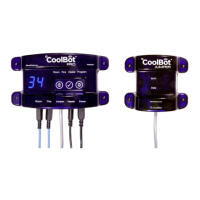
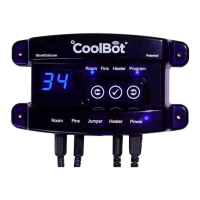
STEP 1 Plug the cables into the corresponding labeled ports at the bottom of the CoolBot.
Plug the cables in and out a couple times as sometimes they don't always “seat” all the way the first time.
If you are replacing an existing CoolBot with removable Temperature Sensors and Heater Cables, you can
leave them in place and connect them to the CoolBot.
The CoolBot works with both black and blue Temperature Sensor Cables.
The Room Sensor should hang free in the room.
STEP 2 Mount the CoolBot on the wall next to the control panel side of the A/C to make it easier to connect the
cables.
CAUTION! Make sure the wall fasteners are smaller in diameter than the hole in the CoolBot tabs or you
will break the plastic tabs.
STEP 3 Remove the air filter from the front of the A/C unit. DO NOT use it!
The filters drastically reduce cooling power and increase your chances of icing up.
Clean your fins two times a month.
Remove the front plastic grill of the A/C if you can.
Some A/C units have a “fresh air vent” tab. This allows some mix of outside air inside the room. If
applicable, make sure it is closed.
 Loading...