6
1
2 3
4
5
6
9 10 12
13
14 15
16
11
7
8
17
18
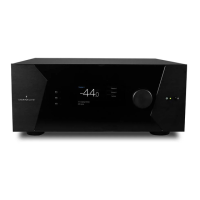
1. Standby button
2. Down button
3. Home/Acces button
4. Up button
5. Display
6. Volume/Left-Right
Press: Mute / OK
7. HDMI In & Out
8. AC Inlet
9. Ethernet port
10. USB ports
11. IR Input/Output
12. Trigger outputs
13. Digital Inputs, Optical
and Coaxial
14. Unbalanced Analog
Inputs
15. Balanced Analog
Input
16. Zone2 Digital Optical
Output
17. Channels 1 to 16
Balanced Outputs
18. Available slots for
optional modules
extending the I/O
capabilities of the ISP
MK2. Refer to Owner
Manual for more
details.
2
1
3
6
4
5
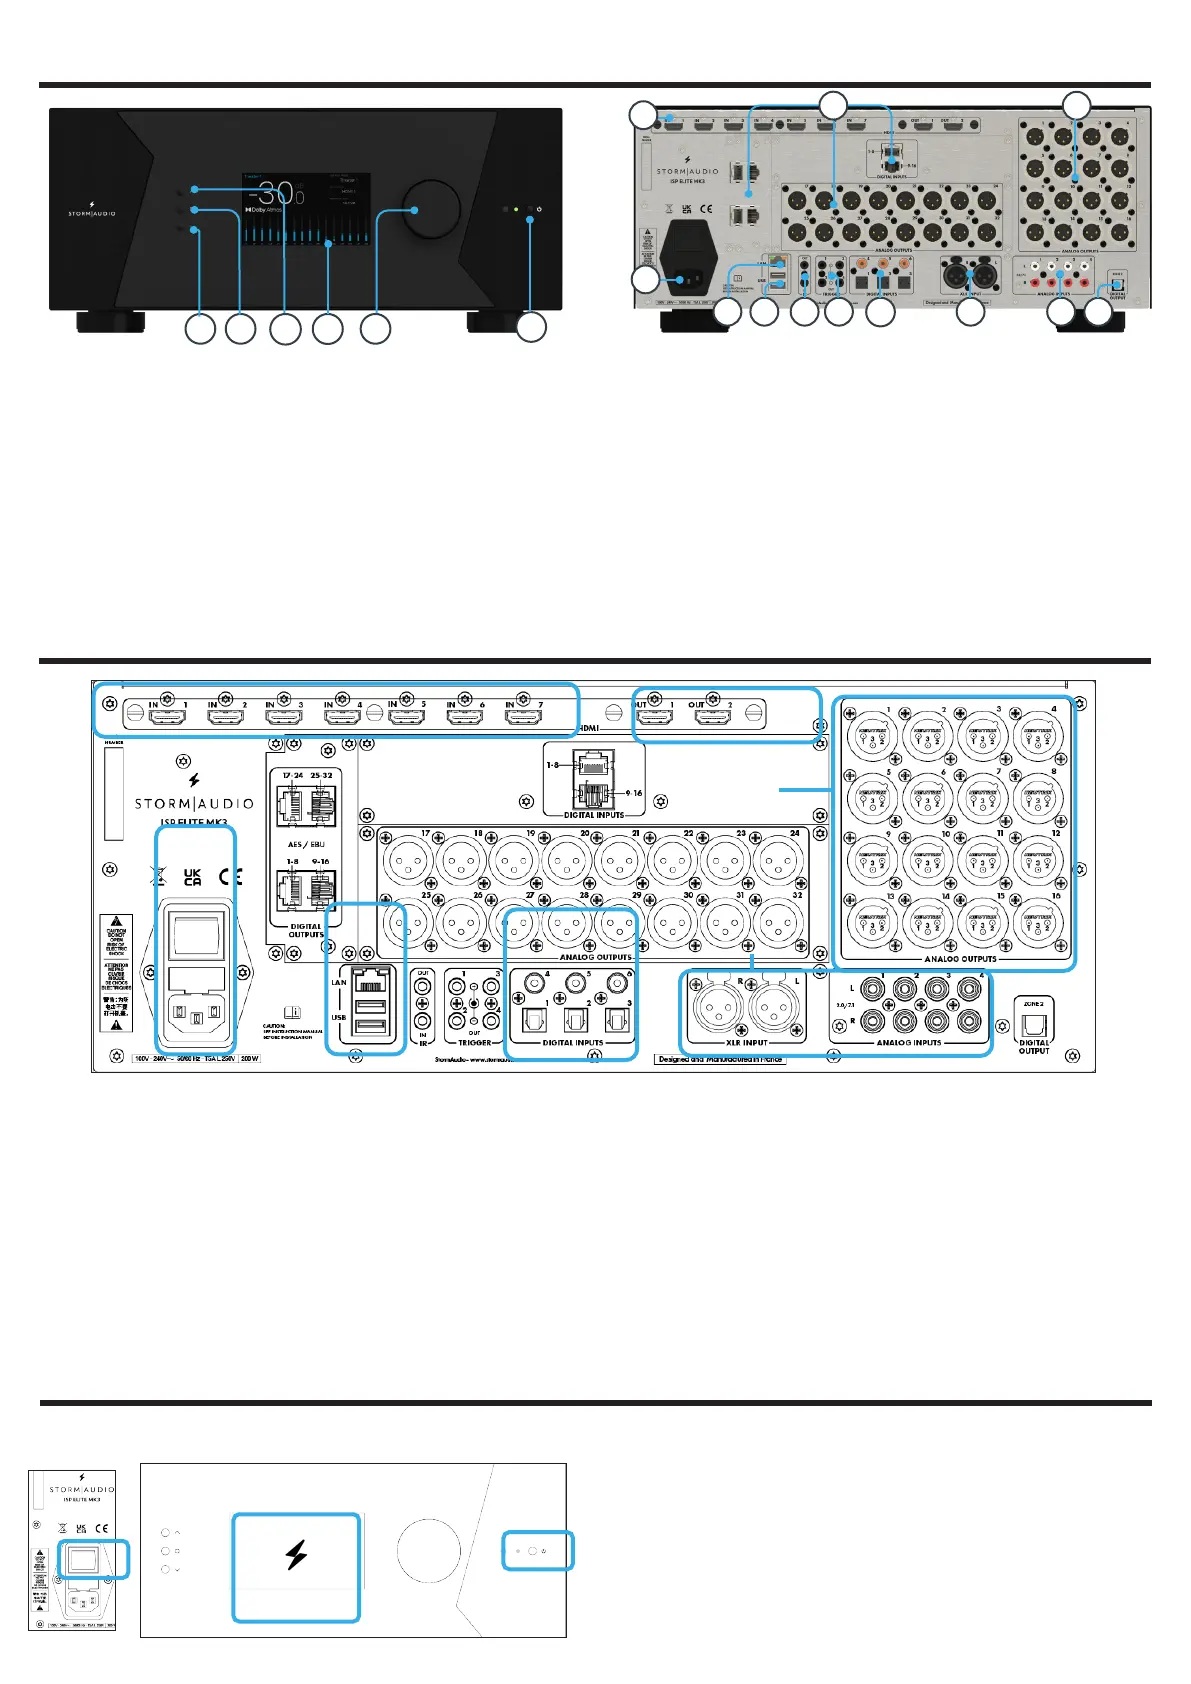
1. Connect your AC cable to a grounded outlet.
2. Connect your RJ45 LAN cable to your router.
3. Connect your digital sources either via the Toslink
Optical or Coaxial interfaces.
4. Connect your analog stereo sources to the
Unbalanced RCA inputs (for 7.1/5.1 Ch source, refer
to Owner Manual) or Balanced XLR input.
5. Connect the Balanced Outputs 1 to 16 to your
amplifiers.
6. Connect your HDMI sources on any input from 1
to 7, all supporting HDMI2.0/HDCP2.2, 18 Gbps.
7. Connect your screen or projector on Outputs 1
and 2, both supporting HDMI2.0/HDCP2.2. Note
that ARC/eARC is only supported in Output 1.
Note: check Owner Manual for other connections.
7
1 - PANELS OVERVIEW
2 - INPUTS AND OUTPUTS CONNECTION
1. Turn the Main Switch to ON (I) on the back panel.
2. Display will show the StormAudio icon for few
seconds and will enter Sleep Mode.
3. When in Sleep Mode, press the Power Button. Unit
will start. Wait until the LED is stable green.
1
2
3
First time access
3 - WEB USER INTERFACE ACCESS