7
Web User Interface description
1
2
3
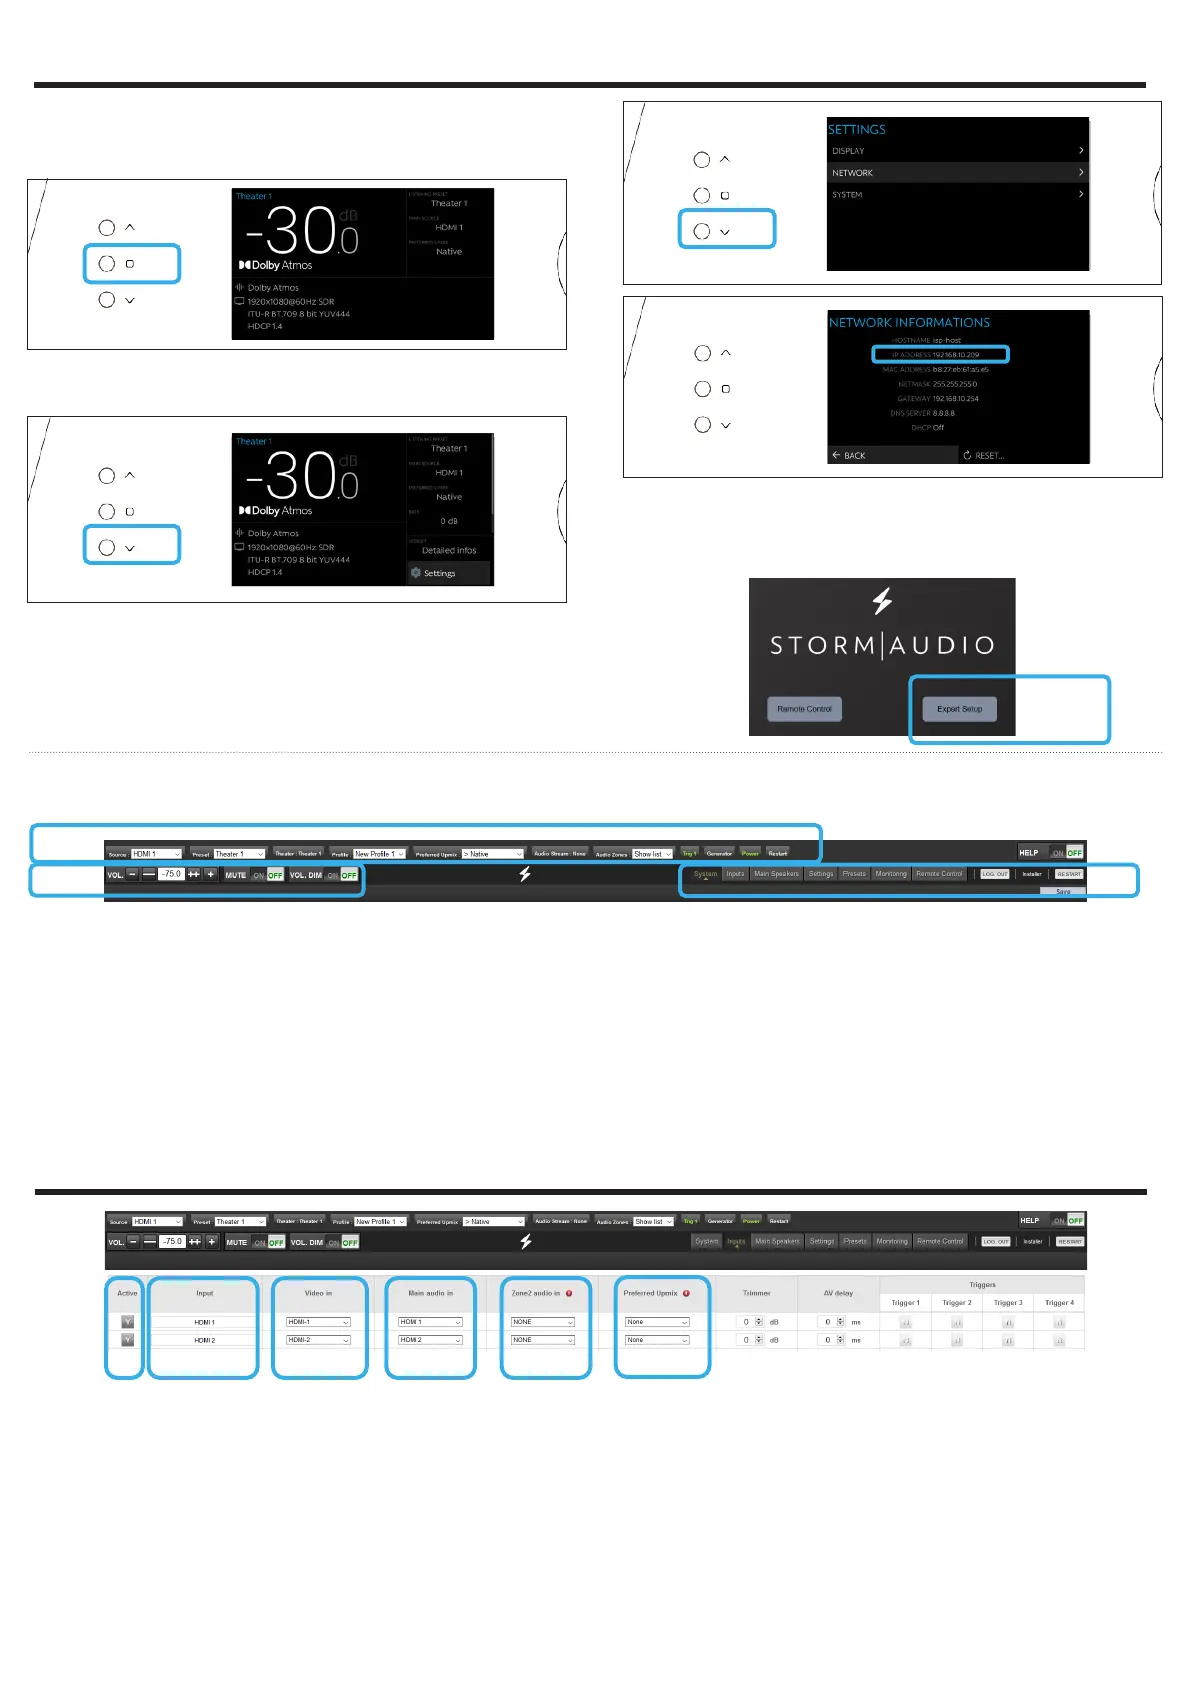
Following Expert Setup selection and password
validation, you will reach the first tab of the Web User
Interface (WebUI) called System. On top of each page
of the WebUI, there is a fixed bar for easy access to:
1. Key remote control commands of the unit, such
as Source or Preset selection.
2. Volume control and its related features, including
MUTE and DIM (20dB decrease by default).
3. The configuration tabs for specific part of the
product configuration: System, Inputs, Speakers,
Settings and Presets. It also provides Remote
Control and Monitoring page access.
Select the «Inputs» tab to proceed with the Inputs
Configuration.
1 2 3 4 5 6
1. Unused inputs should be turned to N (No) to not
appear in the Remote Control.
2. Default names are given to the inputs. You can
use it unchanged or edit it to your preference.
3. Select which HDMI video input must be activated
when the input is selected.
4. Select where the audio should come from for the
defined input.
5. Select where the audio should come from for the
defined input when selected as Zone2 input in the
Remote Control.
6. Choose to force a Preferred Upmix mode when
selecting the Input.
Note: check Owner Manual for more information
about the other settings.
3 - WEB USER INTERFACE ACCESS
4 - INPUTS CONFIGURATION
4
4. When the Home display screen is shown, press
the Select button (rounded square) to access the
Adjustment Menu.
5. Using the Arrow button, access the Settings and
press the Volume knob to Validate.
7
5
6. Select the Network item and press the Volume
knob to validate. This will give access to the
Network info where you can take note of the IP
address and also reset the network parameters.
Select Back to exit.
6
7. Open your Web Browser in a laptop and enter
the IP address in the URL area. Then select Expert
setup and use installer as password.