V 11/17
52
through the special rubber hose. The hose must be connected to a pipe with a suitable gradient,
ensuring no unnecessary bends are created. Do not run siphons and do not immerse in water.
Step two: mount the wall-installation plate
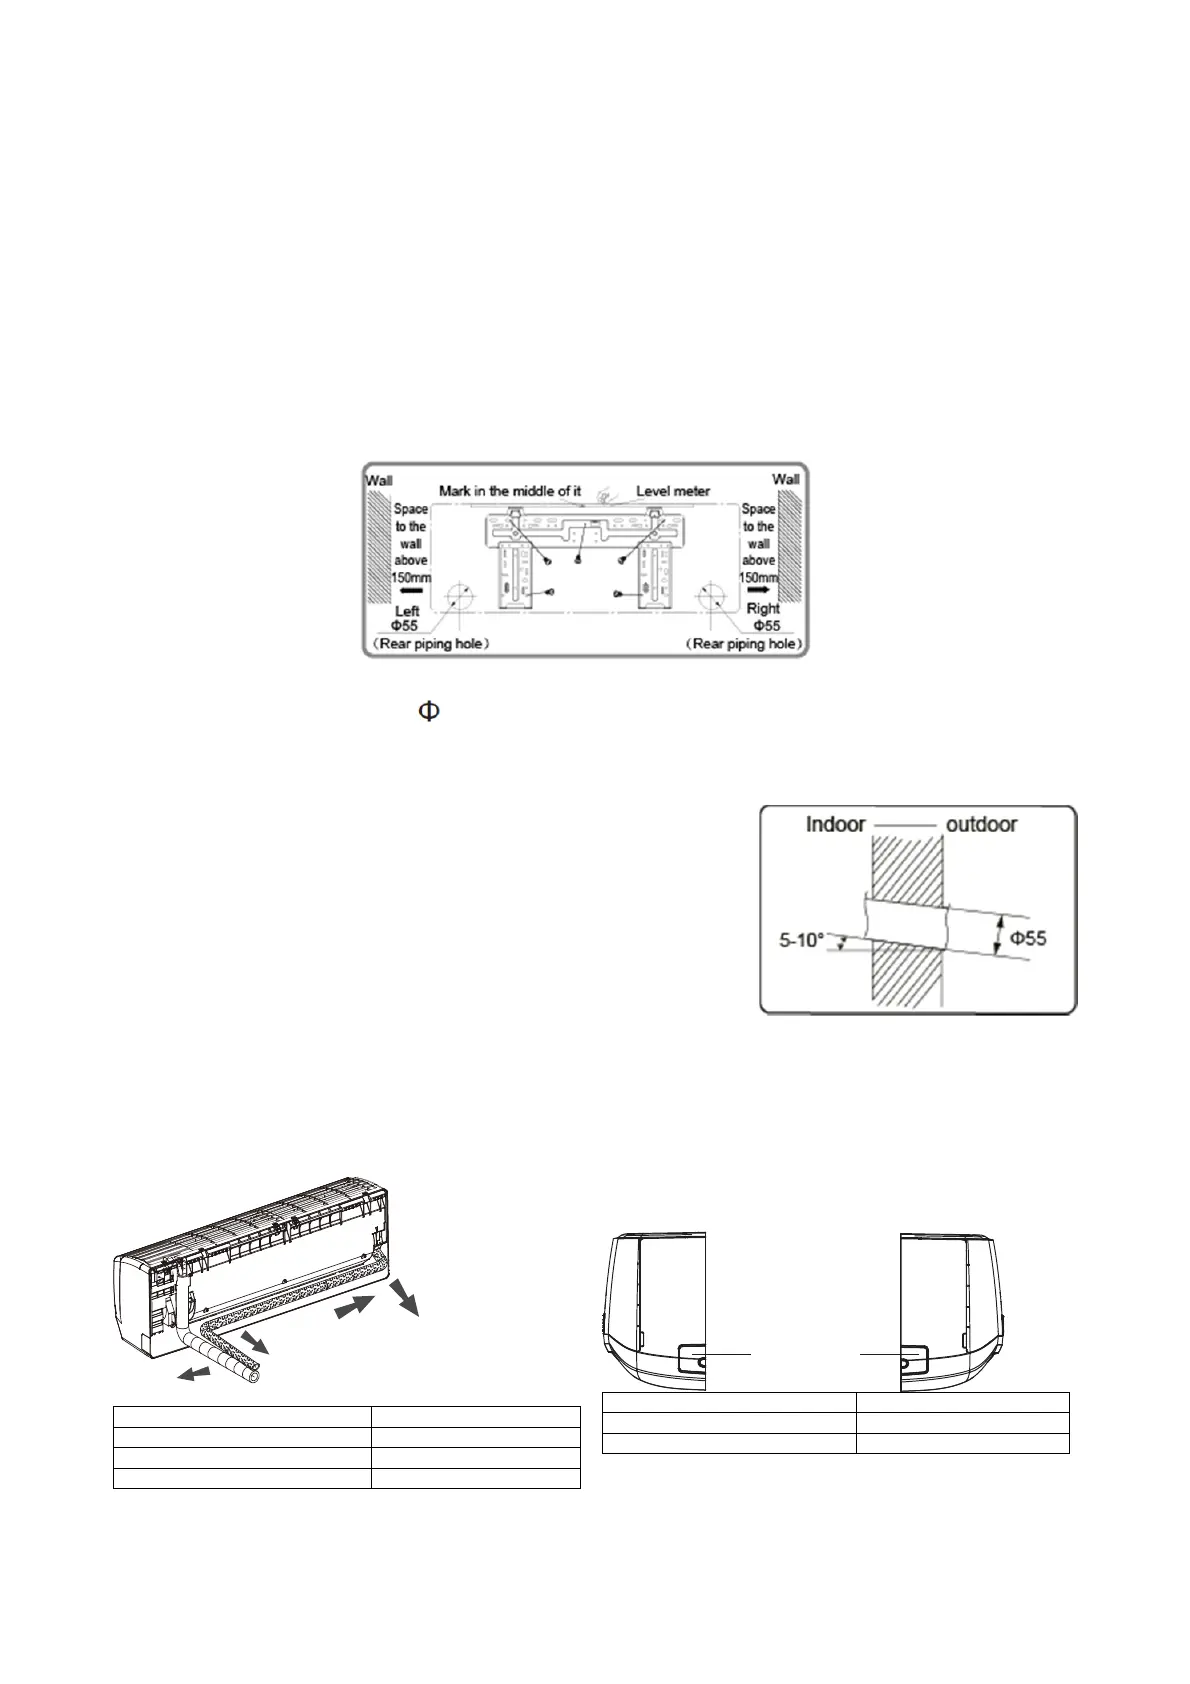
1. Position the installation plate on the wall. Use a level to position it horizontally and mark the
holes for the bolts on the wall.
2. Drill the holes for the screws in the wall with a hammer drill (the drill bit must match the plastic
wall plug). Then insert the wall plugs into the holes.
3. Secure the plate to the wall with the self-tapping screws (ST4.2X25TA). Check it is securely
attached by pulling on the bracket. If a plastic wall plug is loose, drill another hole nearby with the
hammer drill.
Step three: drill the hole for the piping
Select the position for the piping hole according to the direction of the outlet pipe. The piping hole
must be slightly lower than the wall-installation frame, as shown below.
Drill a piping hole of diameter 55 at the chosen location for the outlet pipe. To allow for proper
drainage, the piping hole in the wall must slant slightly downwards to the outdoor side, with a
gradient of 5 – 10°.
N.B.:
• Take the necessary safety measures when
drilling the hole and do not allow dust to
enter.
• The plastic wall plugs are not supplied but
must be purchased on site.
Step four: outlet pipe
The pipe can be brought out in various different
directions: right, rear right, left or rear left.
destra right
posterioredestra rearright
sinistra left
posterioresinistra rearleft
Once you have selected the direction of the
outlet (left or right), drill the corresponding
hole at the bottom.
destra right
forodapraticare holetobedrilled
sinistra left
sinistra
posteriore
sinistra
destra
posteriore
destra
foro da
praticare
sinistra
destra
 Loading...