PRODUCT MOUNTING
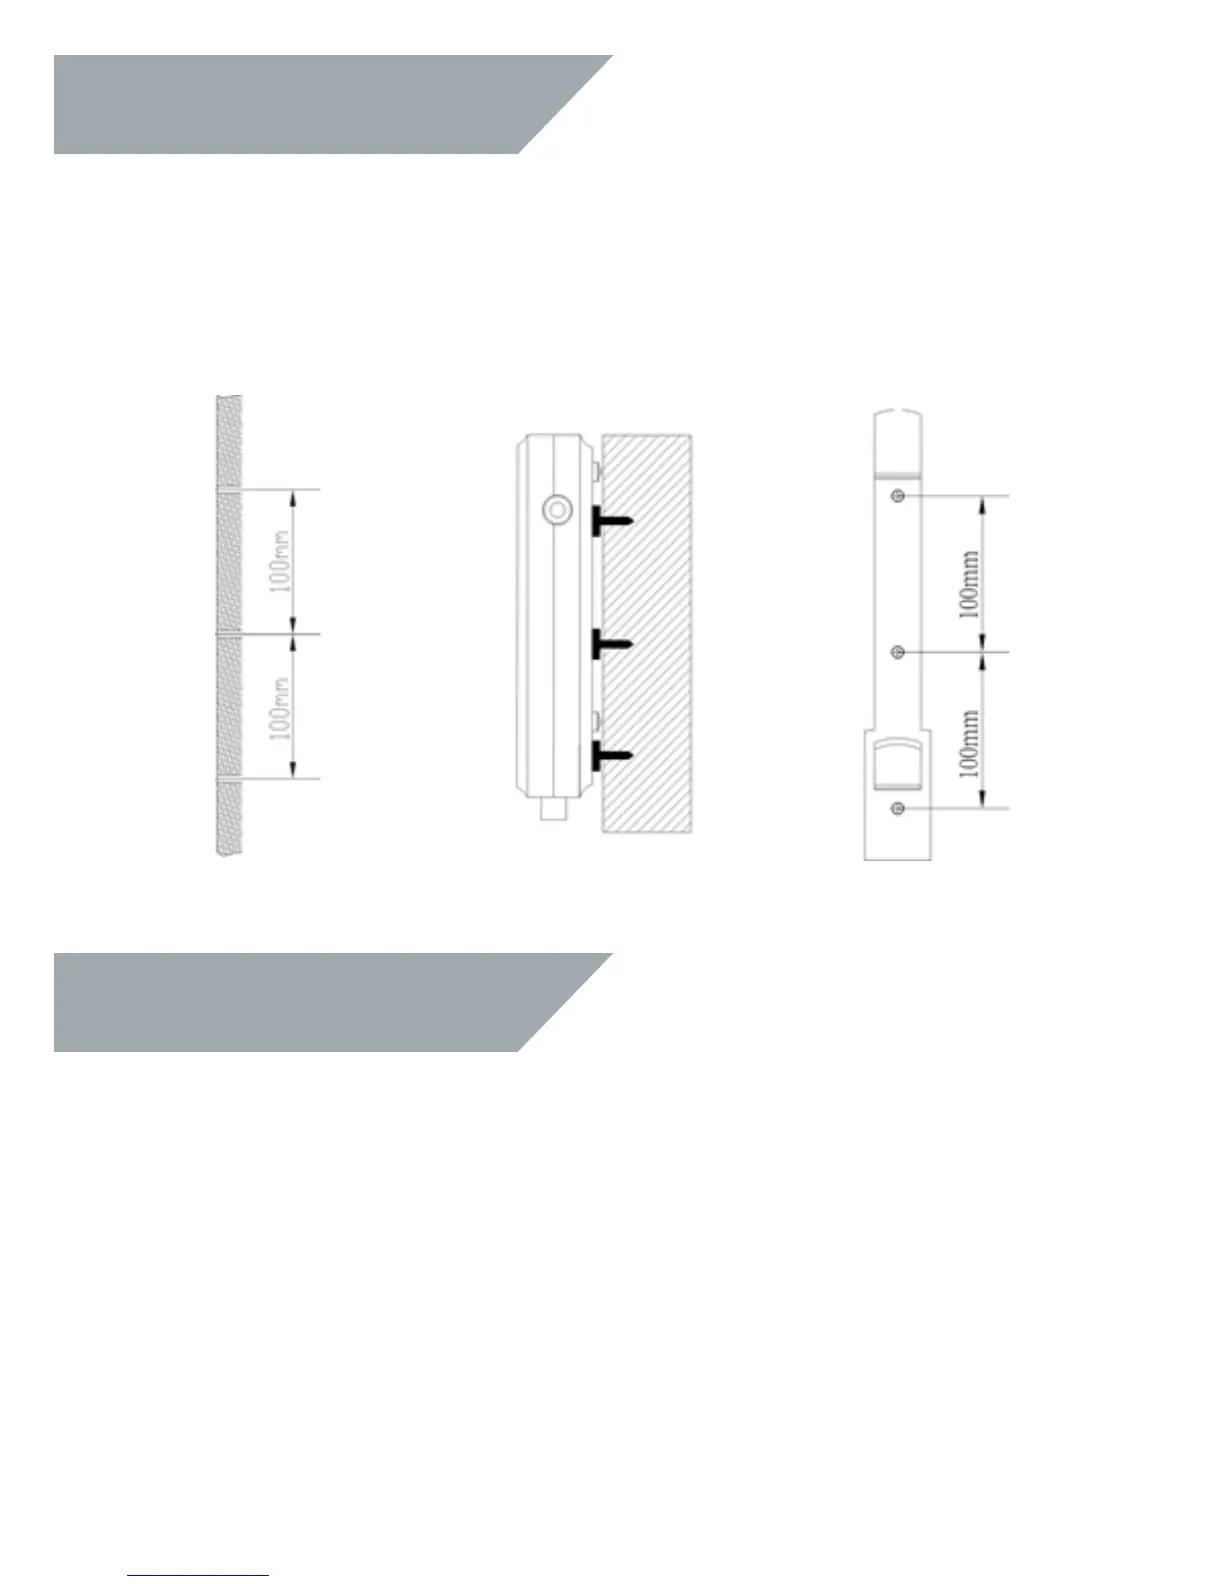
Please remove the hanger bracket from the back of the water heater, and position on the wall in the
orientation shown below. Drill three 6.00mm holes in accordance with the hanger bracket, these holes
should be 100mm apart as shown below. Using wall plugs and suitably long screws secure the hanger
bracket to the wall. Once the hanger bracket is installed and secure the heater unit can be mounted to the
bracket.
INSTALLATION
Once your product has been sited in accordance with the diagrams above please connect your product
to the mains water supply using a 1/2” tap hose to the blue connection of the unit, NOTE: a check valve
should be fitted before your electrical water heater. Fit the supplied filter between the unit and the hose.
We suggest fitting an isolation valve and ball valve before the unit to facilitate removal of the tap and
servicing. Once the cold mains has been fitted you may use another 1/2” tap hose to connect your heater
to the properties hot pipework circuit (this circuit could be 1 outlet or multiple outlets, please ensure your
unit is capable of heating the number of outlets you are asking it to). REMEMBER: Before turning off the
water supply to the unit you must isolate its electric supply, operating the unit while there is no water can
cause premature failure and invalidate your warrenty. DO NOT turn on your electric supply at this time.

 Loading...