Selecng the Proper Stud Collet (Stud Holder)
Listed below are the common collet styles, the choice between these setups is usually a maer of per-
sonal preference
1. The B collet which is a two-piece assembly (collet and insert). The insert determines how much of
the stud is engaged in the collet.
2. The CI (Collet Insert) which is a single part and the amount of the stud that is engaged is predeter-
mined.
3. Standard Adjustable Chucks have an adjustable internal screw to manually adjust for the engage-
ment of the stud.
The collet sizes are based on the diameter of the stud to be welded.
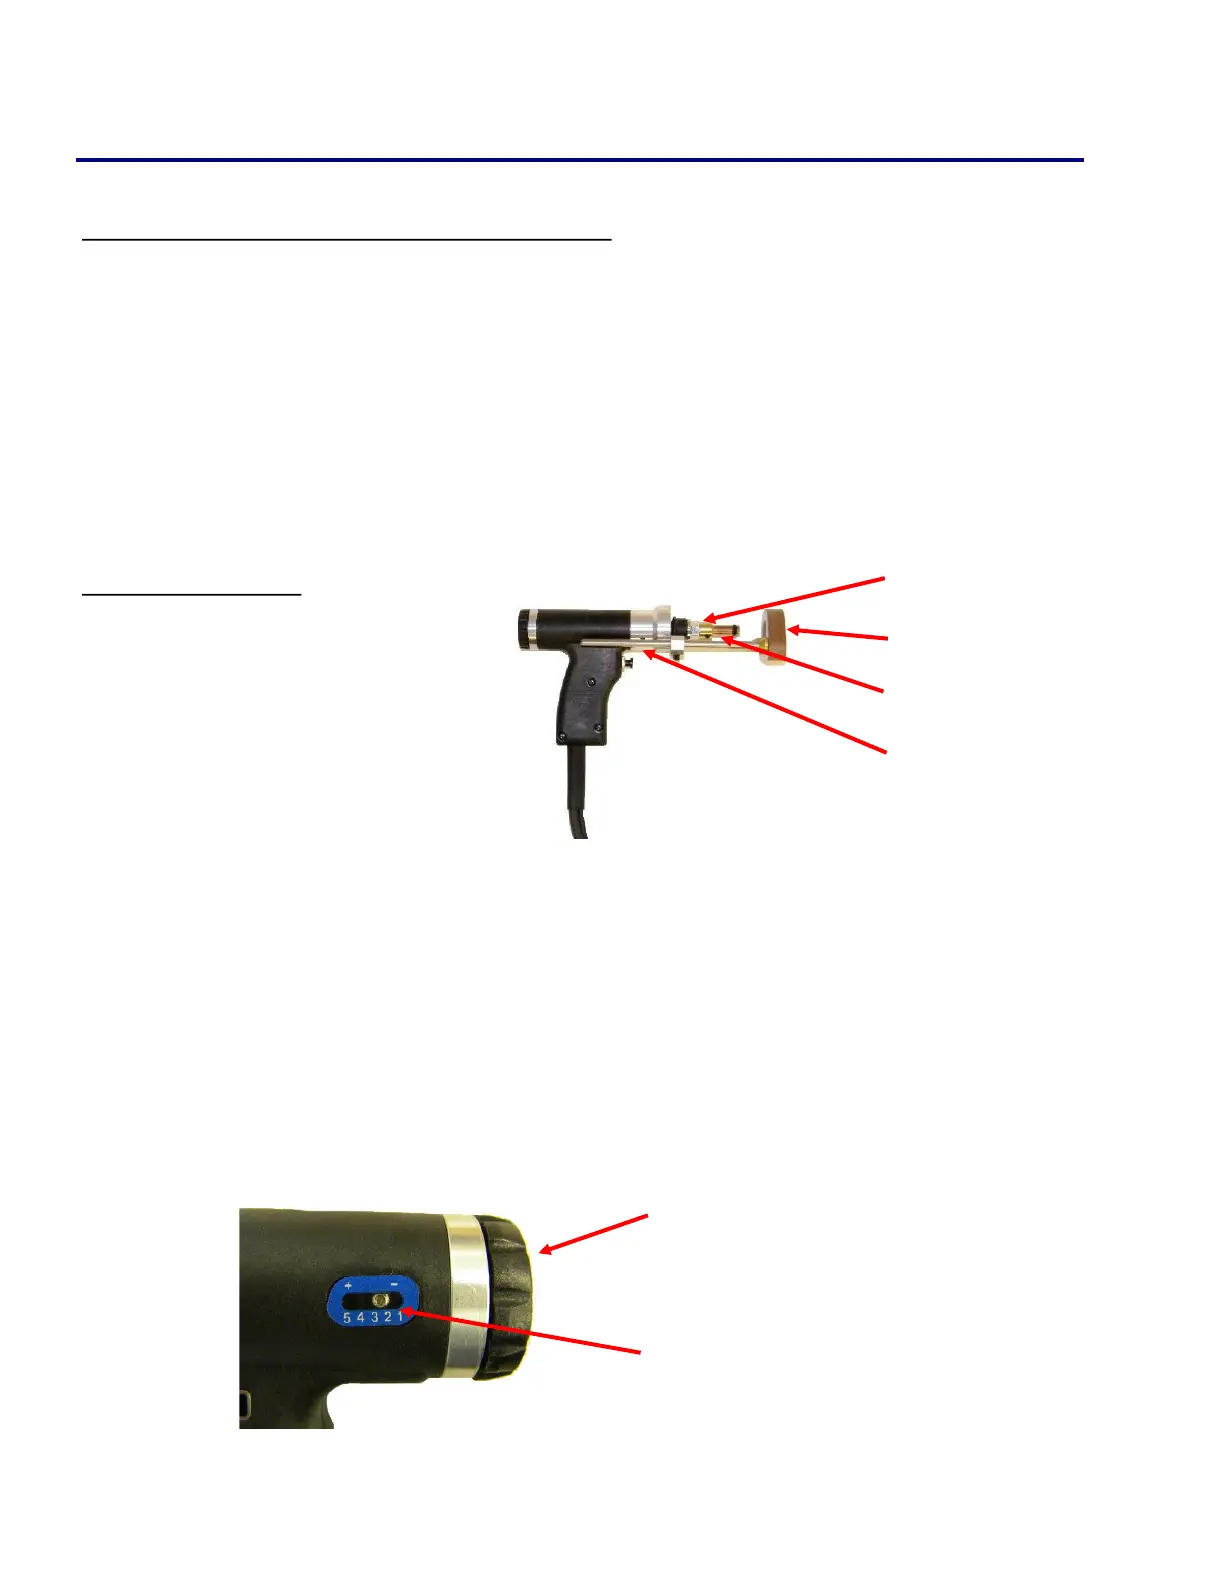
CD Stud Gun Setup
1. Place the collet into the collet
adapter of the stud gun and set the
locking screws to hold the collet in
place.
2. Mount the two legs and foot piece
onto the stud gun. The collet
should be centered through the
opening of the foot piece.
3. Insert the stud to be welded into
the collet.
4. Adjust the leg and foot piece by sliding it into posion unl approximately 1/8” of the stud pro-
trudes from beyond the foot piece. Lock legs in place with the set screws.
5. The tension seng is adjusted by turning the adjustment cap on the back of the stud gun. On the
side of the stud gun is the tension seng indicator, this displays the tension seng of the internal
spring.
6. The spring tension seng of the stud gun will vary depending on the applicaon. Generally, mild
steel and stainless steel should be set in the 1 to 2 range. Aluminum and other nonferrous metals
will require sengs in the 3 to 5 range.
SETUP AND WELDING
Collet Adapter
Collet
Leg Piece
Adjustment Cap
Tension Indicator
10
Foot Piece