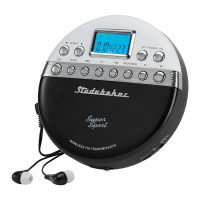
POWER SOURCE
BATTERY OPERATION
Notes: If you are using an external AC adapter (not included) for powering the unit,
disconnect it before installing batteries.
For best performance and longer operating time, we recommend the use of alkaline batteries.
1.
Open the BATTERY DOOR on the bottom of the unit.
2.
Follow the polarity diagram shown in the BATTERY COMPARTMENT to insert 2 X ‘AA’
size (UM-3) batteries and close the BATTERY DOOR.
3.
The LCD backlight lasts for 30 seconds when you press the buttons if you are using
battery power.
4.
The battery low indicator “ ” will blink on the LCD DISPLAY when the batteries need to
be changed.
BATTERY WARNING
1.
Be sure the batteries are installed correctly. Wrong polarity may damage the unit.
2.
Use only the size and type of batteries specified.
3.
Do not mix old and new batteries.
4.
Do not mix alkaline, standard (carbon-zinc) or rechargeable (nickel-cadmium) batteries.
5.
If the unit is not to be used for an extended period of time, remove the batteries. Old or
leaking batteries can cause damage to the unit and may void the warranty.
6.
Do not try to recharge batteries not intended to be recharged; they can overheat and
rupture. (Follow battery manufacturer’s directions).
7.
Do not dispose of batteries in fire, batteries may leak or explode.
AC ADAPTOR OPERATION (adaptor not included)
This unit can also be powered using an AC adapter (not included) wi
th an input voltage of AC
120V ~ 60Hz, and output voltage of DC 4.5V
700mA .
1.
Plug the AC adaptor (not included) into normal AC power outlet socket.
2.
Insert the DC plug of the AC adaptor cord into the DC IN JACK (#3).
3.
When the unit is operated using AC adapter, the battery source will automatically be
disconnected.
WARNING: Before connecting to the power supply, ensure that the supply corresponds to
the information on the rating label at the back of the apparatus
USB POWER
This unit can also be powered using the
built-in MICRO USB JACK (#2) and a USB power
source (not included) like a cell phone charger, computer USB port or USB power bank. USB
cord (included) is also required.
1. Use a USB power source with a minimum output of DC 5V
700mA.
2. Plug one end (micro USB plug) of the USB cable into the MICRO USB JACK (#2) and the
other end of the cable to the USB charger/power bank/computer (not included).
3. The battery source will automatically be disconnected when using the USB port for
powering the unit
Caution: When not using USB power, disconnect the USB cable.
(Batteries included)

 Loading...