EasyManuals Logo

Studer Solsafe concept User Manual

Studer Solsafe concept
17 pages
To Next Page IconTo Next Page
To Previous Page IconTo Previous Page
Page #16 background imageLoading...
Page #16 background image
Appendices – Page 8 / 9
Application Note 003
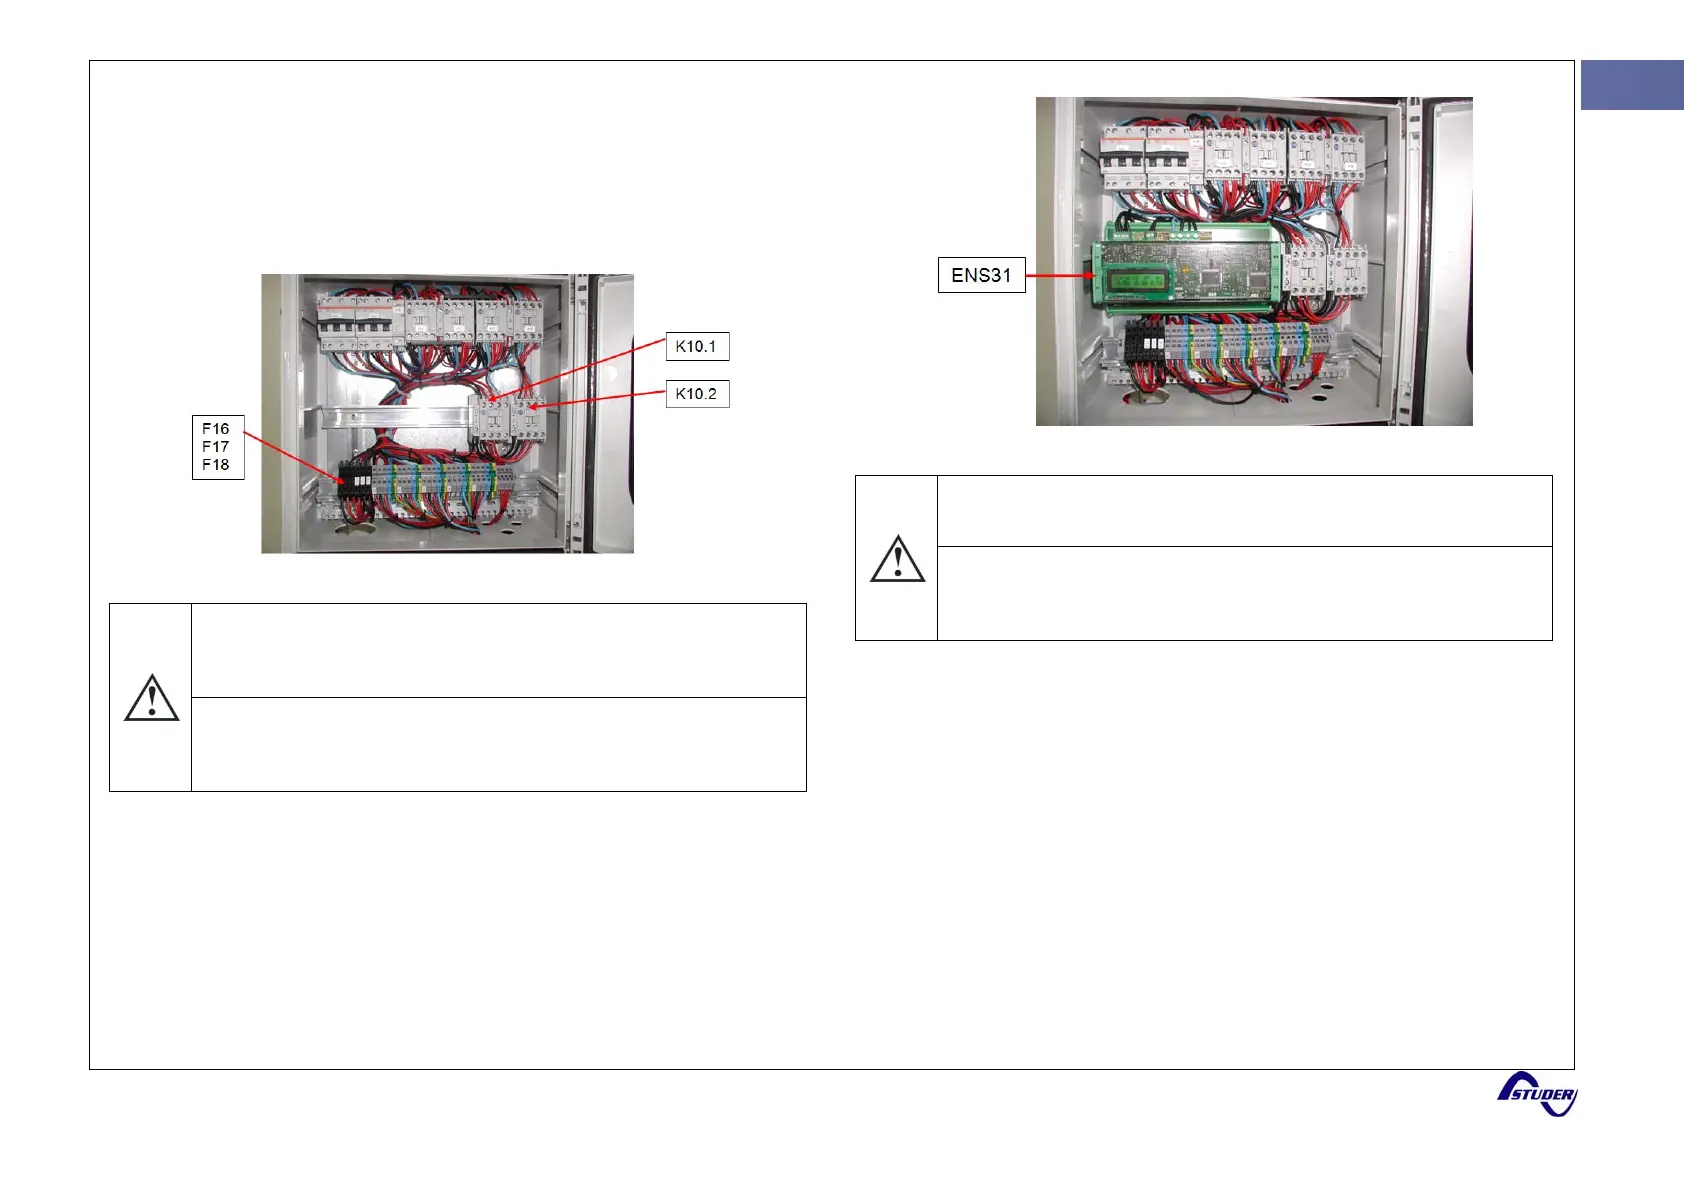
Here are added onto the middle bar the ENS31 relay’s K10.1 and
K10.2 and on the bottom bar the ENS31 fuse holder’s F16, F17
and F18.
It makes sense to put ENS31 before placing K10.1 and K10.2 to
adjust the height of the central bar. Then, remove the ENS31 to
facilitate wiring K10.1 and K10.2 and remplace it.
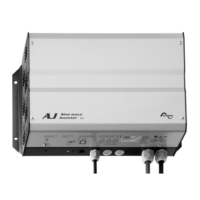
Finally, connect the ENS31 with particular attention to the order of
phases
Note that the neutral must be connected to the ENS31 otherwise
the unit may be damaged. (All references for the ENS31 are in its
user manual.)

Questions and Answers:

Question and Answer IconNeed help?

Do you have a question about the Studer Solsafe concept and is the answer not in the manual?

Studer Solsafe concept Specifications

General IconGeneral
BrandStuder
ModelSolsafe concept
CategoryInverter
LanguageEnglish

Related product manuals