Starting operation
*
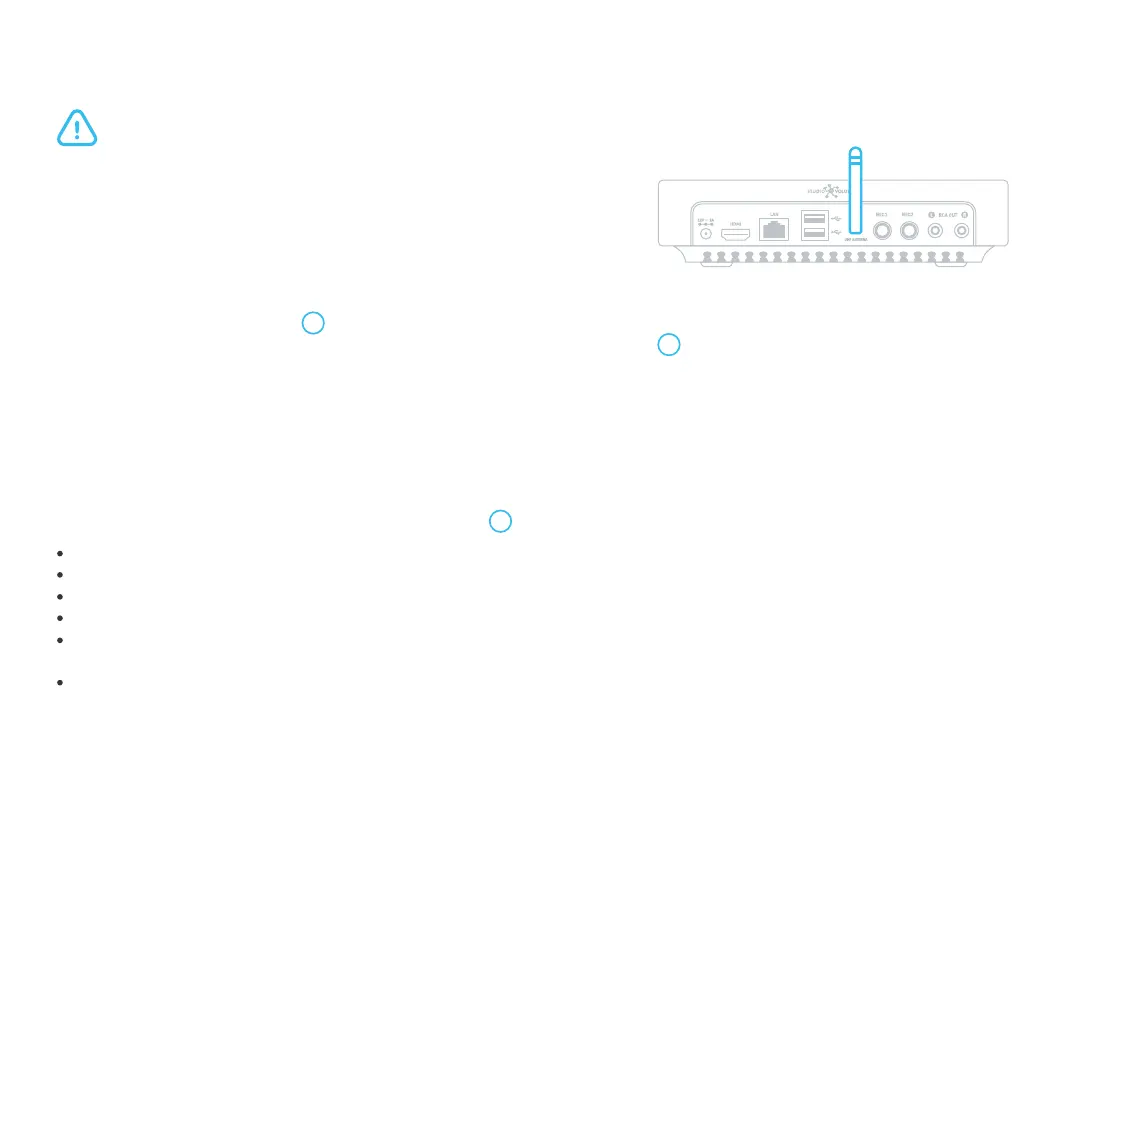
For efficient and correct microphones operation, the antenna should be installed vertically, and the karaoke system should be placed at least 0.5 meters away
from walls, floor, and metal surfaces.
Connect the supplied antenna to the UHF ANTENNA socket at the
back panel of the karaoke system*.
1.
Connect the karaoke system to the mains.2.
Unscrew the protective cap 3 on the microphone and place the battery with the pole "+" downward. Screw the
cap back and switch the microphone on by pressing the "Button Switch" 1 briefly. Repeat the same for the
Microphone 2.
3.
The microphones are now ready for use.
Before starting, make sure the karaoke system is unplugged.
A brief press switches the microphone on.
A brief press with the microphone on switches the microphone to the "MUTE" mode.
3 brief presses with the microphone on switch it to the channel-changing mode.
A long press (~2 sec) switches the microphone off.
A prolonged press (~ 6 sec) with the microphone off switches it to the mode of the microphone interfacing with the
karaoke system.
A very long press (~10 sec) with the microphone off changes the microphone number.
Microphone control with the "Button Switch" 1 :
Recommendations
We recommend that you follow the rules below:
Hold a microphone in its middle. If you hold it at its lower part, you interfere with its built-in antennas.
Keep the microphone in the almost horizontal, slightly downward position.
Direct the sound to the center of the microphone membrane.
Do not move the microphone toward the loudspeakers.
The best distance between the microphone and your lips is 2-5 cm.
Bring the microphone closer to your lips several seconds before you start singing to ensure the first phrase is
complete.
Mute your microphone when it is not in use.
1.
2.
3.
4.
5.
6.
7.