CONDENSER IOM MANUAL
25
refrigerant charge before attempting repairs. Adjacent piping
must be thoroughly cleaned by removing all paint, dirt and oily
film. Use wire brush, sandcloth or sandpaper and wipe the area
with clean, dry cloths. Protect nearby parts from heat damage
by wrapping with water-soaked cloths
4.2.3 Refrigerant Piping
When replacing components within the cabinet, the following
consumable materials are recommended: When brazing copper-
to-copper connections (piping liquid line or suction line), use a
phosphorus copper brazing alloy with 15% silver. General purpose
silver brazing alloy with 45% silver is to be used for copper-to-
brass or copper-to steel.
For liquid line repairs at the drier, strainer, sight glass, or expansion
valve, use a 95% tin to 5% antimony solder with flux. When
component replacement is complete, remove all traces of flux.
After any repair, pressure check the system, checking for leaks
prior to recharging the system.
4.2.4 Electrical System
All electrical connections should be checked to be sure that
they are tight and properly made. Check all switches,
contactors and wiring. Contactors should be examined and
replaced if the contact pads are worn or pitted.
4.3 Troubleshooting
Turn off all power to the unit before conducting any
troubleshooting procedures unless the procedure specifically
requires the system to operate. For troubleshooting purposes,
the system may be operated with the electric box open by
using a pair of channel lock pliers to turn the shaft of the
main power disconnect switch to the “On” position. When
the switch is turned on, high voltage will be present inside
the box. Exercise caution to prevent injury. Keep hands,
clothing and tools clear of the electrical terminals and rotating
components. Verify that your footing is stable.
WARNING
This equipment should be serviced and repaired by a
journeyman or a qualified refrigeration technician only.
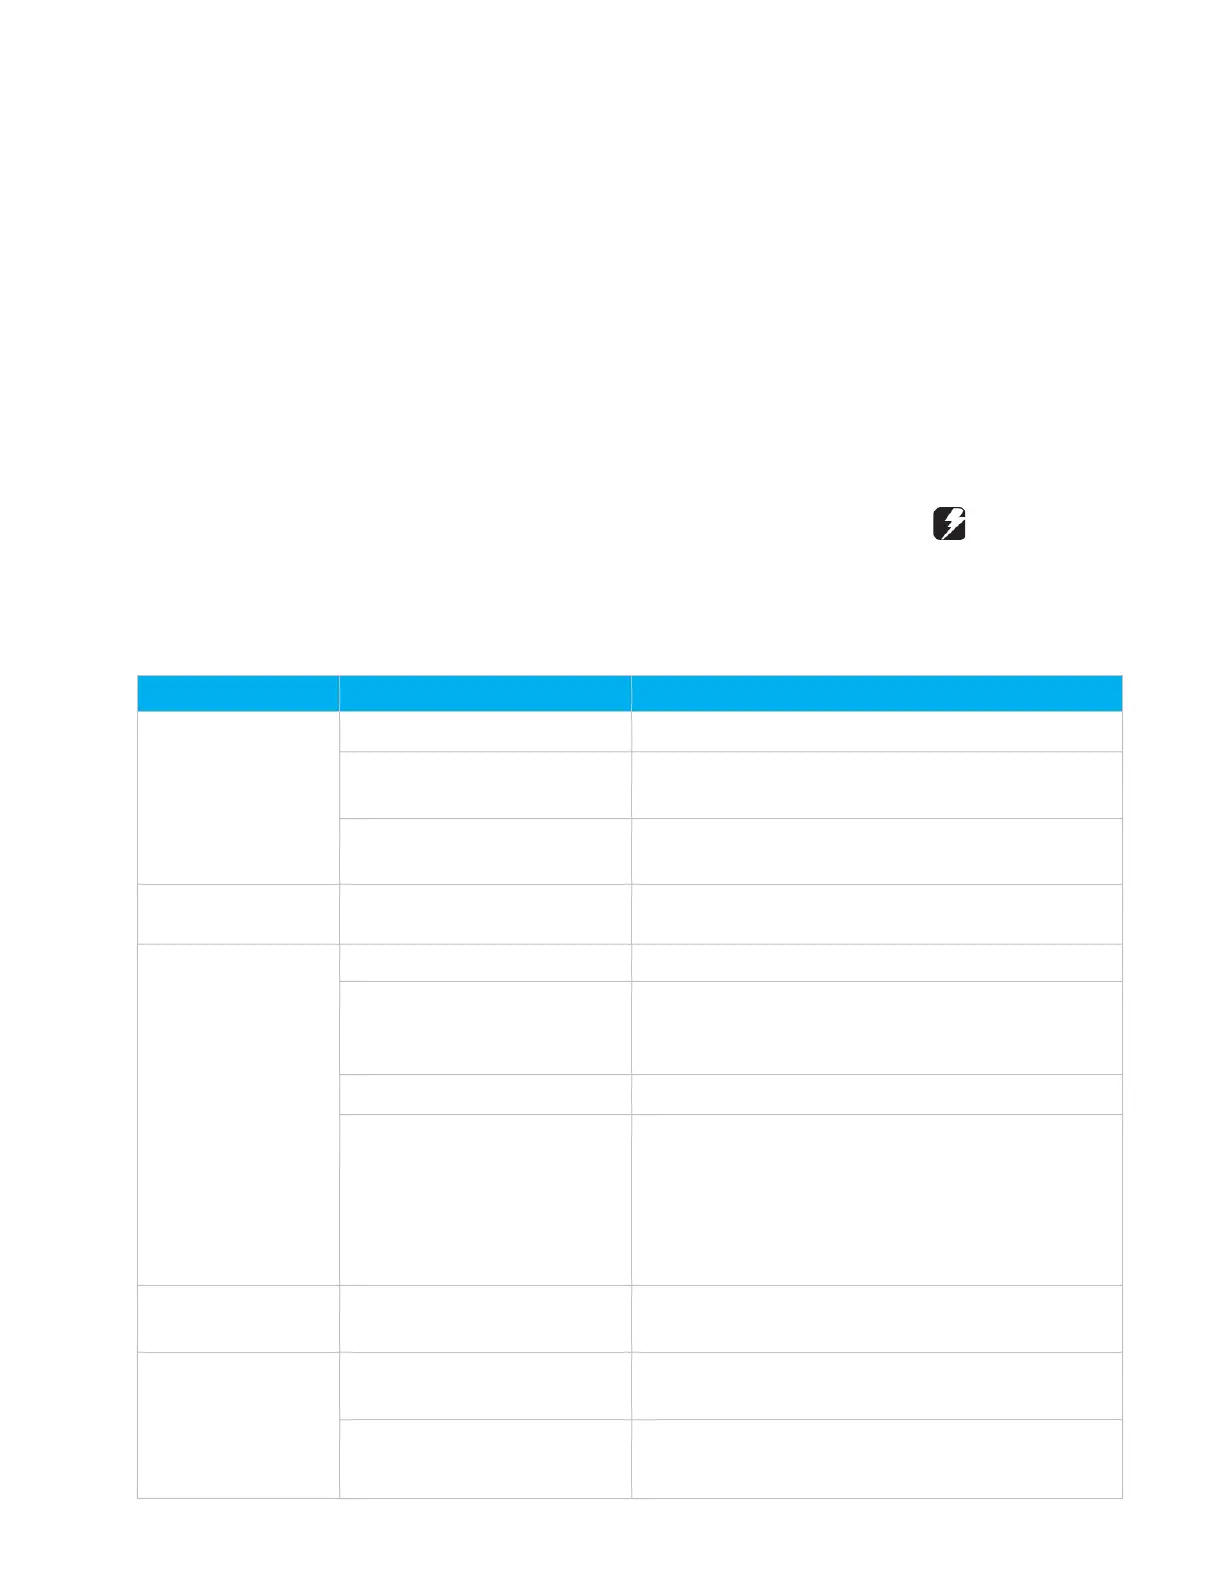
Symptom Probable Cause Recommendation
Unit Fails to Start
Incorrect phasing or voltage.
Correct phase or voltage input.
Power failure Check power source, power input and fuses. Check control
Overload protection tripped Check pressure/temperature operating switches and
motor. Replace as needed
Control is Erratic
Wiring improperly connected or
Check wiring against schematic diagram
Condenser Head
Pressure Too High
Low condenser airflow. (Indicated
by excessive warm air leaving the
Open air passages. Clean coil. Check con- denser fan(s).
Overcharge of refrigerant Reclaim excess refrigerant from system
Condenser fan not operating Check main voltage power source to unit.
Check fan motor, contractor, fan cycling switch or fan
speed controller.
Check pressure/temperature operating switches and
motor. Replace if needed.
Condenser Fan not
Operating
Non-condensable gas or air in
the system
Reclaim system, pull 500-micron vacuum and recharge.
Install new drier/strainer.
Condenser Head
Pressure Too Low
Loss of refrigerant (indicated by
bubbles in sight glass).
Locate and repair leak. Recharge system.
Condenser fan controls not set
properly
Adjust or repair controls.