400 Series
400 Series
Installation Information
2-6
NOTE: If removing a model 424 from its installation, an
anti-tip bracket and a countertop bracket may have
been used to make a solid installation. (See Figures 2-
2) If the brackets were not used, shims may have been
wedged along the sides and top.
Remove the two mounting screws securing the door
closer to the side of unit base. Slide the door closer
down off of the bottom door hinge pin. (See Figure 2-
14)
NOTE: It may be necessary to lean the unit back slight-
ly to create enough clearance between the hinge pin
and the floor.
Open the door and extract the two screws from the top
door hinge. Lean the door away from the unit slightly
and lift the door out of the bottom cabinet hinge. Lay
the door down and remove the bottom door hinge and
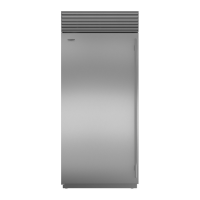
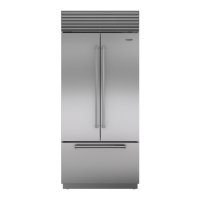
switch depressor. (If a lock and/or screws are present
on the bottom handle side, remove them also.) Locate
the Poly-tape under the gasket on the handle side
which covers the handle mounting screw holes. (See
Figure 2-15) Remove the tape, then extract the handle
mounting screws and pull the handle from the front of
the door. Now, lift the stainless steel panel from the
door. (See Figure 2-16)
To install a stainless steel panel, reverse the steps
above.
Overlay Door Panel Removal and Installation
(Model 424)
NOTE: Overlay panels are attached to the door of a
424G/O, 424HAG/O and 424S/O, using screws passing
through the door frame from the rear, into the panel.
The handle may also be attached through the door
frame or just through the panel.
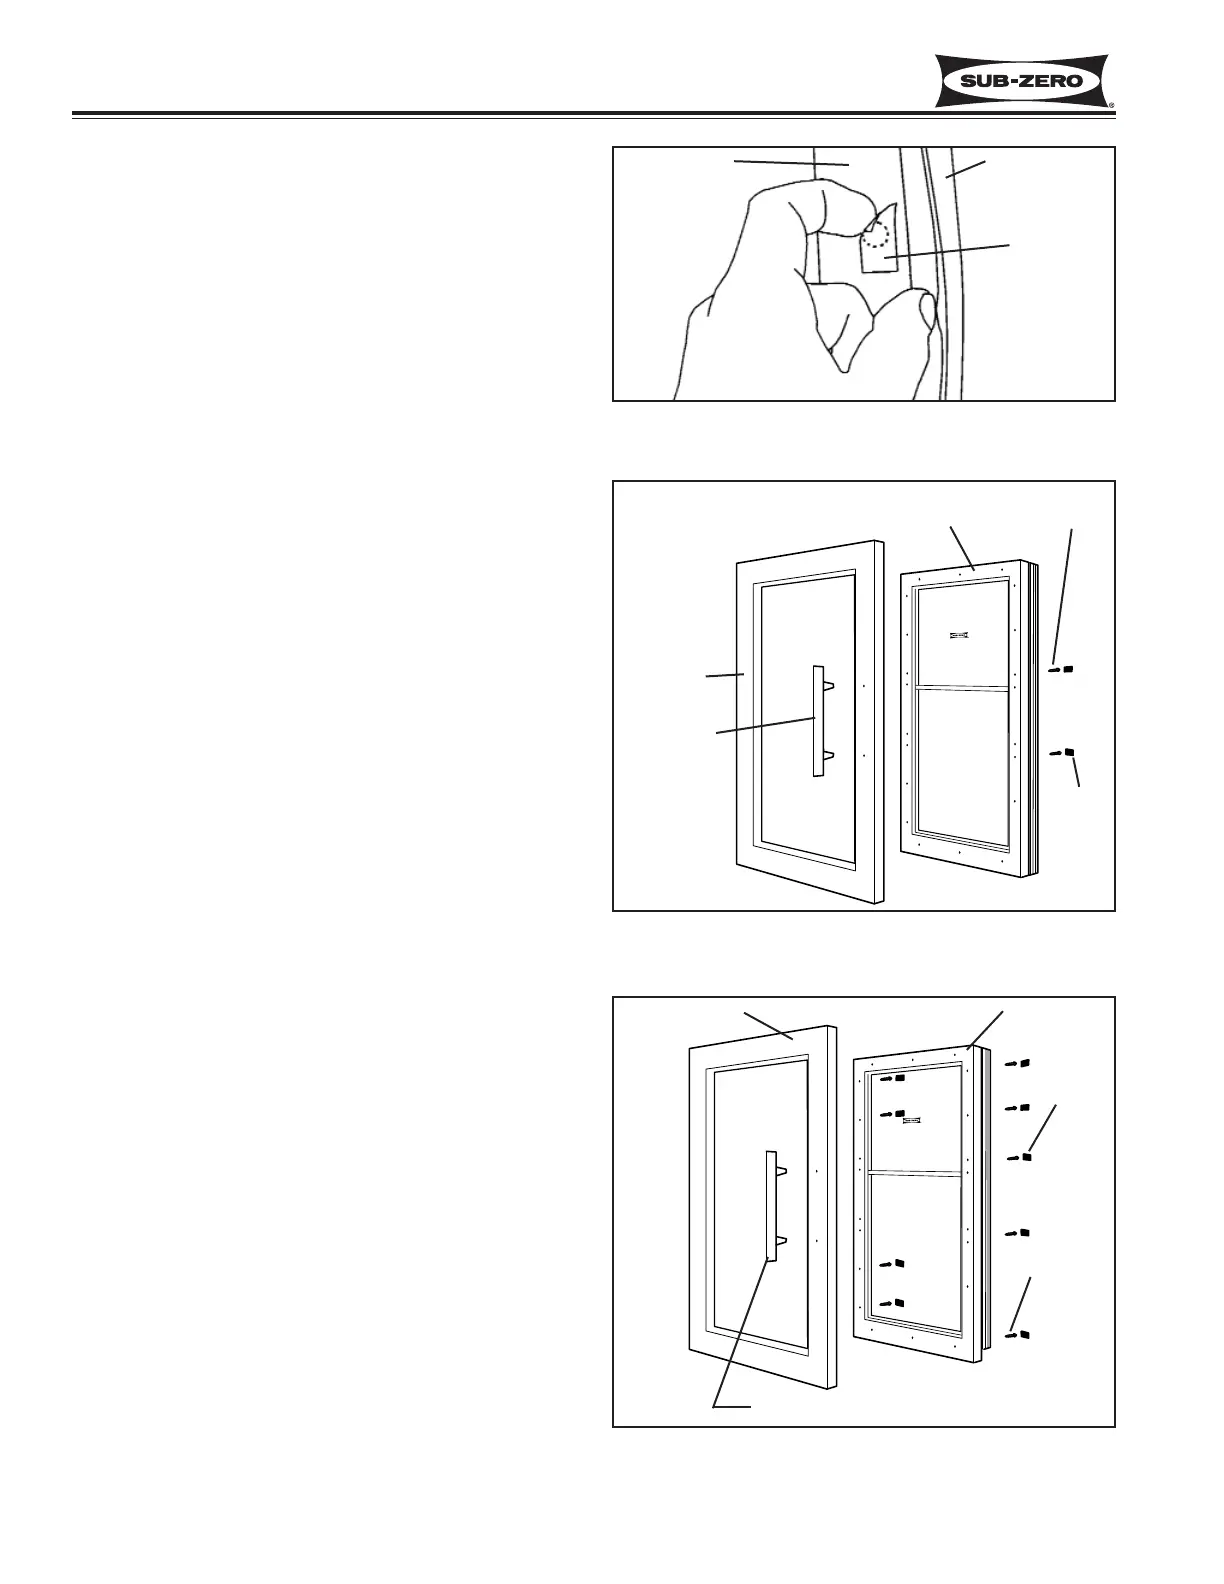
To remove an overlay panel, open the door and locate
the Poly-tape under the gasket which covers the panel
mounting screw holes, and possibly the handle mount-
ing screw holes. (See Figure 2-15) Remove the tape,
then extract the panel mounting screws, and possibly
the handle mounting screws. (See Figure 2-17) Now,
pull the overlay panel from the door.
To install a new overlay panel, refer to the Installation
Manual. If reinstalling the existing panel, reverse the
steps above.
Door Panel Removal and Installation
(Models 427 & 427R)
NOTE: The models 427 and 427R are NOT supplied
with panels from the factory. Panels are purchased
separately. Door panels are attached to the door of a
Figure 2-15. All Models
Poly Tape Over Handle Mounting Screws
Figure 2-16. Model 424 Stainless Steel
Door Panel Removal
Figure 2-17. Model 424 Overlay
Door Panel Removal
Poly Tape
Door Gasket
Door Frame
Handle
Screws
SS Handle
(Door Hinges &
Screws - not shown)
SS Panel
Poly
Tape
Door Assy
Door Assy
Poly
Tape
Panel
Mounting
Screws
Overlay Panel
SS Handle Shown (Handle may vary)
 Loading...